Butterfly Pizza Art: Top 5 Veggie Designs to Try
Introduction
Welcome, food enthusiasts! Today, we’re diving into the whimsical world of Butterfly Pizza Art. This isn’t just any pizza; it’s a canvas for your culinary creativity. We’ll explore how to transform simple vegetables into stunning butterfly designs that will captivate both eyes and taste buds. Perfect for parties, children’s lunches, or simply to add a dash of joy to your meal, this pizza art is sure to become a favorite in your recipe repertoire.
Why is it Perfect for You?
Butterfly Pizza Art is more than just a meal; it’s an experience. Here’s why you’ll love it:
◾ Visually Stunning: Create Instagram-worthy pizzas that are almost too beautiful to eat.
◾ Customizable: Tailor the designs to your preferences or dietary needs.
◾ Kid-Friendly: Engage children in the kitchen with this fun, interactive cooking activity.
◾ Nutritious: Sneak in extra vegetables in a delightful way.
◾ Versatile: Perfect for various occasions, from casual family dinners to elegant parties.
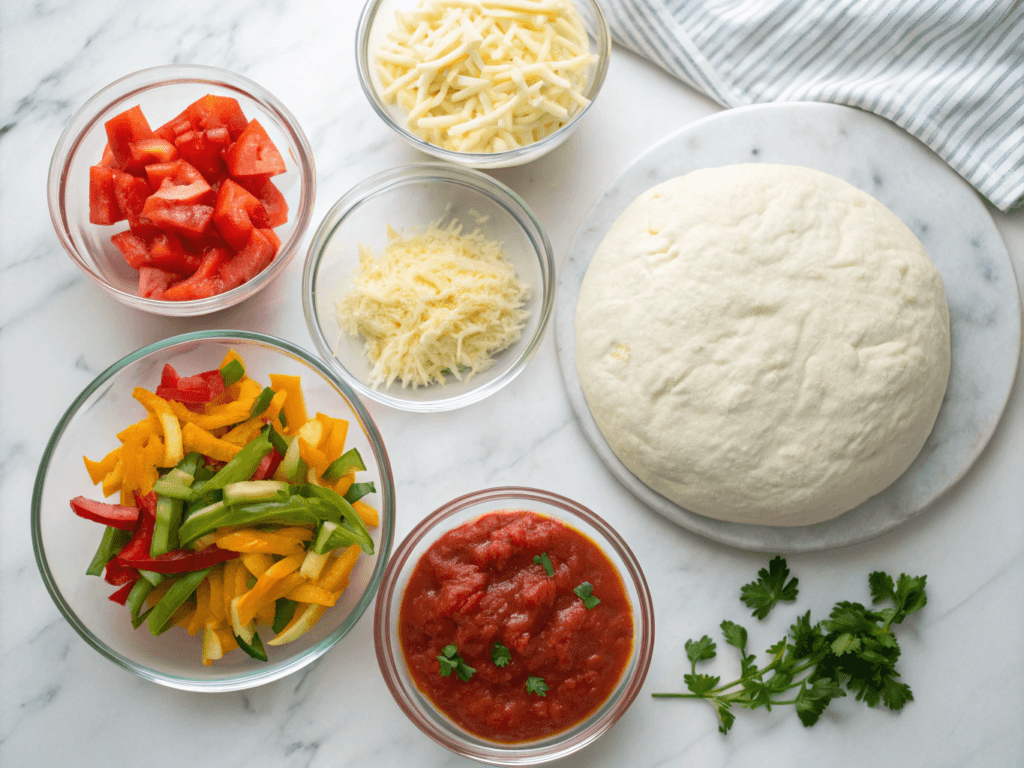
Ingredients List
◾ 1 pre-made pizza dough or focaccia bread
◾ 1/2 cup tomato sauce
◾ 1 cup shredded mozzarella cheese
◾ Assorted colorful vegetables (bell peppers, cherry tomatoes, zucchini, olives, etc.)
◾ 2 tablespoons olive oil
◾ Salt and pepper to taste
◾ Optional herbs (basil, oregano, thyme)
Preparation Time and Servings
Prep Time: 20 minutes
Cook Time: 15 minutes
Total Time: 35 minutes
Servings: 4
Step-by-Step Instructions
Step 1: Prepare the Base
Begin by preheating your oven to 425°F (220°C). While it’s warming up, roll out your pizza dough on a lightly floured surface. If using focaccia, simply place it on a baking sheet. Brush the surface with olive oil and spread a thin layer of tomato sauce, leaving a border around the edges for the crust.
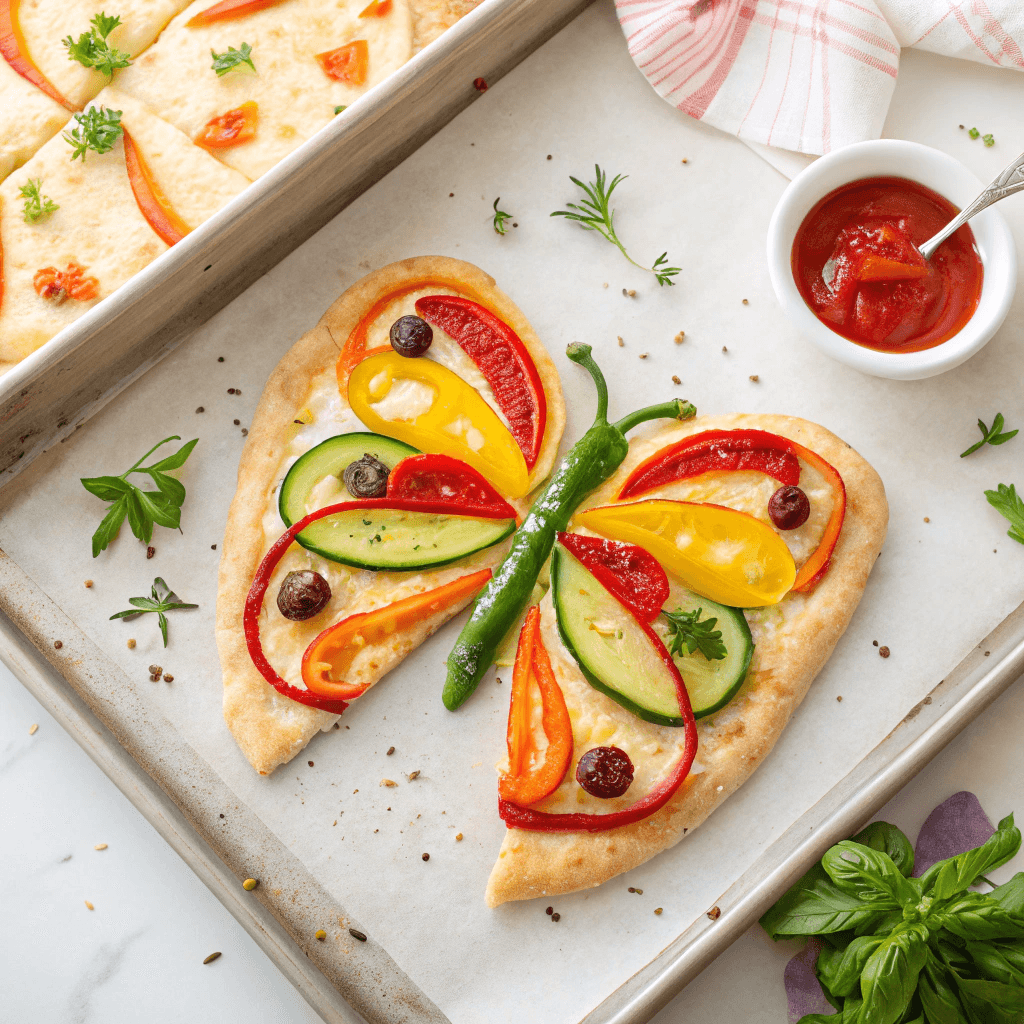
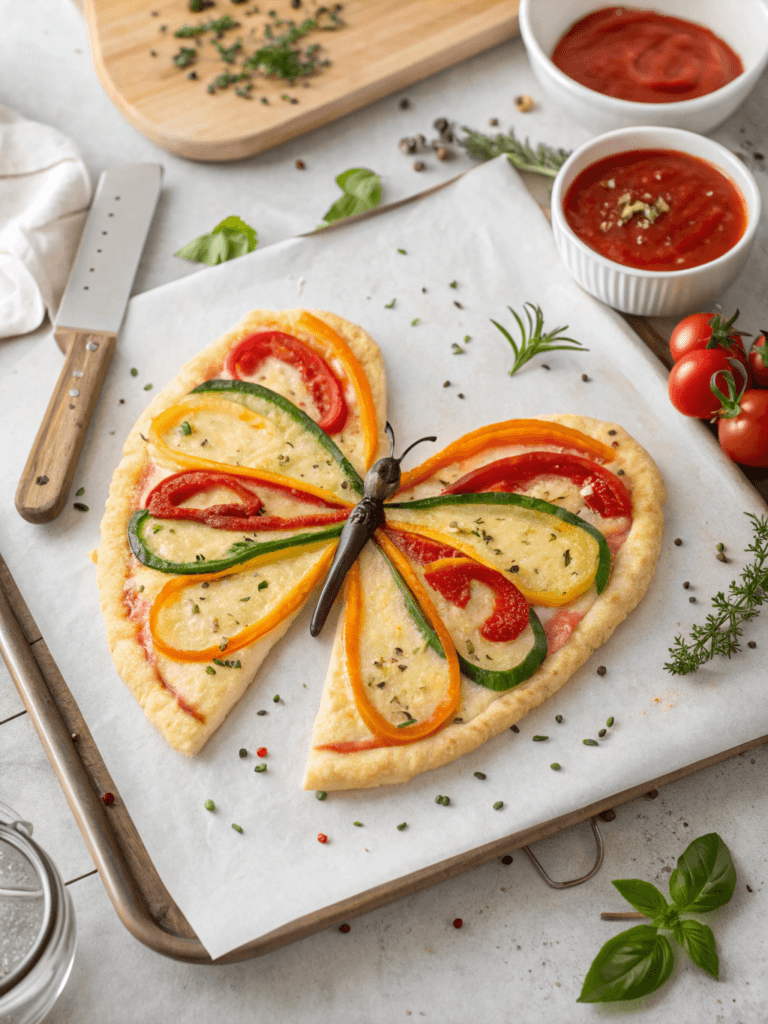
Step 2: Create the Butterfly Body
Using sliced black olives or thinly sliced zucchini, create a long, curved shape down the center of your pizza. This will form the body of your butterfly. Remember, in Butterfly Pizza Art, proportion is key to achieving a realistic look.
Step 3: Design the Wings
Now comes the fun part! Use various colorful vegetables to create the butterfly wings. Thinly sliced bell peppers work wonderfully for outlining the wing shape. Fill in with a mosaic of cherry tomato halves, zucchini rounds, and any other vegetables you fancy. Remember to make the wings symmetrical for that authentic butterfly appearance.
Step 4: Add Final Touches
Sprinkle mozzarella cheese around the vegetable design, being careful not to cover your beautiful artwork completely. Add antennae using thin strips of bell pepper or chives. Season with salt, pepper, and your choice of herbs for extra flavor.
Step 5: Bake to Perfection
Carefully transfer your masterpiece to the preheated oven. Bake for about 15 minutes, or until the crust is golden and the cheese is bubbly. Keep a close eye to ensure your vegetable butterfly doesn’t overcook.
Nutritional Information
This Butterfly Pizza Art is not just beautiful, but also nutritious. It’s packed with vitamins and minerals from the colorful vegetables, while the cheese provides calcium and protein.
Calories per Person
Approximately 350-400 calories per serving, depending on the specific vegetables and amount of cheese used.
Healthier Alternatives for the Recipe
To make this recipe even healthier, consider these alternatives:
◾ Use whole wheat pizza dough for added fiber
◾ Opt for a cauliflower crust for a low-carb option
◾ Choose low-fat mozzarella to reduce calorie content
◾ Increase the vegetable-to-cheese ratio for extra nutrients
Serving Suggestions
Serve your Butterfly Pizza Art alongside a fresh green salad for a balanced meal. For a fun dining experience, let everyone create their own butterfly designs before baking.
Common Mistakes to Avoid
◾ Overloading the pizza with toppings, which can lead to a soggy crust
◾ Not precooking certain vegetables that require longer cooking times
◾ Forgetting to lightly oil the vegetables, which helps them roast nicely
◾ Covering the entire pizza with cheese, hiding your beautiful design
Storing Tips for the Recipe
While Butterfly Pizza Art is best enjoyed fresh, you can store leftovers in an airtight container in the refrigerator for up to 2 days. Reheat in the oven for best results, avoiding the microwave which can make the crust soggy.
FAQs
Can I make this recipe vegan?
Absolutely! Use vegan cheese or omit cheese entirely, focusing on the colorful vegetable design.
How can I involve kids in making Butterfly Pizza Art?
Let children choose and arrange the vegetables. It’s a great way to encourage creativity and healthy eating habits.
Can I prepare this in advance for a party?
You can pre-cut vegetables and prepare the base, but it’s best to assemble and bake just before serving for the freshest result.
What other designs can I create using this technique?
The possibilities are endless! Try flowers, animals, or even landscape scenes using various vegetables.
Conclusion
Butterfly Pizza Art is more than just a meal; it’s a creative culinary adventure. By combining the beloved comfort of pizza with the beauty of butterfly designs, you’re not just feeding bodies, but nurturing creativity and joy. Whether you’re a seasoned chef or a kitchen novice, this recipe offers a delightful way to play with your food and create memories around the dinner table.
Contact Us
Contact us at [email protected] and we’ll get back to you as soon as possible.
Share your experience with us
OOLALA
This turned out so awesome they look like they came from a exspensive bakery.
Just a question
So what about the grease from the meat? Should I use the leanest meats or is the grease give more flavor.
What about a meatloaf on top of veggies ? Would that work?
Ingredients list good, directions lacking
There were great details on quantities of ingredients I should use, but the recipe didn’t tell me the cook time. Also, mentioned in the section about “common mistakes” that you need to let it chill enough but doesn’t direct you in the recipe that you need to let it chill. More details would be helpful
Dressing is perfect!
Not a big fan of mayo, loved the Greek yogurt swap. Reduced garlic a bit. Dressing was delish!
Best coffee cake- ever!!
This recipe was not the easiest to follow due to how it was written. It requires a lot of back and forth from instructions to the lists of ingredients but oh, hey, the end result is totally worth the effort! Mouthwatering and delicious plus it’s a pretty presentation.