Party Charcuterie Board Guide: Easy Elegant Appetizer for Entertaining

Introduction
Welcome, food enthusiasts! Today, we’re diving into the world of sophisticated yet effortless entertaining with the Party Charcuterie Board. This versatile and visually stunning appetizer is perfect for any gathering, from intimate wine nights to grand holiday soirées. As a renowned international chef, I’m excited to share my expertise on creating the perfect charcuterie board appetizer party platter cheese board cured meats entertaining easy appetizers cheese and meat platter holiday snacks grazing board finger food wine party.
Why is it Perfect for You?
A Party Charcuterie Board is the epitome of effortless elegance. It’s a crowd-pleaser that requires minimal cooking, allowing you to spend more time with your guests. The variety of flavors and textures caters to different palates, making it an ideal choice for diverse gatherings. Plus, it’s customizable to fit any dietary restrictions or preferences.
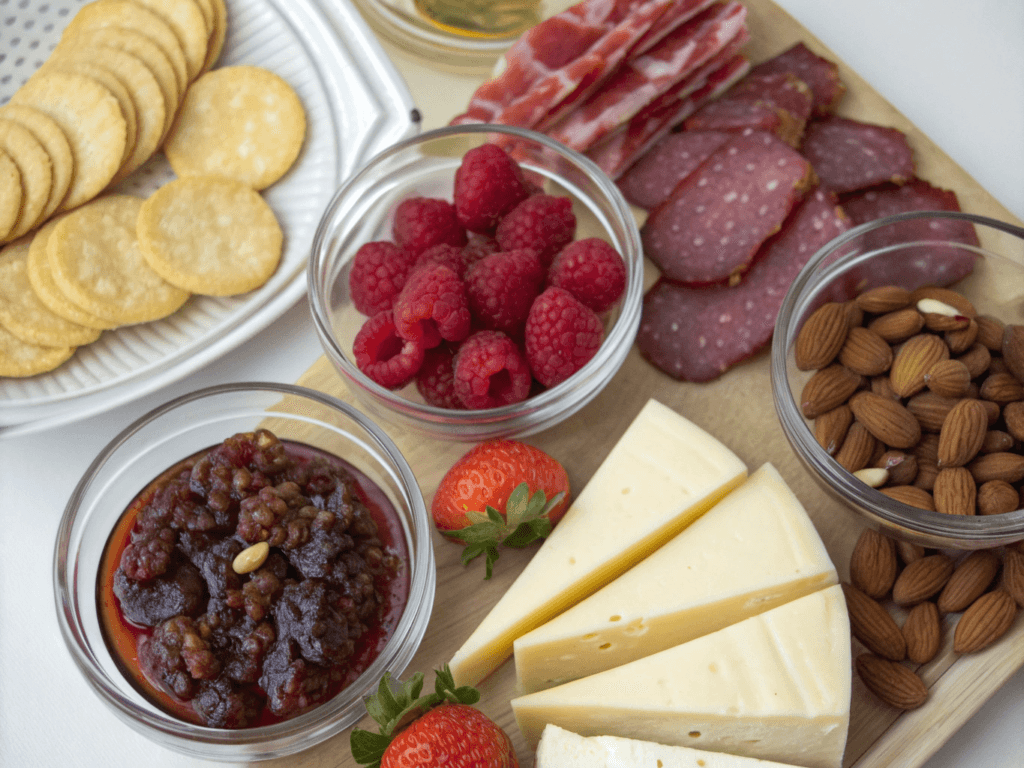
Ingredients List
◾ Assorted cured meats (prosciutto, salami, chorizo)
◾ Various cheeses (brie, cheddar, gouda, blue cheese)
◾ Fresh and dried fruits (grapes, figs, apricots)
◾ Nuts (almonds, walnuts, pistachios)
◾ Olives and pickles
◾ Crackers and breadsticks
◾ Honey and fruit preserves
◾ Fresh herbs for garnish
Preparation Time and Servings
Prep Time: 30 minutes
Cook Time: 0 minutes
Total Time: 30 minutes
Servings: 8-10
Step-by-Step Instructions
Step 1: Choose Your Board
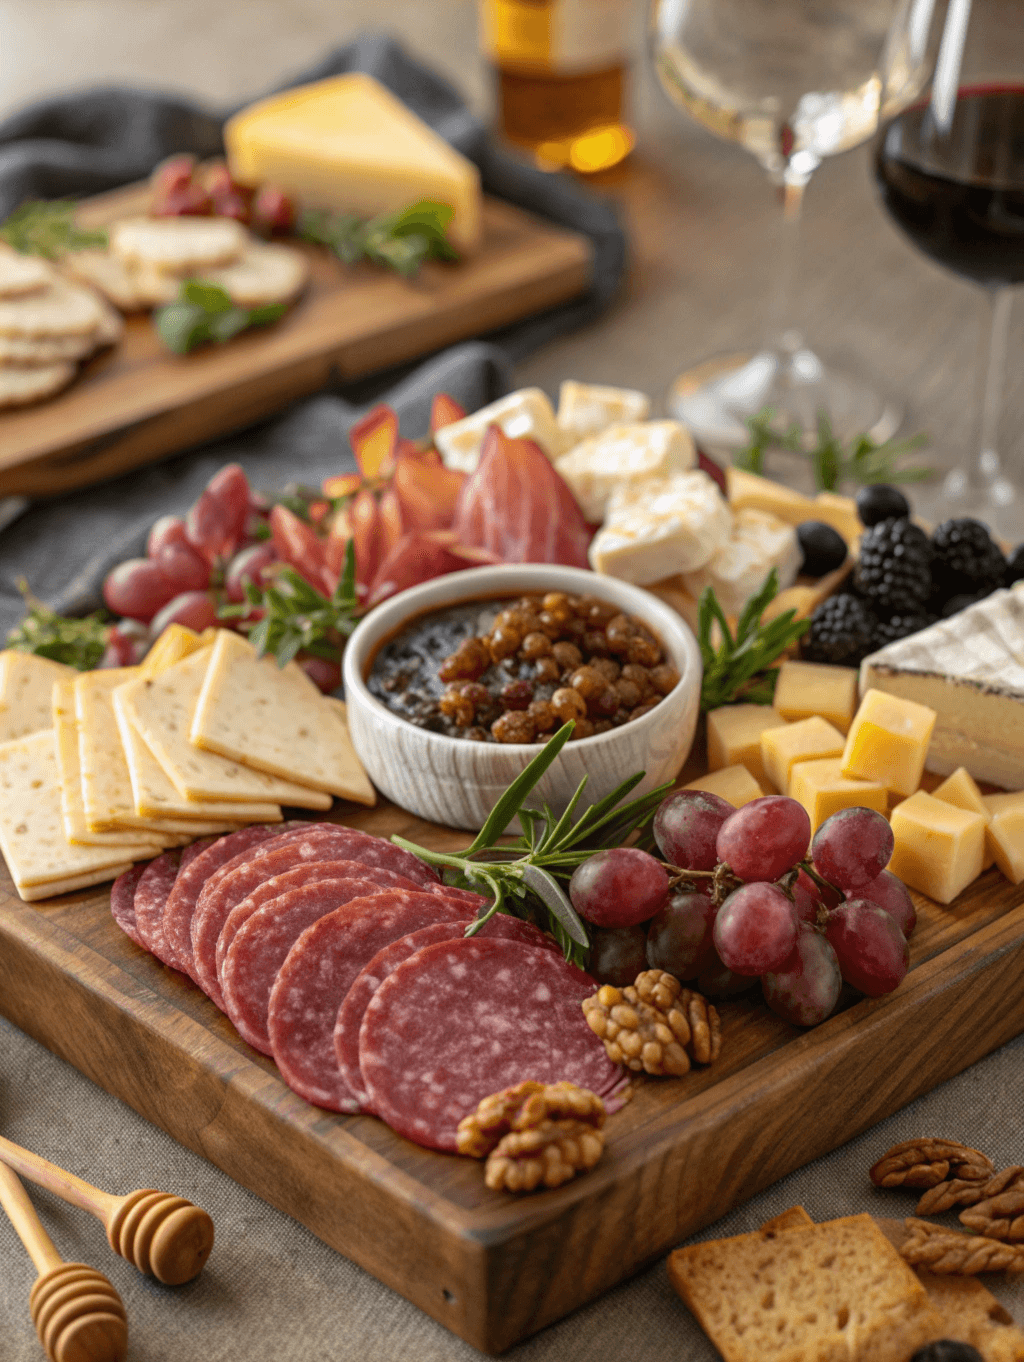
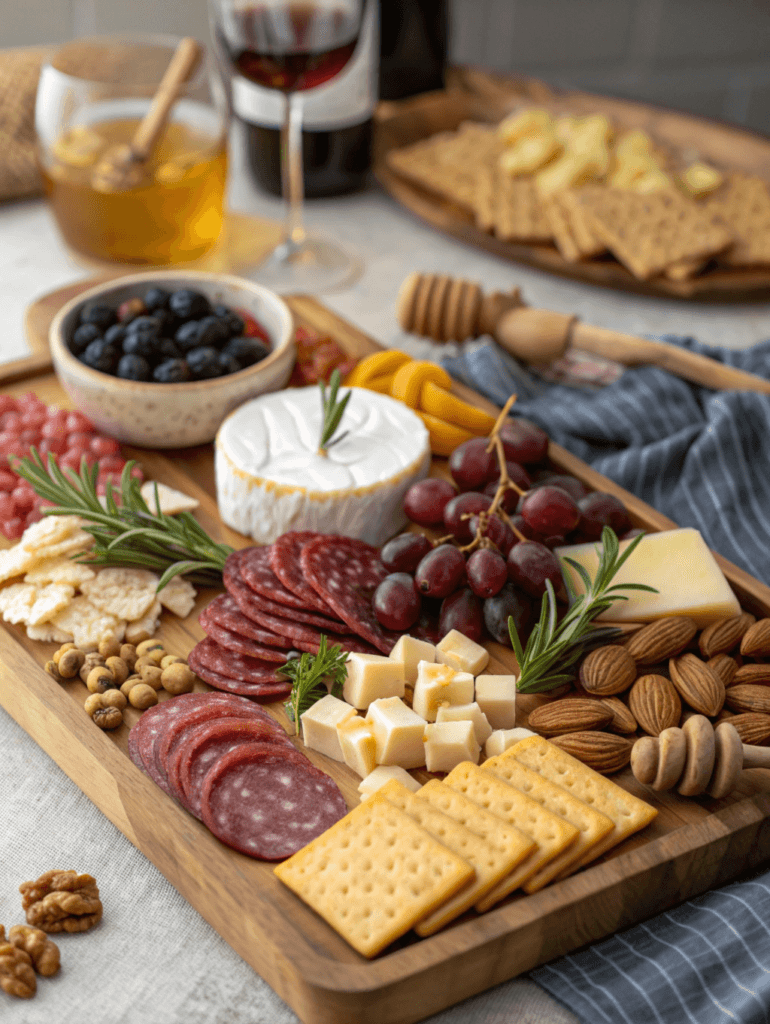
Select a large, flat surface like a wooden board, slate, or marble platter. Ensure it’s clean and food-safe. The size should accommodate all your ingredients without overcrowding.
Step 2: Start with the Cheese
Begin by placing your cheeses on the board. Aim for a variety of textures and flavors. Cut some cheeses into cubes or slices for easy serving, while leaving others whole for visual appeal and to allow guests to cut their own portions.
Step 3: Add the Meats
Arrange your cured meats next. Create visually appealing patterns by folding salami into flowers, rolling prosciutto into roses, or fanning out slices of chorizo. This not only looks beautiful but also makes the meats easy to pick up.
Step 4: Fill in with Fruits and Nuts
Add clusters of grapes, sliced figs, and other fresh fruits to bring color and freshness to the board. Scatter dried fruits and nuts in the spaces between the meats and cheeses. These add texture and complement the savory elements.
Step 5: Include Accompaniments
Place small bowls of olives, pickles, honey, and preserves on the board. These add variety and allow guests to customize their bites. Arrange crackers and breadsticks around the edges of the board for easy access.
Step 6: Garnish and Final Touches
Finish your Party Charcuterie Board with fresh herbs like rosemary or thyme for a pop of green and a lovely aroma. Add any final touches like edible flowers or a drizzle of high-quality olive oil over certain cheeses.
Nutritional Information
While the exact nutritional content will vary based on your specific ingredients and portions, a typical serving from a charcuterie board can contain:
◾ Protein: 15-20g
◾ Fat: 20-25g
◾ Carbohydrates: 15-20g
◾ Fiber: 2-3g
Calories per Person
On average, a serving from a Party Charcuterie Board can range from 300-400 calories, depending on the selection and portion sizes.
Healthier Alternatives for the Recipe
To create a lighter version, consider these substitutions:
◾ Use lean meats like turkey or chicken breast instead of fatty cured meats
◾ Opt for lower-fat cheeses or include more fresh vegetables
◾ Replace crackers with cucumber slices or bell pepper strips
◾ Include more fresh fruits and fewer dried fruits
Serving Suggestions
Pair your Party Charcuterie Board with a selection of wines, craft beers, or non-alcoholic beverages like sparkling water with fruit infusions. For a more substantial meal, serve alongside a light soup or salad.
Common Mistakes to Avoid
◾ Overcrowding the board – leave some space for visual appeal
◾ Forgetting to provide serving utensils for each item
◾ Not considering food safety – remember to keep perishables chilled
◾ Neglecting to offer a variety of flavors and textures
Storing Tips for the Recipe
While charcuterie boards are best enjoyed fresh, you can store leftovers separately in airtight containers in the refrigerator. Consume within 2-3 days for best quality. Bring cheese to room temperature before serving again for optimal flavor.
FAQs
How far in advance can I prepare a charcuterie board?
You can prepare most elements a few hours in advance, but it’s best to assemble the board just before serving to maintain freshness.
What’s the best way to cut cheese for a charcuterie board?
Vary your cuts based on the cheese type. Soft cheeses can be left whole with a knife for spreading, while harder cheeses should be pre-cut into slices or cubes for easy serving.
Can I make a vegetarian charcuterie board?
Absolutely! Replace meats with additional cheeses, roasted vegetables, hummus, and a variety of nuts and fruits for a delicious vegetarian option.
Conclusion
Creating a Party Charcuterie Board is an art form that combines culinary skill with visual creativity. By following these guidelines, you’ll be able to create a stunning centerpiece that will impress your guests and elevate any gathering. Remember, the key is in the variety, quality of ingredients, and thoughtful presentation. Happy entertaining!
Contact Us
Contact us at [email protected] and we’ll get back to you as soon as possible.
Share your experience with us
OOLALA
This turned out so awesome they look like they came from a exspensive bakery.
Just a question
So what about the grease from the meat? Should I use the leanest meats or is the grease give more flavor.
What about a meatloaf on top of veggies ? Would that work?
Ingredients list good, directions lacking
There were great details on quantities of ingredients I should use, but the recipe didn’t tell me the cook time. Also, mentioned in the section about “common mistakes” that you need to let it chill enough but doesn’t direct you in the recipe that you need to let it chill. More details would be helpful
Dressing is perfect!
Not a big fan of mayo, loved the Greek yogurt swap. Reduced garlic a bit. Dressing was delish!
Best coffee cake- ever!!
This recipe was not the easiest to follow due to how it was written. It requires a lot of back and forth from instructions to the lists of ingredients but oh, hey, the end result is totally worth the effort! Mouthwatering and delicious plus it’s a pretty presentation.