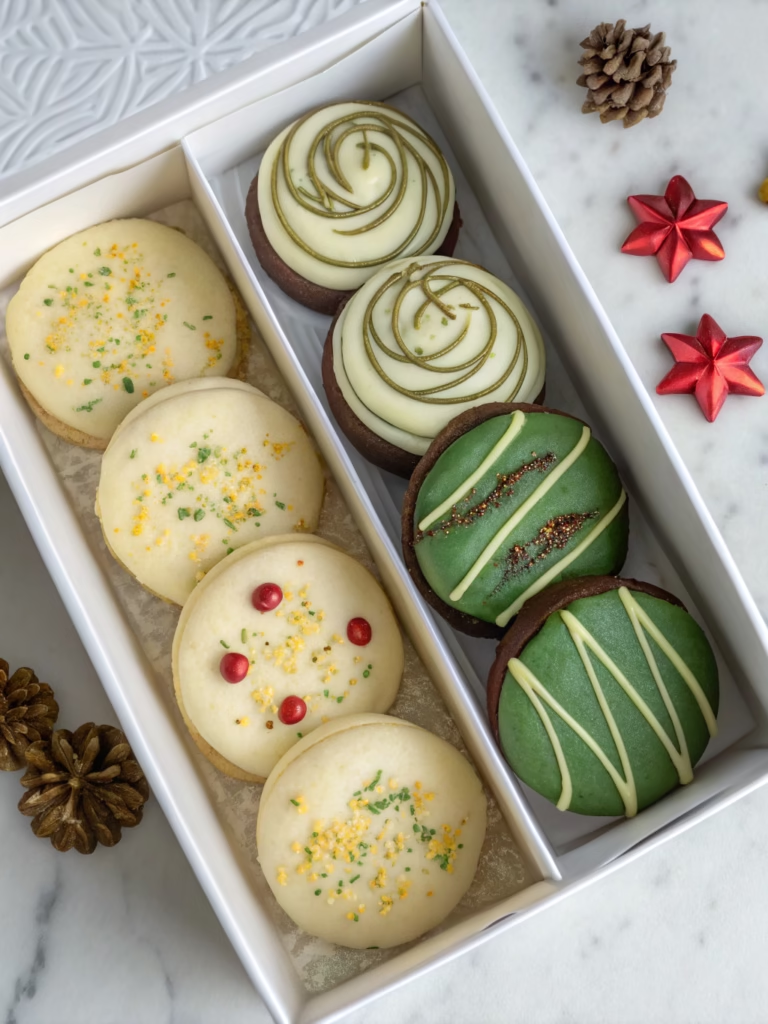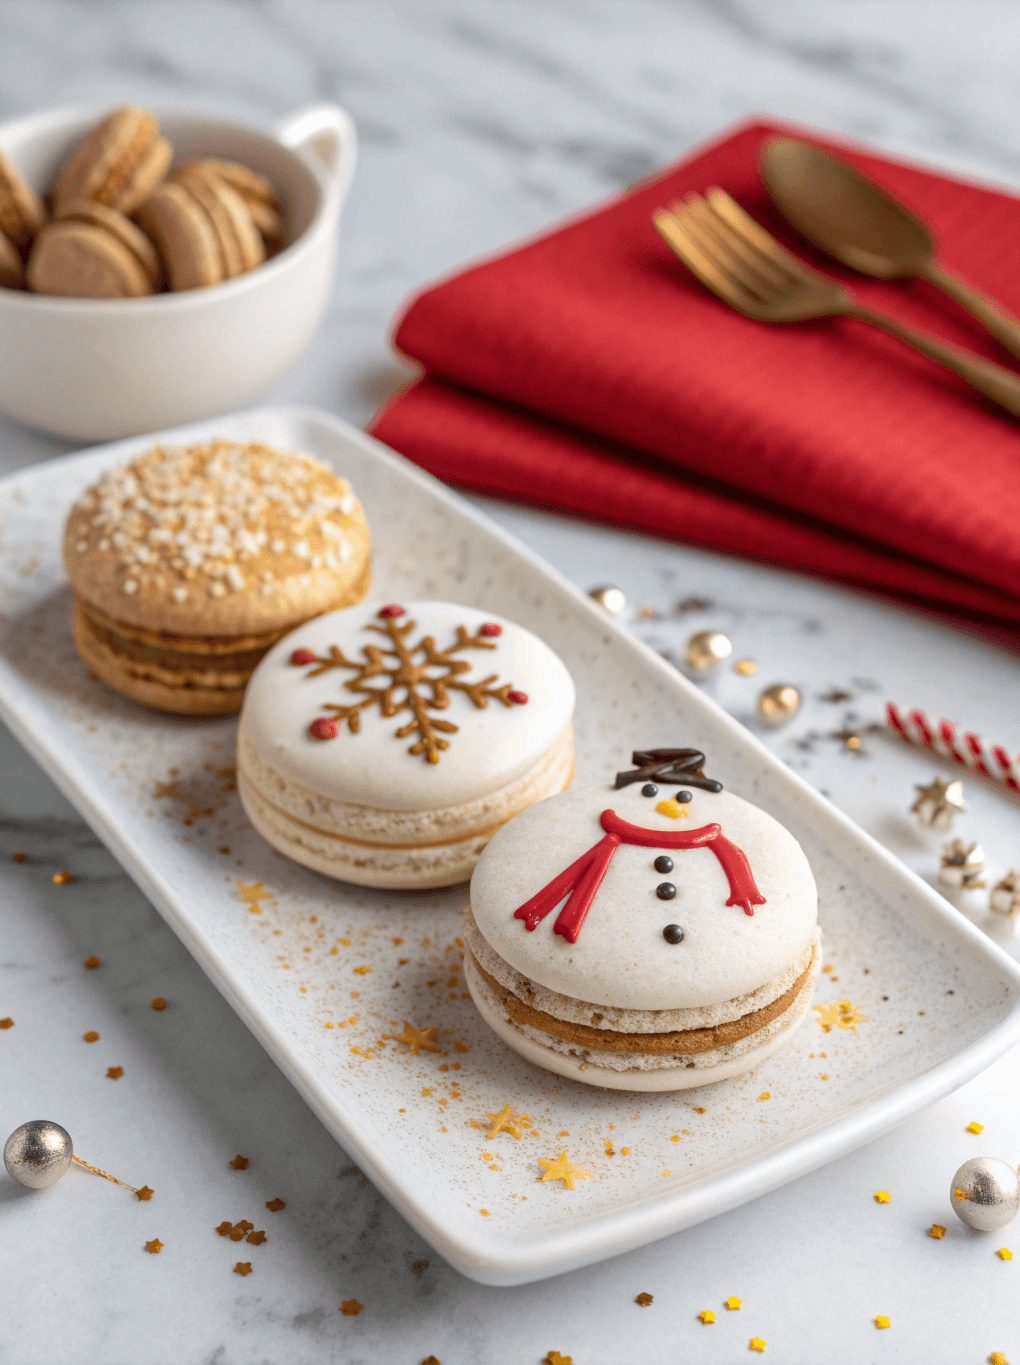
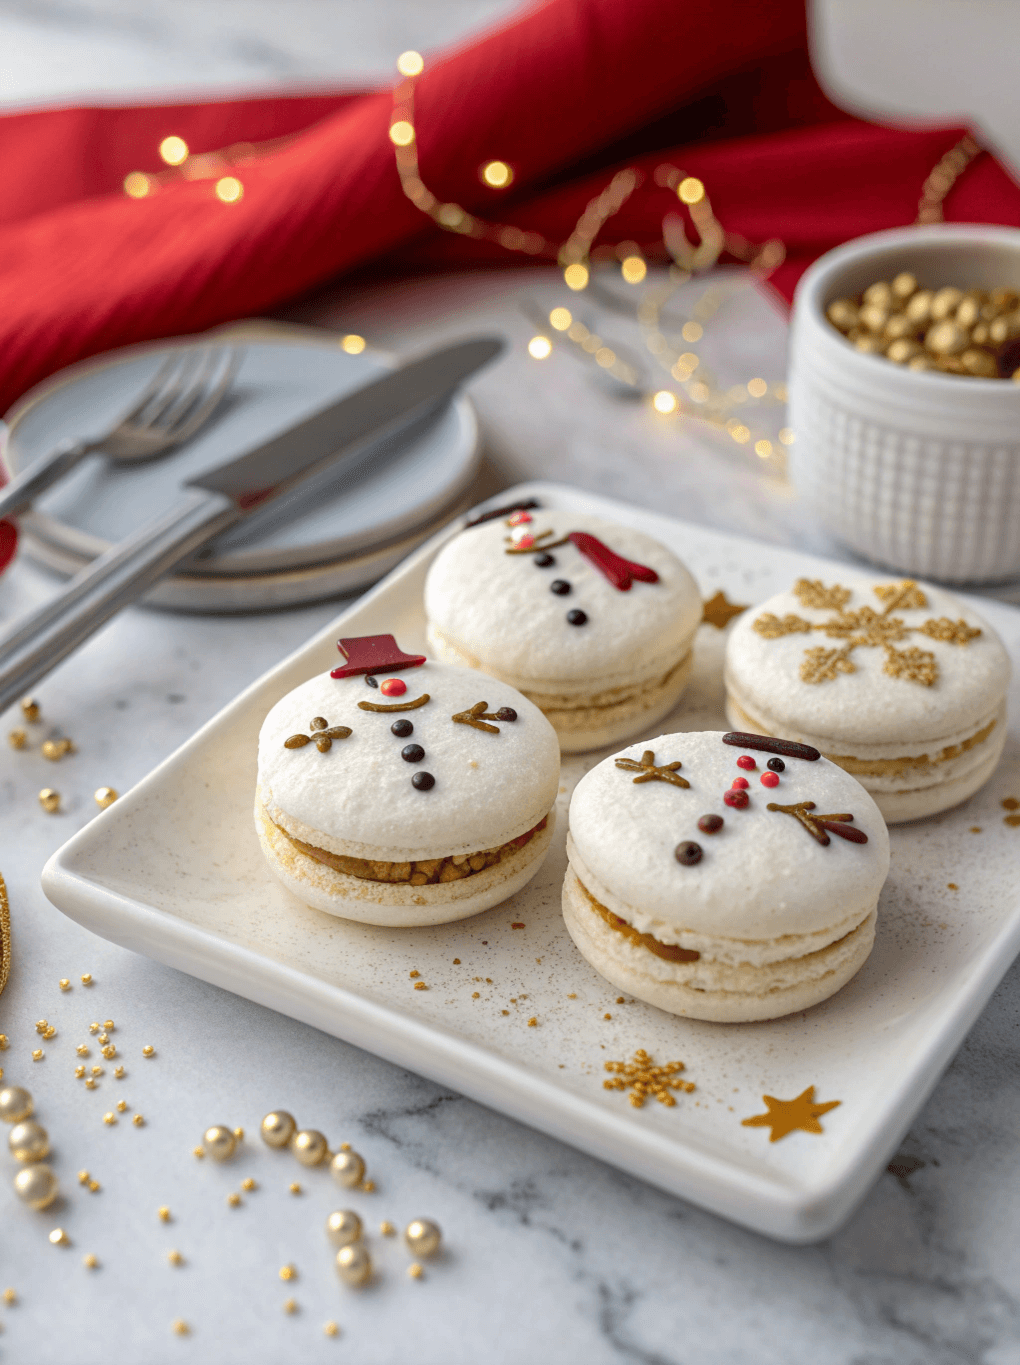
Christmas Macarons: Easy Guide to Make the Perfect Treat
Introduction
In my years spent navigating the world’s most demanding kitchens, I’ve learned that true culinary magic often lies not in complexity, but in precision and passion. What dessert embodies this philosophy more than the macaron? This holiday season, I invite you to bring that patisserie-level elegance into your own home with this guide to the perfect Christmas Macarons. Forget the intimidating reputation; these delicate French cookies, with their crisp shells, chewy centers, and festive fillings, are a joy to create. They are more than just a sweet treat; they are a statement, a centerpiece, and a testament to the care you put into your holiday baking. Together, we will demystify the process, turning a few simple ingredients into an edible masterpiece. Let’s explore exactly why this recipe will become your new festive favorite.
Why You’ll Love This Recipe
- Elegant and Festive: These macarons are visually stunning, with vibrant colors and delicate feet that will impress any guest at your holiday gathering.
- Surprisingly Achievable: My detailed, step-by-step method breaks down the process, making it accessible even for first-time macaron bakers.
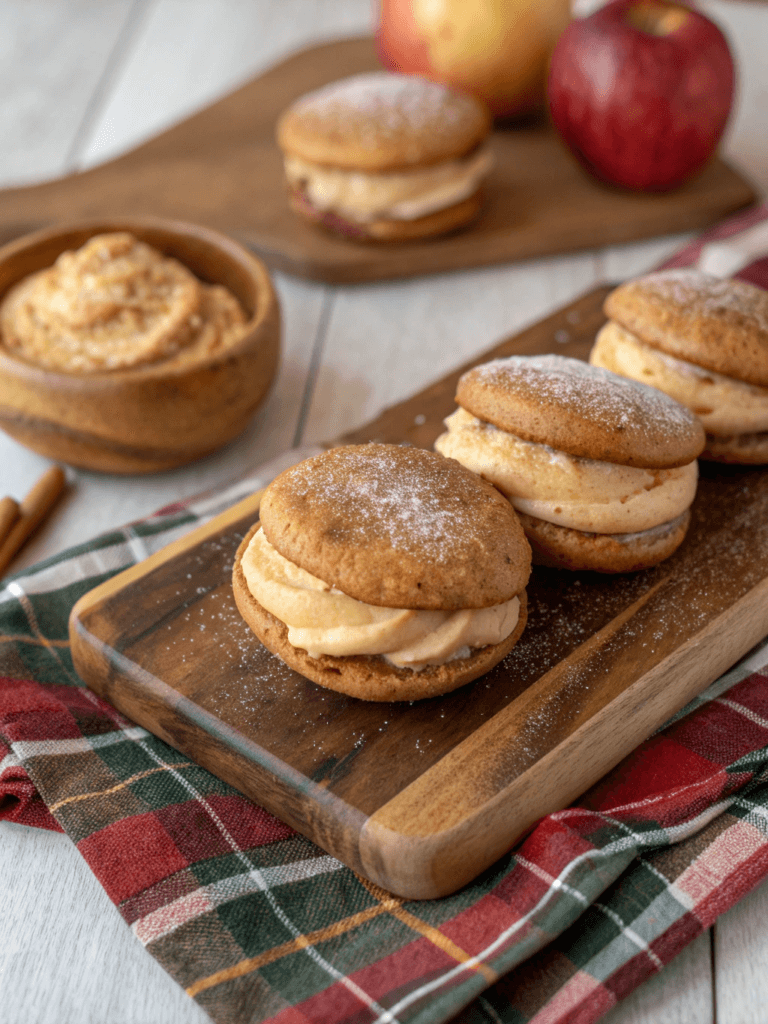
- Deliciously Customizable: The peppermint buttercream is a classic, but you can easily adapt the filling with gingerbread, eggnog, or cranberry flavors to suit your taste.
- Perfect for Gifting: Packaged in a beautiful box, homemade Christmas macarons are a thoughtful and sophisticated gift that shows true effort and care.
Preparation Time and Servings
This surprisingly quick recipe yields a professional-quality batch of macarons in just over an hour of active time, perfect for busy holiday schedules.
⏱️ Preparation Time: 45 minutes
🔥 Cooking Time: 15-18 minutes
⏰ Total Time: 63 minutes (plus 30-60 minutes resting time)
💡 Difficulty: Intermediate
👥 Servings: 24 finished macarons
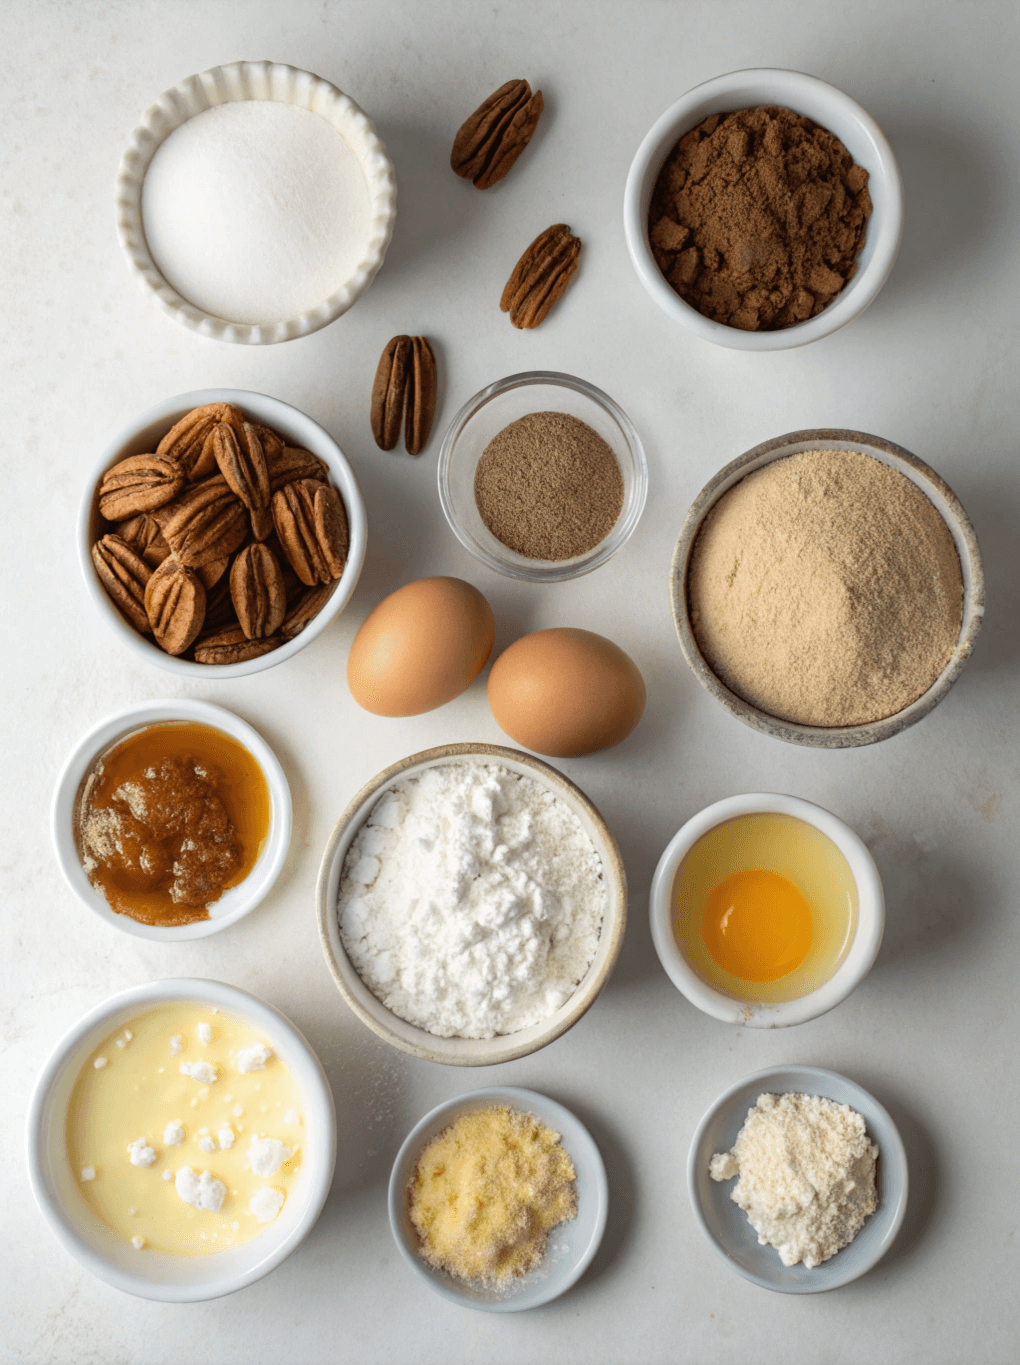
Ingredients List
- For the Macaron Shells:
- 100g (about 1 cup) finely ground almond flour
- 100g (about ¾ cup + 1 tbsp) powdered sugar
- 75g (from about 2 large) aged egg whites, at room temperature
- 75g (about 6 tbsp) granulated sugar
- ¼ teaspoon cream of tartar
- Red and green gel food coloring
- For the Peppermint Buttercream Filling:
- 1/2 cup (113g) unsalted butter, softened
- 1 ½ cups (180g) powdered sugar
- 1 tablespoon heavy cream or milk
- ½ teaspoon peppermint extract
- Pinch of salt
Step-by-Step Instructions
- Prepare Ingredients: Line two large baking sheets with parchment paper or silicone mats. In a food processor, pulse the almond flour and powdered sugar together for 30 seconds. Sift this mixture through a fine-mesh sieve into a large bowl, discarding any large pieces. This step is critical for smooth shells.
- Make the Meringue: In the clean bowl of a stand mixer fitted with the whisk attachment, beat the egg whites and cream of tartar on medium-low speed until foamy. Slowly stream in the granulated sugar while increasing the speed to medium-high. Continue whipping until the meringue is glossy and forms stiff peaks (when you lift the whisk, the peak should stand straight up).
- Color and Combine: If making two colors, divide the meringue evenly between two bowls. Add a few drops of gel food coloring to each and gently fold just to combine. Add half of the sifted almond flour mixture to each bowl.
- Perform the Macaronage: This is the most crucial step. Using a spatula, fold the dry ingredients into the meringue by scraping around the bowl and pressing the batter down the middle. Continue until the batter flows off the spatula in a continuous, slow-moving ribbon, like molten lava. You should be able to draw a “figure 8” with the ribbon without it breaking.
- Pipe the Shells: Transfer the batter to a piping bag fitted with a round tip (about ½-inch). Pipe 1.5-inch circles onto your prepared baking sheets, spacing them about 1 inch apart. Firmly tap the baking sheets on the counter a few times to release any air bubbles.
- Rest the Macarons: Let the piped shells rest at room temperature for 30-60 minutes, or until they develop a dry “skin.” You should be able to gently touch the top without any batter sticking to your finger. This step ensures the macarons develop their signature “feet.”
- Bake: Preheat your oven to 300°F (150°C). Bake one sheet at a time for 15-18 minutes, rotating halfway through. The macarons are done when the feet are firm and the tops don’t wiggle when gently pushed.
- Cool Completely: Let the macaron shells cool completely on the baking sheet before attempting to remove them.
- Make the Filling: While the shells cool, beat the softened butter until creamy. Gradually add the powdered sugar, followed by the heavy cream, peppermint extract, and salt. Beat until light and fluffy.
- Assemble and Mature: Pipe a small amount of buttercream onto the flat side of one macaron shell and gently sandwich it with another. For the best flavor and texture, place the assembled Christmas macarons in an airtight container in the refrigerator for 24 hours to mature.
Expert Tips for Perfect Christmas Macarons
- Use a Kitchen Scale: Precision is everything in patisserie. Measuring ingredients by weight, especially for delicate Christmas macarons, eliminates guesswork and guarantees consistent results.
- Age Your Egg Whites: Separate your eggs 24-48 hours in advance and leave the whites lightly covered in the refrigerator. This dehydration process strengthens the egg white proteins, leading to a more stable meringue.
- Master the Figure-8 Test: The macaronage stage is where most recipes go wrong. The “figure 8” test is your guide. If the batter is too stiff, your macarons will be lumpy. If it’s too runny, they will spread and won’t develop feet. Practice makes perfect.
- Know Your Oven: Ovens can have hot spots and temperature inaccuracies. An oven thermometer is an inexpensive tool that can save you from cracked or browned macaron shells.
Common Mistakes to Avoid
Prevent common issues with these simple tips:
- Overmixing the batter: Over-folding the macaronage will result in a runny batter, causing the macarons to spread too thin and not develop feet.
- Incorrect oven temperature: Always use an oven thermometer. An oven that is too hot will cause the shells to crack, while one that is too cool will prevent the feet from forming properly.
- Skipping the resting time: This step is non-negotiable. The skin that forms during resting is what forces the air out the bottom, creating those beautiful, ruffled feet.
- Using the wrong pan size: Use heavy, flat-bottomed aluminum baking sheets. Dark or warped pans can conduct heat unevenly, leading to inconsistent results.
Storing Tips for the Recipe
Proper storage is key to enjoying your creations at their peak.
- Short-term storage: Assembled macarons must be refrigerated. They are best enjoyed after “maturing” for 24 hours.
- Refrigeration: Store in an airtight container in the refrigerator for up to 5 days. Let them sit at room temperature for 15-20 minutes before serving.
- Freezing: Unfilled shells can be frozen in an airtight container for up to 2 months. You can also freeze assembled macarons, though the filling texture may change slightly upon thawing.
- Make-ahead option: Prepare the macaron shells up to 2 days in advance and store them in an airtight container at room temperature before filling.
Frequently Asked Questions (FAQs)
Why did my Christmas Macarons crack on top?
Cracking is one of the most common issues. It’s typically caused by one of three things: not resting the macarons long enough to form a proper skin, an oven temperature that is too high, or having too much air in the batter from not tapping the trays firmly enough after piping.
Can I use different fillings or flavors?
Absolutely! That’s the beauty of this recipe. For other festive holiday desserts, try a white chocolate ganache infused with cinnamon, a spiced gingerbread buttercream, or even a tangy cranberry curd. The shell is a perfect blank canvas for your creativity. These versatile treats can be adapted for any celebration.
Conclusion
Crafting these elegant Christmas Macarons is a rewarding experience that brings a touch of Parisian magic to your holiday table. With their delicate shells and creamy peppermint filling, they are more than just a cookie; they are an unforgettable memory in the making. This recipe proves that with a little precision and care, you can create a truly spectacular treat. Don’t forget to share this Holiday Desserts recipe with your friends and family!
Contact Us
Contact us at [email protected] and we’ll get back to you as soon as possible.
Share your experience with us
OOLALA
This turned out so awesome they look like they came from a exspensive bakery.
Just a question
So what about the grease from the meat? Should I use the leanest meats or is the grease give more flavor.
What about a meatloaf on top of veggies ? Would that work?
Ingredients list good, directions lacking
There were great details on quantities of ingredients I should use, but the recipe didn’t tell me the cook time. Also, mentioned in the section about “common mistakes” that you need to let it chill enough but doesn’t direct you in the recipe that you need to let it chill. More details would be helpful
Dressing is perfect!
Not a big fan of mayo, loved the Greek yogurt swap. Reduced garlic a bit. Dressing was delish!
Best coffee cake- ever!!
This recipe was not the easiest to follow due to how it was written. It requires a lot of back and forth from instructions to the lists of ingredients but oh, hey, the end result is totally worth the effort! Mouthwatering and delicious plus it’s a pretty presentation.