Easy Strawberry Shortcake Trifle: A Delicious Treat
Introduction
In my years of culinary exploration, from the patisseries of Paris to the vibrant markets of Tokyo, I’ve learned that true elegance often lies in simplicity. Every culture has a dessert that embodies pure, unadulterated comfort. For many, that is the classic strawberry shortcake. But how do we elevate this nostalgic favorite for a modern palate without losing its soul? We deconstruct it, we layer it, and we transform it into a show-stopping centerpiece. This is where the magic of our Strawberry Shortcake Trifle comes to life. It captures all the beloved flavors-sweet berries, tender cake, and luscious cream-but presents them in a stunning, layered Trifle that is impossibly easy to assemble. It’s a symphony of textures and tastes that will have your guests believing you spent hours in the kitchen. Let’s explore why this recipe will become your new go-to for effortless entertaining.

Why You’ll Love This Strawberry Shortcake Trifle
- Effortlessly Elegant: This dessert looks like it came from a high-end bakery, with beautiful, distinct layers that are guaranteed to impress, yet it requires no special decorating skills.
- A Crowd-Pleasing Classic: The familiar and beloved flavors of strawberries and cream appeal to all ages, making it the perfect finale for family dinners, potlucks, or holiday gatherings.
- A No-Bake Wonder: By using a quality store-bought cake, this entire dessert comes together without turning on the oven, a true blessing during warmer months.
- Perfectly Make-Ahead: You can prepare the components a day in advance and assemble a few hours before serving, making it the ultimate stress-free dessert for any host.
Preparation Time and Servings
This quick dessert comes together in just about 20 minutes of active time, making it a fantastic choice for last-minute guests or a spontaneous treat. The chilling time is essential for the flavors to meld beautifully.
⏱️ Preparation Time: 20 minutes
🔥 Cooking Time: 0 minutes
⏰ Total Time: 20 minutes (plus 2-4 hours chilling)
💡 Difficulty: Easy
👥 Servings: 8-10 people
Ingredients List
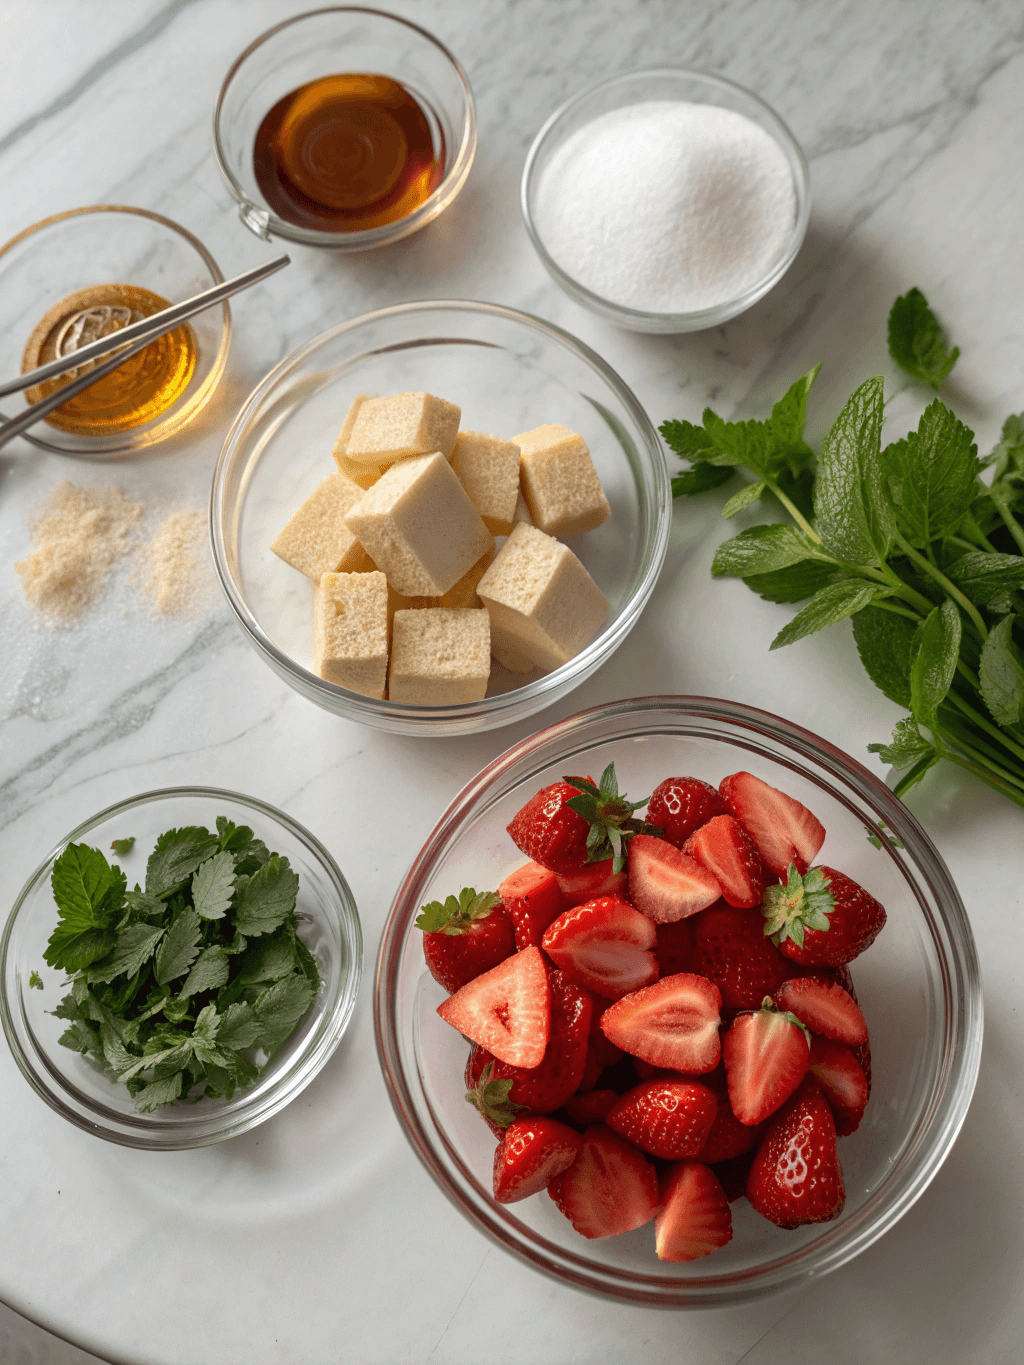
For a truly exceptional dessert, the quality of your ingredients is paramount. Use the freshest berries you can find for the most vibrant flavor.
- For the Strawberry Layer:
- 2 lbs (about 900g) fresh strawberries, hulled and sliced
- 1/4 cup (50g) granulated sugar
- 1 tablespoon fresh lemon juice
- For the Cream Layer:
- 2 cups (480ml) cold heavy whipping cream
- 8 oz (226g) full-fat cream cheese, softened
- 1 cup (120g) powdered sugar
- 2 teaspoons vanilla extract
- For the Cake Layer:
- 1 large (16 oz / 450g) pound cake or angel food cake, cut into 1-inch cubes
Step-by-Step Instructions
- Macerate the Berries: In a medium bowl, gently combine the sliced strawberries, granulated sugar, and lemon juice. Stir until the sugar begins to dissolve. Set aside for at least 15-20 minutes at room temperature. This process, known as maceration, will draw out the natural juices from the berries to create a beautiful syrup.
- Prepare the Cream Filling: In a large mixing bowl, use an electric hand mixer or a stand mixer to beat the softened cream cheese until it is smooth and free of lumps. Sift in the powdered sugar and mix on low until combined. Add the vanilla extract and cold heavy cream. Start on low speed and gradually increase to high, whipping until stiff peaks form. Be careful not to overmix.
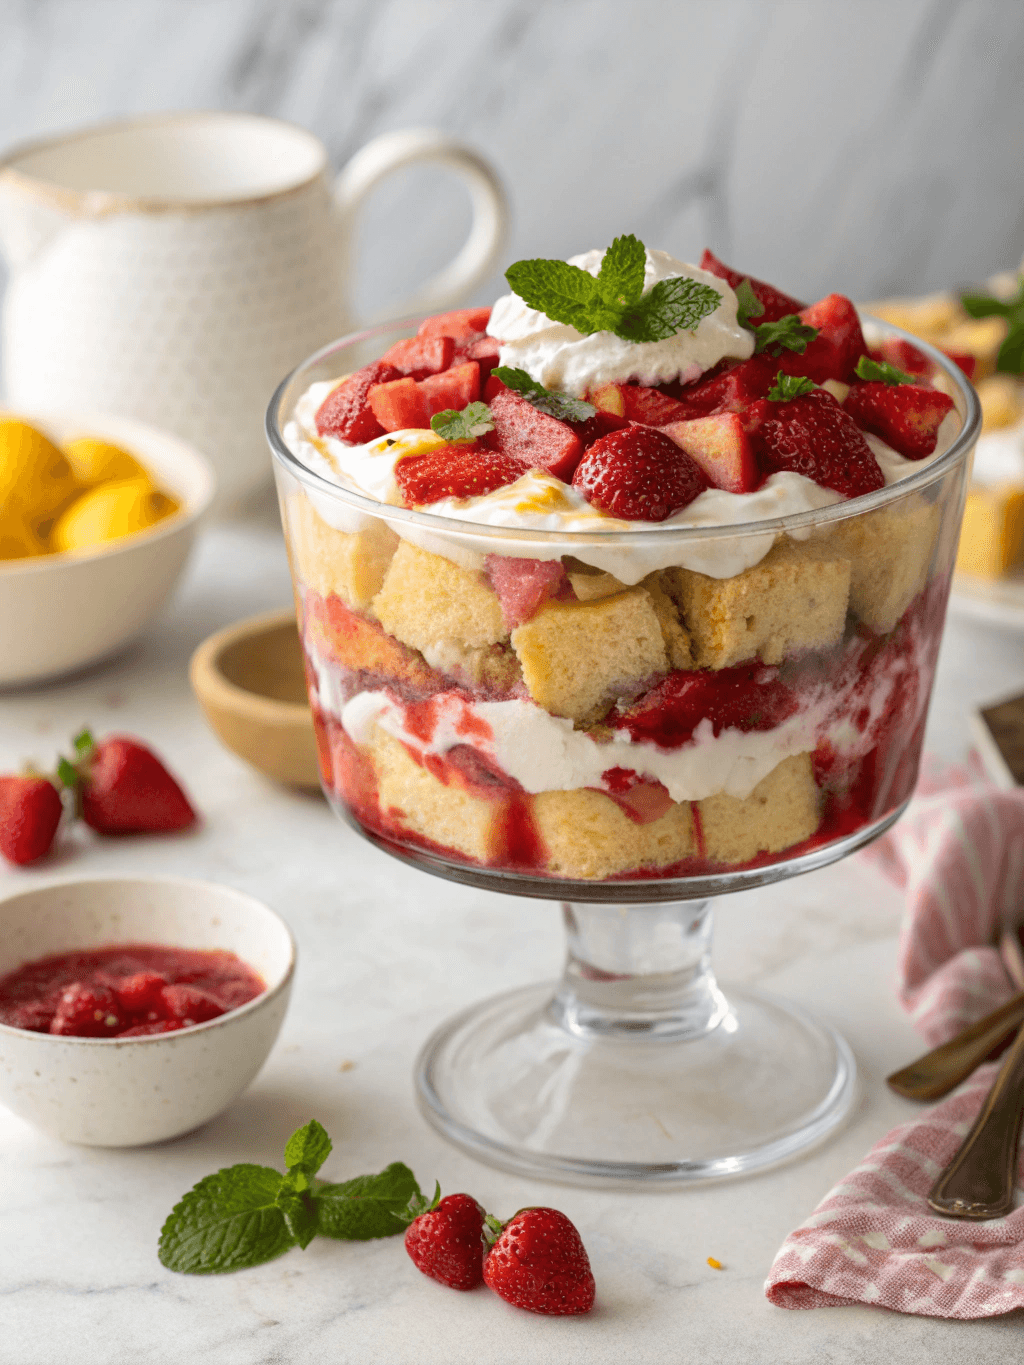
- Begin Assembly: Select a large glass trifle bowl or a deep glass dish (around 3-4 quarts) to showcase the beautiful layers. Arrange half of the cake cubes in an even layer at the bottom of the dish.
- Layer the Fruit: Spoon half of the macerated strawberries and their accumulated juices evenly over the cake layer. The syrup will soak into the cake, infusing it with incredible flavor.
- Add the Cream: Gently spread half of the whipped cream mixture over the strawberry layer, smoothing the top with a spatula.
- Repeat the Layers: Create the second layer by repeating the process. Add the remaining cake cubes, followed by the rest of the strawberries and their juices. Finish your glorious Strawberry Shortcake Trifle with the remaining whipped cream, creating an attractive final layer.
- Chill for Perfection: Cover the trifle bowl with plastic wrap and refrigerate for at least 2 hours, or up to 4 hours. This chilling time is crucial; it allows the cake to soften and the flavors to meld together into a harmonious dessert. Before serving, you can garnish with a few whole strawberries and fresh mint leaves for a professional touch.
Expert Tips for Success
- Choose the Right Cake: A sturdy pound cake provides a buttery, dense texture that holds up well against the fruit and cream. For a lighter, airier dessert, angel food cake is an excellent alternative.
- A Touch of Elegance: For an adult version, lightly brush the cake cubes with a tablespoon or two of a complementary liqueur like Grand Marnier (orange) or Chambord (raspberry) before assembling.
- Stabilize Your Cream: The softened cream cheese in the whipped cream is a chef’s secret. It not only adds a subtle, tangy flavor but also stabilizes the cream, ensuring it holds its shape beautifully for days.
- Don’t Rush the Chill: I cannot stress this enough. A proper chilling period transforms this from a collection of ingredients into a cohesive, delicious dessert. The wait is well worth it.
Common Mistakes to Avoid
Prevent common issues with these simple tips to ensure your Strawberry Shortcake Trifle is flawless every time:
- Soggy Layers: This can happen if berries are overripe or if too much liquid is used. Ensure your strawberries are firm and fresh, and don’t be tempted to add extra liquid to the maceration process.
- Assembling with Warm Ingredients: Ensure your cake is completely cool before cubing and layering. Assembling with warm components can cause the cream to melt and lose its structure.
- Skipping the Chilling Time: This crucial step allows the cake to absorb the delicious strawberry syrup and the flavors to meld. Rushing this will result in a less flavorful and poorly set dessert.
- Using the Wrong Dish: The visual appeal is a huge part of a trifle’s charm. Using a clear glass bowl is essential to showcase the beautiful, distinct layers you worked to create.
Storing Tips for the Recipe
Proper storage ensures you can enjoy this delightful dessert for a couple of days after making it.
- Short-term storage: This dessert must be kept in the refrigerator.
- Refrigeration: Cover the trifle bowl tightly with plastic wrap and store in the refrigerator for up to 2 days. Note that the cake will continue to soften over time.
- Freezing: Freezing the assembled Strawberry Shortcake Trifle is not recommended, as the cream and fresh strawberries will not thaw well.
- Make-ahead option: For the best results, prepare the cream filling and the macerated strawberries up to 24 hours in advance. Store them in separate airtight containers in the refrigerator, and assemble the trifle a few hours before you plan to serve it.
Frequently Asked Questions (FAQs)
Can I use frozen strawberries for this recipe?
While fresh, in-season strawberries will always provide the best flavor and texture, you can use frozen strawberries in a pinch. Thaw them completely and drain off any excess liquid before macerating them with sugar and lemon juice to avoid a watery result.
What other fruits can I use in this Strawberry Shortcake Trifle?
This recipe is wonderfully versatile! Feel free to substitute with a mix of fresh berries like blueberries, raspberries, and blackberries. In the summer, sliced peaches or nectarines would also be a delicious variation.
Conclusion
In the world of desserts, few things offer the stunning visual appeal and comforting flavor of this **Strawberry Shortcake Trifle**. It is a celebration of simplicity, transforming humble ingredients into an unforgettable experience. This recipe proves that you don’t need complex techniques to create something truly special and delicious. Don’t forget to share this beautiful Trifle with your friends and family at your next get-together!
Contact Us
Contact us at [email protected] and we’ll get back to you as soon as possible.
Share your experience with us
OOLALA
This turned out so awesome they look like they came from a exspensive bakery.
Just a question
So what about the grease from the meat? Should I use the leanest meats or is the grease give more flavor.
What about a meatloaf on top of veggies ? Would that work?
Ingredients list good, directions lacking
There were great details on quantities of ingredients I should use, but the recipe didn’t tell me the cook time. Also, mentioned in the section about “common mistakes” that you need to let it chill enough but doesn’t direct you in the recipe that you need to let it chill. More details would be helpful
Dressing is perfect!
Not a big fan of mayo, loved the Greek yogurt swap. Reduced garlic a bit. Dressing was delish!
Best coffee cake- ever!!
This recipe was not the easiest to follow due to how it was written. It requires a lot of back and forth from instructions to the lists of ingredients but oh, hey, the end result is totally worth the effort! Mouthwatering and delicious plus it’s a pretty presentation.