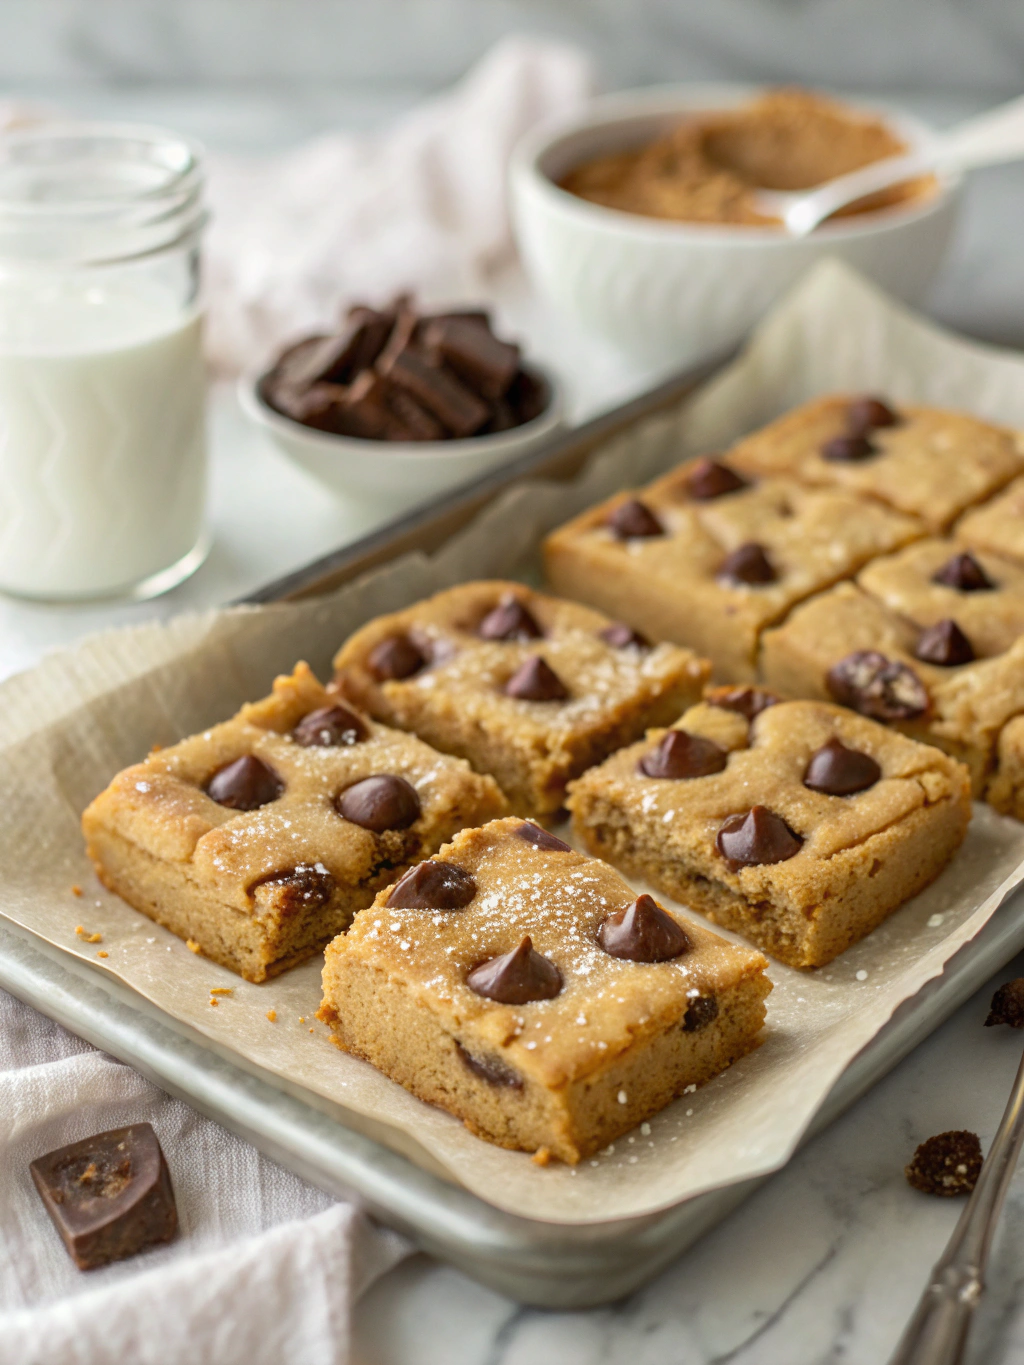
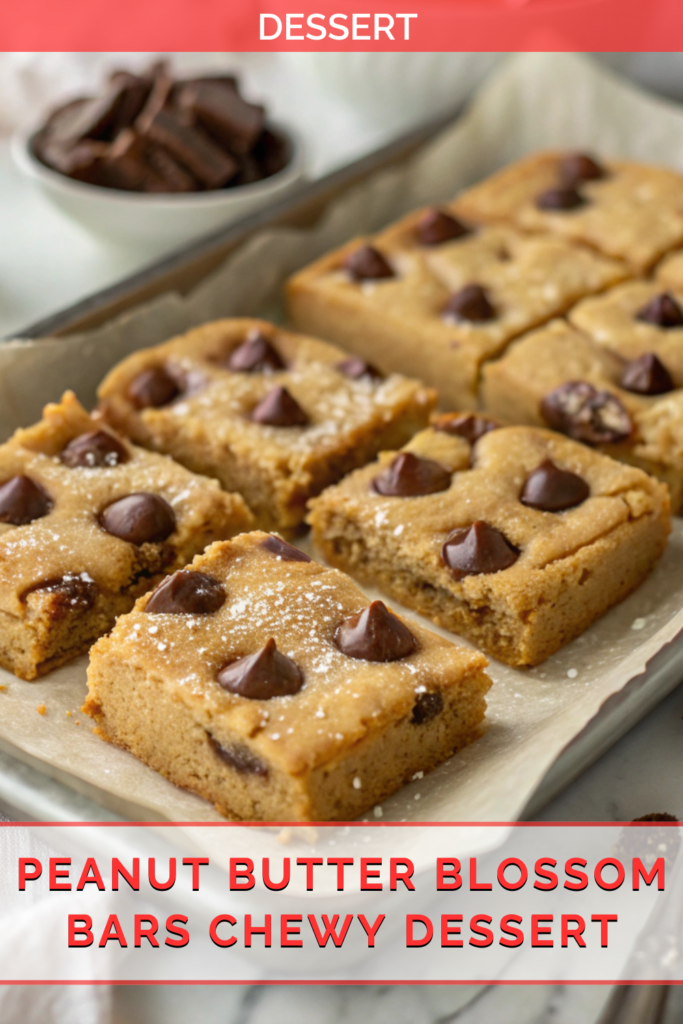
Peanut Butter Blossom Bars: The Ultimate Easy Recipe
Introduction
In my years traveling the world and mastering complex pastries, I’ve learned that the most profound culinary joy often comes from the simplest classics. I remember the nostalgic charm of a warm, crackled peanut butter cookie topped with a single chocolate kiss, a staple of holiday baking. But I also remember the time it took to roll each one perfectly. A question sparked in my mind: could we capture that iconic flavor profile-that perfect marriage of salty, sweet peanut butter and rich, melting chocolate-in a form that was faster, easier, and arguably even more delicious? The answer is a resounding yes, and it comes in the form of these incredible Peanut Butter Blossom Bars. This recipe transforms a beloved cookie into a decadent, shareable bar with a soft, chewy base and a beautiful mosaic of chocolate tops. Get ready to discover your new go-to dessert for any occasion.

Why You’ll Love This Recipe
- Effortless Elegance: This recipe delivers the classic taste you love without the tedious process of rolling individual cookies. It’s a one-pan wonder that saves you precious time.
- Perfectly Chewy Texture: We’ve perfected the ratio of ingredients to create a bar that is wonderfully soft and chewy in the center with slightly crisp edges.
- Crowd-Pleasing Favorite: The combination of peanut butter and chocolate is universally adored. These Peanut Butter Blossom Bars are a guaranteed hit at parties, potlucks, and family gatherings.
- Customizable and Fun: While classic chocolate kisses are traditional, you can easily swap them for peanut butter cups, chocolate chunks, or any other favorite candy.
Preparation Time and Servings
⏱️ Preparation Time: 15 minutes
🔥 Cooking Time: 25 minutes
⏰ Total Time: 40 minutes
💡 Difficulty: Easy
👥 Servings: 16 bars
This is a wonderfully quick recipe, taking you from raw ingredients to warm, delicious bars in under an hour.
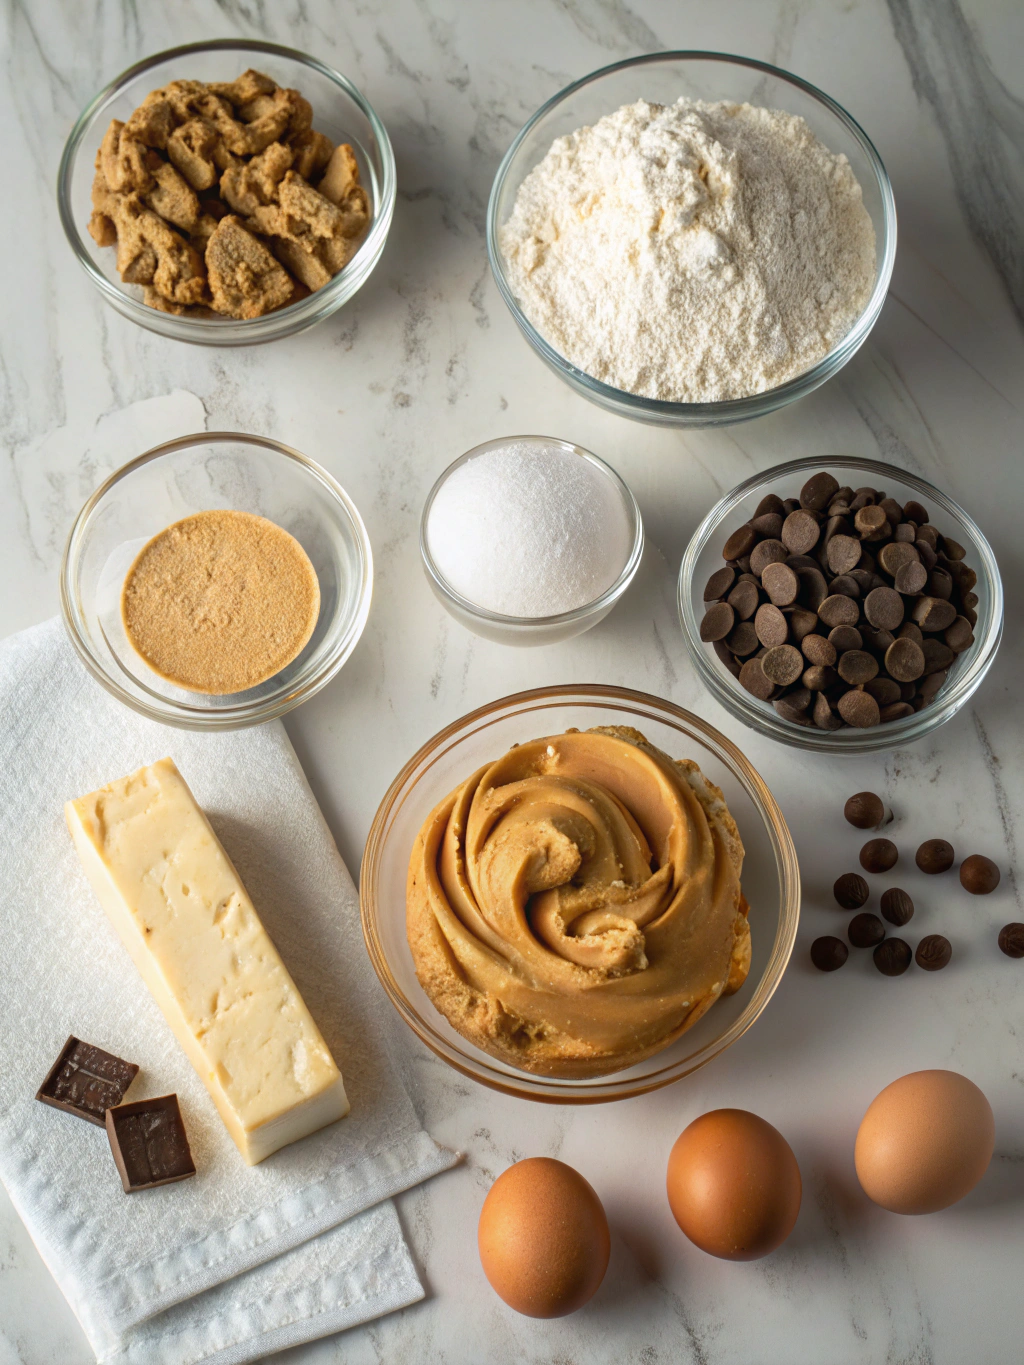
Ingredients List
- 1/2 cup (113g) unsalted butter, softened to room temperature
- 1/2 cup (100g) granulated sugar
- 1/2 cup (100g) packed light brown sugar
- 1/2 cup (128g) creamy peanut butter
- 1 large egg
- 1 teaspoon vanilla extract
- 1 1/4 cups (150g) all-purpose flour
- 1/2 teaspoon baking soda
- 1/4 teaspoon salt
- 32-36 unwrapped milk chocolate kisses (or similar chocolate candies)
Step-by-Step Instructions for Perfect Peanut Butter Blossom Bars
- Preheat and Prepare: Preheat your oven to 350°F (175°C). Grease and flour an 8×8-inch square baking pan, or line it with parchment paper, leaving an overhang on the sides to use as handles for easy removal later.
- Cream the Fats and Sugars: In a large mixing bowl, using an electric mixer or a stand mixer fitted with the paddle attachment, beat the softened butter, granulated sugar, and brown sugar together on medium-high speed until the mixture is light and fluffy, about 2-3 minutes.
- Incorporate Wet Ingredients: Add the creamy peanut butter, egg, and vanilla extract to the bowl. Beat again on medium speed until everything is well combined and smooth, scraping down the sides of the bowl as needed to ensure even mixing.
- Combine Dry Ingredients: In a separate medium bowl, whisk together the all-purpose flour, baking soda, and salt.
- Mix the Dough: Gradually add the dry ingredient mixture to the wet ingredients. Mix on low speed just until combined. Be careful not to overmix the dough, as this can lead to a tougher bar. The dough will be thick and soft.
- Press and Bake: Evenly press the cookie dough into the bottom of your prepared 8×8-inch pan. Use your fingertips or the back of a spatula to create a smooth, level surface. Bake for 22-25 minutes, or until the edges are lightly golden brown and the center is set.
- Add the Chocolate Topping: Remove the pan from the oven and immediately press the unwrapped chocolate kisses evenly into the top of the hot bars, about 1 inch apart. The heat will soften them slightly.
- Cool Completely: Let the Peanut Butter Blossom Bars cool completely in the pan on a wire rack for at least 2 hours. This step is crucial; cutting them while warm will result in a crumbly mess as the chocolate hasn’t had time to set. Once cooled, use the parchment handles to lift the bars out of the pan and cut into 16 squares.
Expert Tips for Success
- Room Temperature is Key: Ensure your butter and egg are at room temperature before you begin. This allows them to emulsify properly with the sugars, creating a uniform, airy texture in the final product.
- Do Not Overbake: The secret to an irresistibly chewy bar is to pull it from the oven when the center is just barely set. It will continue to cook from the residual heat of the pan as it cools.
- Peanut Butter Choice: For the best results, use a standard commercial creamy peanut butter like Jif or Skippy. Natural peanut butters that require stirring can alter the texture and may result in a drier, more crumbly bar.
- Chill for Cleaner Cuts: For perfectly clean, professional-looking squares, place the fully cooled bars in the refrigerator for 30 minutes before slicing. This helps the chocolate and the bars firm up completely.
Common Mistakes to Avoid
Prevent common issues with these simple tips:
- Overmixing the batter: Stop mixing as soon as the flour is incorporated. Overmixing develops gluten, which leads to a dense, tough texture instead of a soft and chewy one.
- Incorrect oven temperature: Always use an oven thermometer for accuracy, as home ovens can be notoriously inaccurate. An oven that’s too hot will dry out the edges before the center is cooked.
- Skipping the cooling time: This step is non-negotiable. Cutting into warm bars will cause the chocolate to smear and the bars to fall apart. Patience is a virtue in baking!
- Using the wrong pan size: Sticking to an 8×8-inch pan is important. A larger pan will result in thin, dry bars, while a smaller one will require a longer baking time and may not cook evenly.
Storing Tips for the Recipe
Help your bars stay fresh and delicious with these storage guidelines:
- Short-term storage: Keep the bars in an airtight container at room temperature for up to 4 days. Placing a slice of bread in the container can help keep them soft.
- Refrigeration: While not necessary, you can store them in an airtight container in the refrigerator for up to one week. They will be firmer, so let them sit at room temperature for 15 minutes before serving.
- Freezing: These bars freeze beautifully. Wrap individual squares in plastic wrap and then place them in a freezer-safe bag or container. They will last for up to 3 months. Thaw overnight in the refrigerator or on the counter for a couple of hours.
- Make-ahead option: You can prepare the cookie dough, press it into the pan, cover it tightly, and refrigerate for up to 2 days before baking as directed.
Frequently Asked Questions (FAQs)
Can I use a different kind of chocolate?
Absolutely! While classic milk chocolate kisses are traditional, this recipe is incredibly versatile. Feel free to use dark chocolate kisses, peanut butter cups, chopped chocolate bars, or even caramel-filled chocolates for a different flavor experience. Simply press them into the top just as you would with the kisses.
Can I make these bars gluten-free?
Yes, you can adapt this recipe for a gluten-free diet. Substitute the all-purpose flour with a high-quality 1-to-1 gluten-free baking flour blend that contains xanthan gum. The texture might be slightly different, but they will still be delicious. Ensure all your other ingredients, including the peanut butter, are certified gluten-free.
Conclusion
This recipe proves that you don’t need to spend hours in the kitchen to create a truly spectacular dessert. With its rich, chewy texture and the timeless combination of peanut butter and chocolate, this Peanut Butter Blossom Bars recipe is destined to become a staple in your baking repertoire. It’s simple, satisfying, and utterly delicious. Don’t forget to share this How to make the best chewy peanut butter blossom cookie bars guide with your friends and family!
Contact Us
Contact us at [email protected] and we’ll get back to you as soon as possible.
Share your experience with us
OOLALA
This turned out so awesome they look like they came from a exspensive bakery.
Just a question
So what about the grease from the meat? Should I use the leanest meats or is the grease give more flavor.
What about a meatloaf on top of veggies ? Would that work?
Ingredients list good, directions lacking
There were great details on quantities of ingredients I should use, but the recipe didn’t tell me the cook time. Also, mentioned in the section about “common mistakes” that you need to let it chill enough but doesn’t direct you in the recipe that you need to let it chill. More details would be helpful
Dressing is perfect!
Not a big fan of mayo, loved the Greek yogurt swap. Reduced garlic a bit. Dressing was delish!
Best coffee cake- ever!!
This recipe was not the easiest to follow due to how it was written. It requires a lot of back and forth from instructions to the lists of ingredients but oh, hey, the end result is totally worth the effort! Mouthwatering and delicious plus it’s a pretty presentation.