Santa Claus Macarons: A Quick Guide to Make for Christmas

Introduction
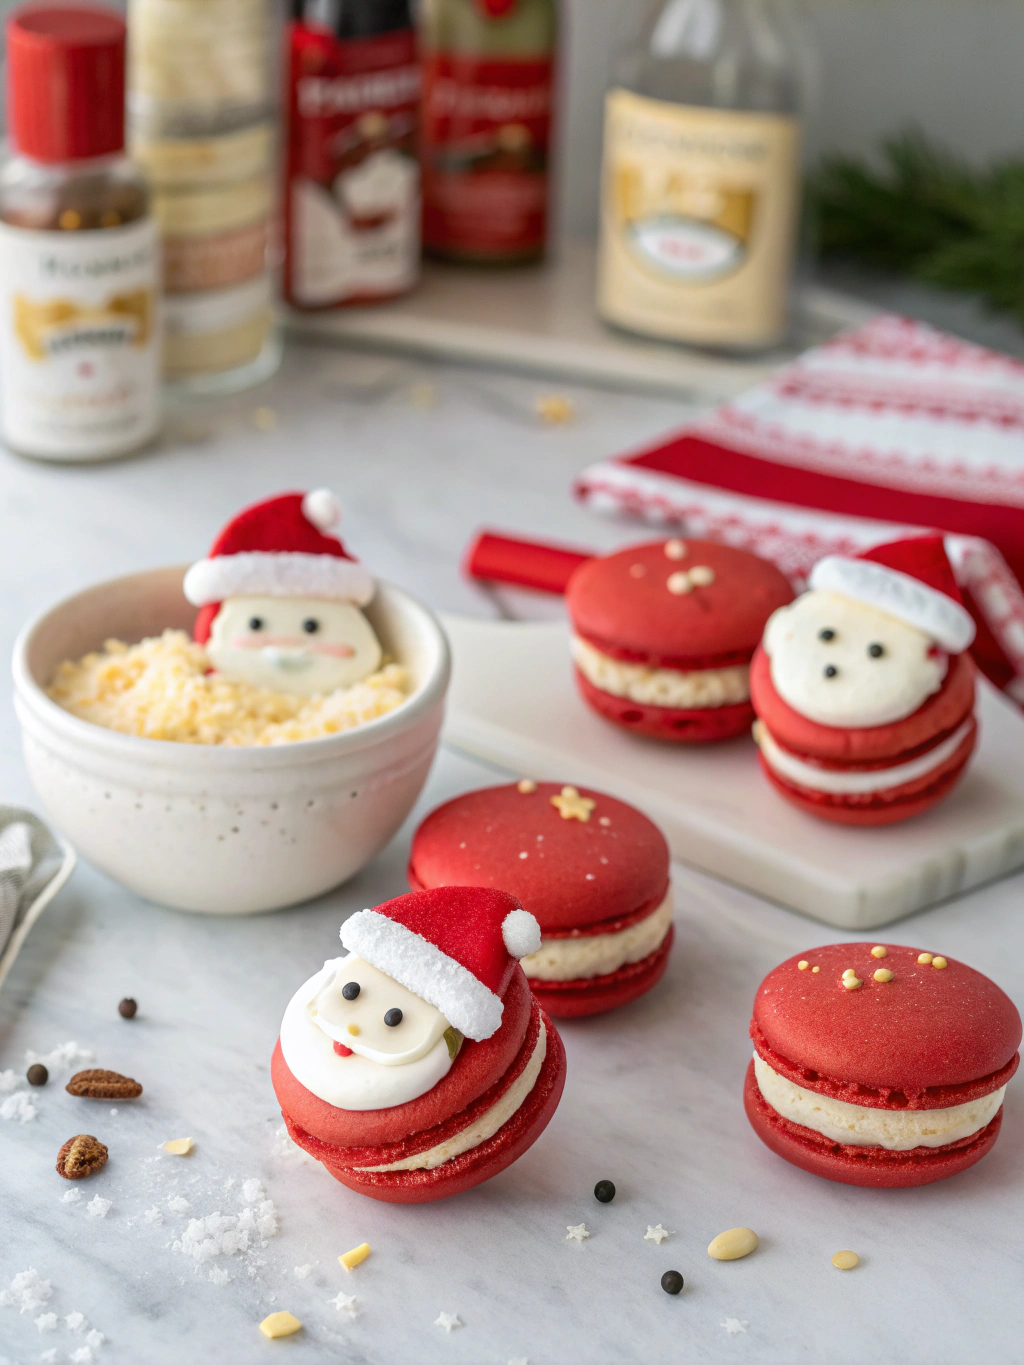
In my years spent in kitchens around the world, from bustling Parisian patisseries to serene Tokyo bakeries, I’ve learned that the most memorable dishes are those that tell a story. This holiday season, we’re not just baking; we’re crafting a narrative of joy, nostalgia, and festive cheer. Imagine the delight on your loved ones’ faces when you present a tray of these exquisite Santa Claus Macarons. These aren’t just simple cookies; they are delicate, almond-meringue jewels filled with a luscious buttercream, meticulously decorated to look like St. Nick himself. This guide will demystify the process, transforming what many consider a complex pastry into an accessible holiday project. Let’s embark on this delightful culinary adventure together and see why these treats are destined to become your new Christmas tradition.
Why You’ll Love This Recipe
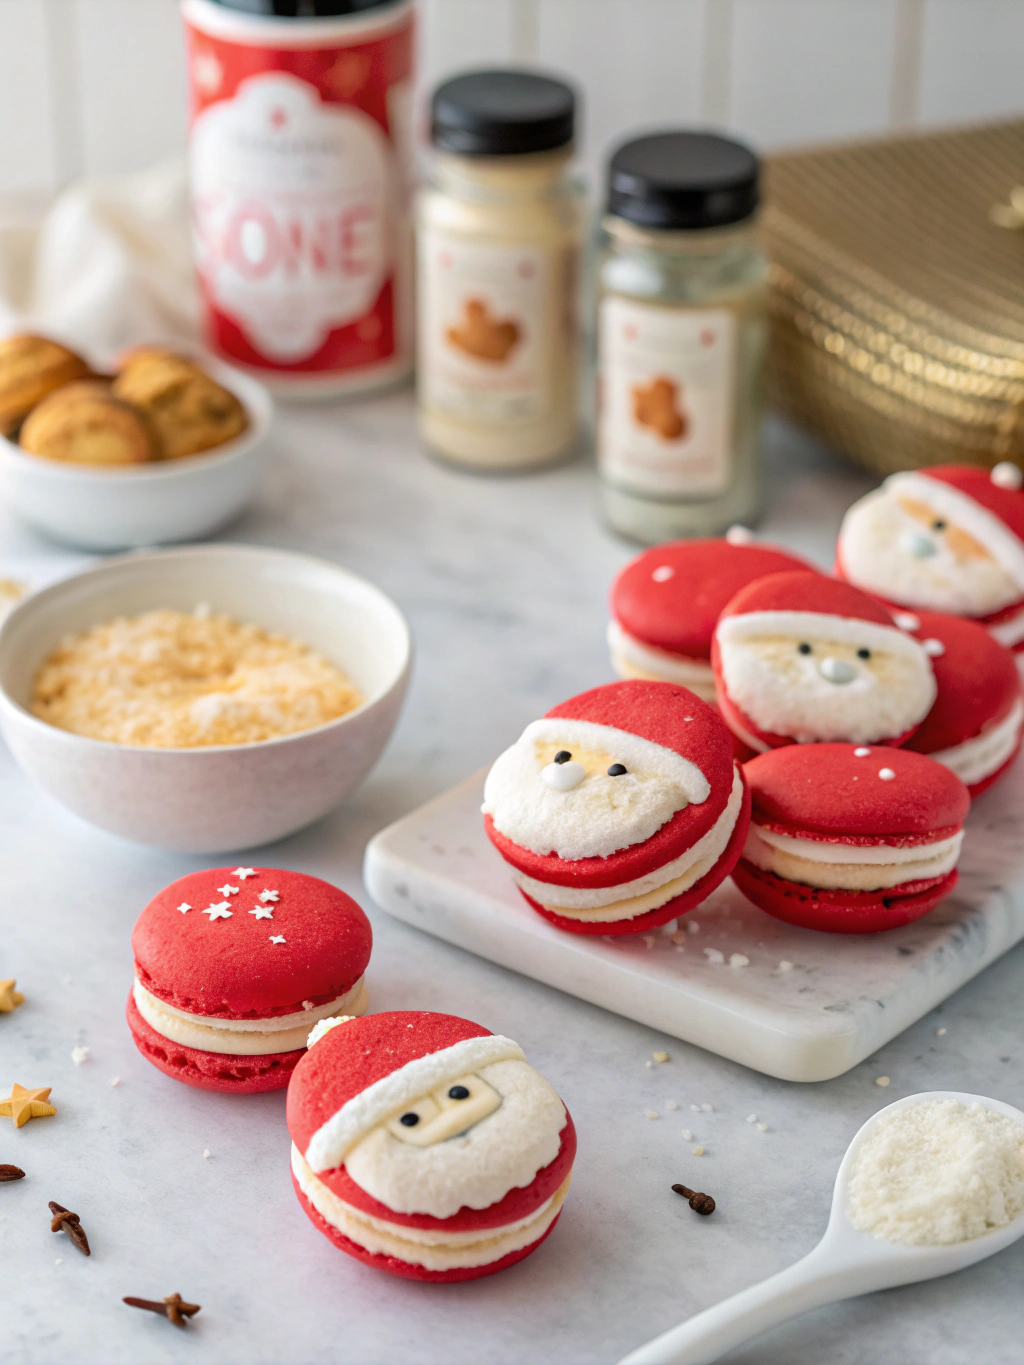
- Visually Stunning: These macarons are designed to be the star of any holiday dessert table, with their vibrant red color and charming Santa details.
- Perfectly Balanced Flavors: The classic crisp-yet-chewy almond shell pairs beautifully with a sweet and creamy vanilla bean buttercream, creating a sophisticated flavor profile.
- A Rewarding Challenge: While macarons require precision, this recipe breaks down each step, making it a satisfying and achievable project for bakers of all levels.
- Ideal for Gifting: Packaged in a beautiful box, these Santa Claus Macarons make an elegant and thoughtful homemade gift for friends, family, and neighbors.
Preparation Time and Servings
This recipe is designed for a quick and rewarding holiday baking session, resulting in about two dozen delightful treats.
⏱️ Preparation Time: 45 minutes
🔥 Baking Time: 16-18 minutes
⏰ Total Time: Approximately 1 hour 30 minutes (includes resting time)
💡 Difficulty: Intermediate
👥 Servings: Makes 24-28 finished macarons
Ingredients List
For the Santa Macaron Shells:
- 150g (1 ½ cups) Almond Flour, finely ground
- 150g (1 ¼ cups) Powdered Sugar
- 110g (about 4 large) Egg Whites, aged at room temperature for a few hours
- 150g (¾ cup) Granulated Sugar
- 1 teaspoon Vanilla Extract
- Red Gel Food Coloring
- Black Edible Ink Pen and White Nonpareils for decoration
For the Vanilla Buttercream Filling:
- 113g (½ cup) Unsalted Butter, softened
- 200g (1 ¾ cups) Powdered Sugar
- 1 teaspoon Vanilla Bean Paste or Extract
- 1-2 tablespoons Heavy Cream or Milk

Step-by-Step Instructions for Perfect Santa Claus Macarons
- Prepare the Dry Ingredients: Sift the almond flour and powdered sugar together through a fine-mesh sieve into a large bowl at least twice. This step is crucial for achieving smooth shells. Discard any large almond pieces left in the sieve.
- Create the Meringue: In the clean bowl of a stand mixer fitted with a whisk attachment, beat the egg whites on medium-low speed until foamy. Gradually add the granulated sugar while increasing the speed to medium-high. Continue whipping until stiff, glossy peaks form-the meringue should hold its shape when you lift the whisk. Beat in the vanilla extract and several drops of red gel food coloring until you achieve a vibrant Santa-suit red.
- Perform the Macaronage: Gently fold one-third of the sifted dry ingredients into the meringue until just combined. Add the remaining dry ingredients and continue to fold, scraping the sides and bottom of the bowl. The goal is a batter that flows off the spatula like a thick, slow-moving ribbon of lava. Do not overmix.
- Pipe the Shells: Transfer the batter to a piping bag fitted with a medium round tip (like a Wilton 12). Pipe 1.5-inch circles onto baking sheets lined with parchment paper or silicone mats, leaving about an inch of space between each. Firmly tap the baking sheets on the counter a few times to release any air bubbles.
- Rest the Shells: Let the piped macarons rest at room temperature for 30-60 minutes, or until a dry skin forms on top. You should be able to gently touch a shell without any batter sticking to your finger.
- Bake to Perfection: Preheat your oven to 300°F (150°C). Bake the shells one sheet at a time for 16-18 minutes, rotating the sheet halfway through. The shells are done when they have developed “feet” (the ruffled bottoms) and do not wobble when you gently nudge them. Let them cool completely on the baking sheet before removing.
- Whip the Filling: While the shells cool, beat the softened butter in a mixer until light and fluffy. Gradually add the powdered sugar, mixing on low speed until combined, then increase to high and beat for 3-5 minutes. Mix in the vanilla and cream until you reach a smooth, pipeable consistency.
- Assemble Your Santas: Transfer the buttercream to a piping bag. Pipe a dollop of filling onto the flat side of one macaron shell and gently sandwich it with another. To decorate your Santa Claus Macarons, use a black edible ink pen to draw a belt and buckle, and use a tiny dab of buttercream to affix two white nonpareils for buttons.
Expert Tips for Success
- Age Your Egg Whites: Leaving egg whites at room temperature for a few hours (or overnight in the fridge) can reduce their water content, leading to a more stable meringue.
- Weigh Your Ingredients: Baking is a science, and macarons demand precision. Using a kitchen scale for all ingredients is non-negotiable for consistent results.
- Understand Macaronage: The folding stage is where most mistakes happen. Under-mixing results in lumpy, peaked shells, while over-mixing causes the batter to be too thin, leading to flat, spread-out cookies. Aim for that perfect lava-like flow.
- Use Gel Food Coloring: Liquid food coloring adds too much moisture and can ruin the delicate structure of the meringue. High-quality gel coloring provides vibrant color without compromising the batter.
Common Mistakes to Avoid
Prevent common issues with these simple tips:
- Overmixing the batter: This will deflate your meringue, leading to shells that are flat, oily, or lack the signature “feet”. Stop folding as soon as the batter flows in a continuous ribbon.
- Incorrect oven temperature: An oven that is too hot can cause the shells to crack or brown. Always use an oven thermometer for accuracy, as many home ovens are not perfectly calibrated.
- Skipping the resting time: This step is crucial for developing feet. The skin that forms prevents the air from escaping out the top, forcing it out the bottom to create that perfect ruffle.
- Uneven Piping: Piping shells of different sizes will result in an uneven bake. Use a template under your parchment paper to guide you for uniformly sized Santa Claus Macarons.
Storing Tips for the Recipe
Proper storage is key to enjoying your creations at their best.
- Maturation is Key: For the best texture, macarons should “mature” after filling. Store them in an airtight container in the refrigerator for 24 hours before serving. This allows the filling to soften the inside of the shell, creating the perfect chewy texture.
- Refrigeration: Store filled macarons in an airtight container in the refrigerator for up to 5 days. Let them sit at room temperature for 15-20 minutes before serving to soften the buttercream.
- Freezing: You can freeze unfilled shells or fully assembled macarons in an airtight container for up to one month. Thaw them in the refrigerator overnight before serving.
- Make-ahead option: The macaron shells can be baked and stored in an airtight container at room temperature for 2 days or frozen for a month, making assembly quick and easy for a party.
Frequently Asked Questions (FAQs)
Why did my Santa Claus Macarons crack on top?
Cracking is a common issue with a few potential causes. The most frequent culprits are an over-mixed batter, an oven that is too hot, or not letting the shells rest long enough to form a proper skin before baking. Ensure you follow the resting and temperature guidelines precisely.
Can I use a different filling for these macarons?
Absolutely! While vanilla buttercream is classic, feel free to get creative. A white chocolate peppermint ganache, a rich cream cheese filling, or even a spiced eggnog buttercream would be wonderfully festive and pair beautifully with the almond shells.
Conclusion
Crafting a batch of beautiful Santa Claus Macarons is more than just baking; it’s about creating edible art that captures the magic of Christmas. With their crisp shells, chewy centers, and delightful design, this recipe is guaranteed to bring smiles and impress your guests. Embrace the process, enjoy the artistry, and share the joy. Don’t forget to share this guide for festive Macarons with your fellow baking enthusiasts!
Contact Us
Contact us at [email protected] and we’ll get back to you as soon as possible.
Share your experience with us
OOLALA
This turned out so awesome they look like they came from a exspensive bakery.
Just a question
So what about the grease from the meat? Should I use the leanest meats or is the grease give more flavor.
What about a meatloaf on top of veggies ? Would that work?
Ingredients list good, directions lacking
There were great details on quantities of ingredients I should use, but the recipe didn’t tell me the cook time. Also, mentioned in the section about “common mistakes” that you need to let it chill enough but doesn’t direct you in the recipe that you need to let it chill. More details would be helpful
Dressing is perfect!
Not a big fan of mayo, loved the Greek yogurt swap. Reduced garlic a bit. Dressing was delish!
Best coffee cake- ever!!
This recipe was not the easiest to follow due to how it was written. It requires a lot of back and forth from instructions to the lists of ingredients but oh, hey, the end result is totally worth the effort! Mouthwatering and delicious plus it’s a pretty presentation.