Christmas tree shaped charcuterie board: Easy Guide
A Centerpiece That Tells a Story
In my years of culinary exploration across continents, I’ve discovered a universal truth: the most memorable dishes are often those that bring people together, sparking conversation and delight. They are not always the most complicated, but they are always prepared with intention and presented with love. This philosophy is perfectly captured in the art of a festive, edible centerpiece. Forget complex recipes that keep you in the kitchen; this year, let’s create something spectacular with simple, beautiful ingredients. I’m talking about the ultimate holiday showstopper: the Christmas tree shaped charcuterie board. It is an arrangement of flavors and textures that is as much a feast for the eyes as it is for the palate. Let me show you how to craft this edible work of art that will become the heart of your celebration.
Why You’ll Love This Recipe
- Stunning Visual Impact: This isn’t just an appetizer; it’s a decorative, edible masterpiece that will have your guests reaching for their cameras.
- Effortlessly Elegant: With no cooking required, you can create a sophisticated and impressive spread that looks like it took hours to prepare.
- Completely Customizable: Easily adapt the ingredients to suit any taste, preference, or dietary need, from nut-free to vegetarian.
- Interactive and Fun: A grazing board encourages guests to mingle, sample, and create their own perfect bites, making it a wonderful icebreaker.
Preparation Time and Servings
This quick 30-minute masterpiece is perfect for last-minute holiday preparations, proving that elegance doesn’t require hours of effort.
⏱️ Preparation Time: 30 minutes
🔥 Cooking Time: 0 minutes
⏰ Total Time: 30 minutes
💡 Difficulty: Easy
👥 Servings: 8-10 people
Ingredients for Your Christmas Tree Shaped Charcuterie Board
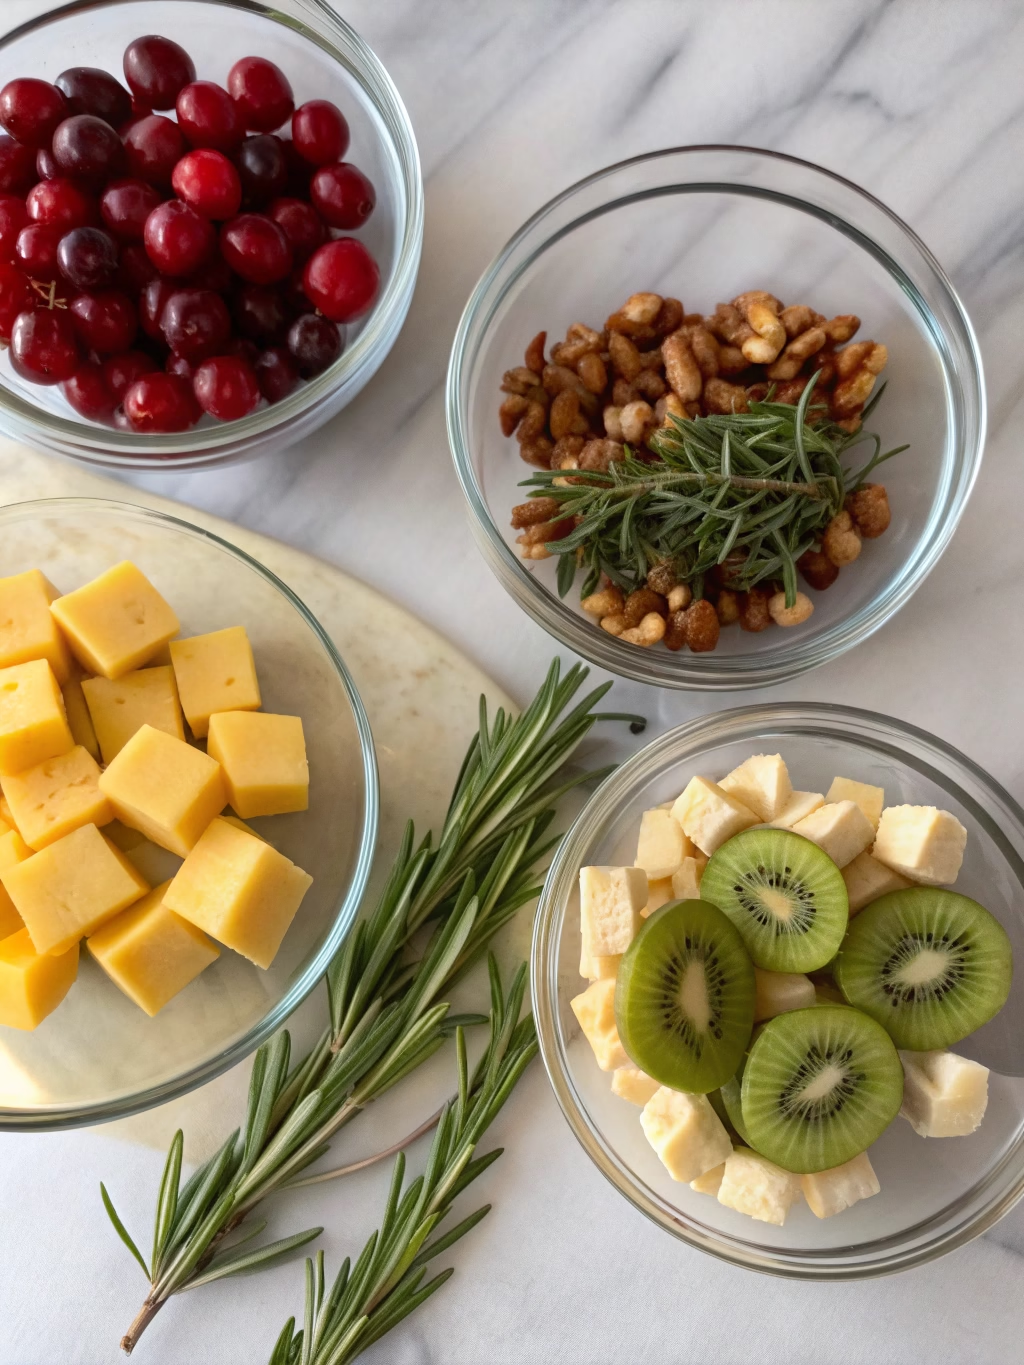
- For the Cheeses: 1 (8-ounce) wheel of Brie, 6 ounces cubed Aged White Cheddar, 6 ounces sliced Manchego, 1 (4-ounce) log of cranberry goat cheese.
- For the Cured Meats: 4 ounces Prosciutto, 4 ounces sliced Genoa Salami, 4 ounces Soppressata.
- For the Fruits & Nuts: 1 cup red seedless grapes, 1 cup green seedless grapes, 1/2 cup mixed nuts (almonds, walnuts, pistachios), 1/4 cup pomegranate arils.
- For the Accompaniments: 1/2 cup cornichons, 1/2 cup mixed olives, assorted crackers and sliced baguette.
- For the Garnish & Structure: 5-6 fresh rosemary sprigs, 1 thick pretzel stick for the trunk, 1 slice of provolone or cheddar for the star.
Step-by-Step Instructions
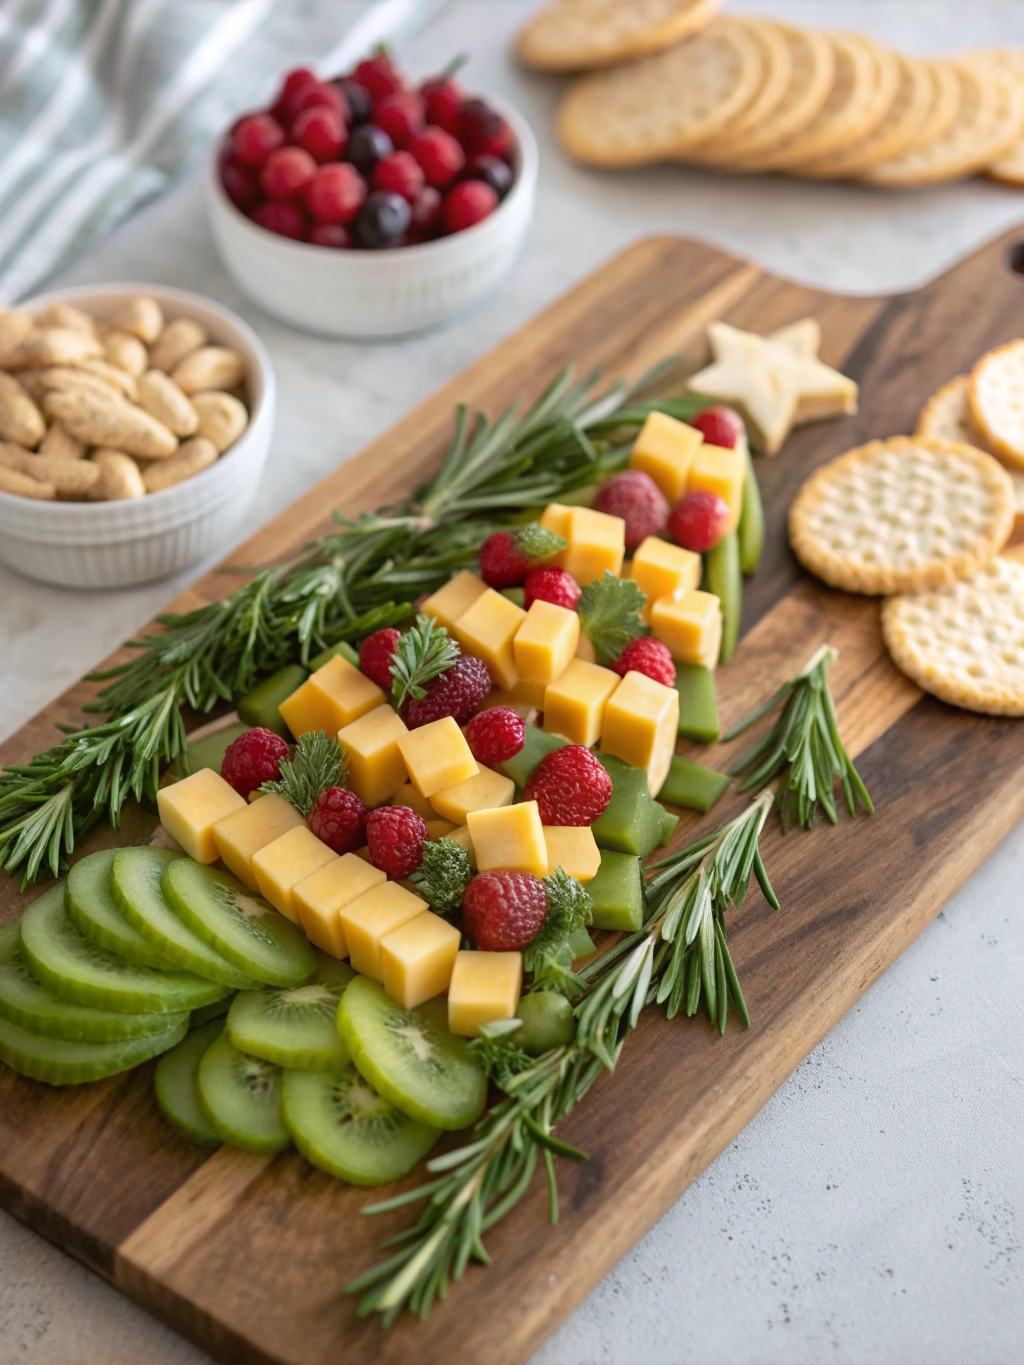
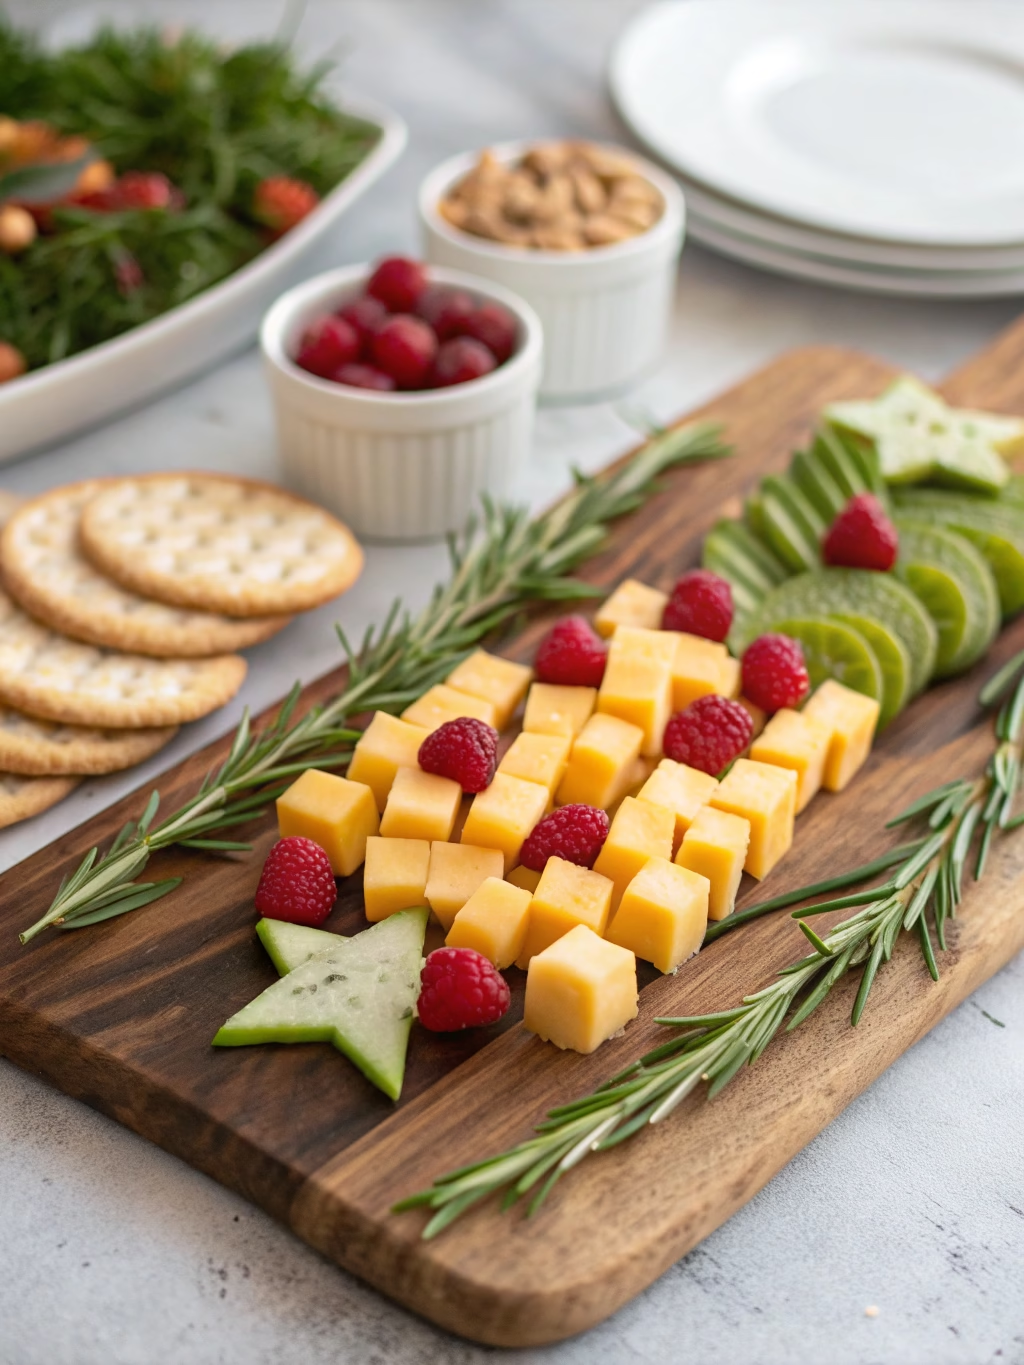
- Prepare your canvas. Select a large rectangular wooden board, slate, or serving platter. This will be the foundation for your edible art.
- Create the star and trunk. Use a small, star-shaped cookie cutter to cut a star from your slice of provolone or cheddar. Place it at the top of the board. Place the pretzel stick at the bottom center to act as the tree trunk.
- Outline the tree’s shape. Arrange the fresh rosemary sprigs to form a large triangle between the star and the trunk. This creates the fragrant and festive outline for your tree.
- Arrange the main components. Begin filling in the tree. Fold the salami and soppressata slices into quarters or “roses.” Drape the prosciutto slices loosely. Place these meats and the larger cubed cheeses within the rosemary outline, starting with a wider base and tapering towards the star.
- Fill the gaps with color and texture. Tuck bunches of red and green grapes, handfuls of nuts, olives, and cornichons into the empty spaces. This is where the Christmas tree shaped charcuterie board truly comes to life.
- Garnish and serve. Sprinkle the bright pomegranate arils over the board; they will look like little ornaments. Arrange the crackers and baguette slices artfully around the base of the tree and serve immediately.
Expert Tips for Success
- Balance Flavors and Textures: A great board has variety. Pair a creamy Brie with a sharp cheddar, a salty prosciutto with a sweet grape. The contrast is what makes each bite interesting.
- Think in Color: Use the vibrant colors of fruits like pomegranates and grapes and the deep greens of rosemary and olives to make your board visually dynamic and appealing.
- Prep Ahead, Assemble Fresh: You can wash fruit, cube cheese, and portion nuts hours in advance. Store them in separate airtight containers in the refrigerator. Assemble the board just before your guests arrive for maximum freshness.
- Don’t Forget the Knives: Place small cheese knives and tongs near the board to make it easy for guests to serve themselves without creating a mess.
Common Mistakes to Avoid
Prevent common issues with these simple tips:
- Overcrowding the board: This makes it difficult for guests to pick items without causing an avalanche. Leave some breathing room to showcase the ingredients.
- Serving cheeses too cold: Cheese has the best flavor and texture at room temperature. Remove it from the refrigerator 30-60 minutes before serving.
- Not planning your layout: Placing the larger items, like the wheel of Brie, first helps anchor the design of your Christmas tree shaped charcuterie board and makes filling in the rest easier.
- Using a small board: This edible masterpiece needs space to shine! A larger board allows for a more impressive tree shape and prevents ingredients from looking cramped.
Storing Tips for the Recipe
Keep your beautiful creation fresh with these storage guidelines:
- Short-term storage: If the board will be out for a while, you can cover it loosely with plastic wrap. It’s best enjoyed within 2 hours of sitting at room temperature.
- Refrigeration: For leftovers, disassemble the board. Wrap cheeses and meats separately and store in airtight containers for up to 3 days. Crackers should be stored separately in a dry place to prevent them from getting soggy.
- Freezing: Freezing is not recommended for an assembled board, as the texture of the cheeses, fruits, and meats will be compromised upon thawing.
- Make-ahead option: You can wash and chop fruits and vegetables, and cube hard cheeses up to 24 hours in advance. Store everything in separate containers in the refrigerator until you are ready to assemble your beautiful Christmas tree shaped charcuterie board.
Frequently Asked Questions (FAQs)
How can I make a vegetarian Christmas tree shaped charcuterie board?
It’s wonderfully simple! Omit the cured meats and expand your selection of cheeses. Add more variety with items like marinated artichoke hearts, roasted red peppers, stuffed olives, and perhaps a small bowl of hummus or a festive beet dip placed strategically on the board.
What kind of board is best for this display?
A large, flat, rectangular board provides the ideal canvas for creating the tree shape. Materials like wood, slate, or marble are excellent choices as they offer a beautiful, rustic, or elegant backdrop for your ingredients. The key is to ensure it is large enough to prevent overcrowding.
Conclusion
Crafting this edible centerpiece is more than just preparing an appetizer; it is about creating a moment of joy and connection for your guests. The beauty of this recipe lies in its simplicity and its spectacular result. Your Christmas tree shaped charcuterie board will undoubtedly be the talk of the party. Now, gather your favorite ingredients and get creative! Don’t forget to share this delightful charcuterie idea with your friends and family.
Contact Us
Contact us at [email protected] and we’ll get back to you as soon as possible.
Share your experience with us
OOLALA
This turned out so awesome they look like they came from a exspensive bakery.
Just a question
So what about the grease from the meat? Should I use the leanest meats or is the grease give more flavor.
What about a meatloaf on top of veggies ? Would that work?
Ingredients list good, directions lacking
There were great details on quantities of ingredients I should use, but the recipe didn’t tell me the cook time. Also, mentioned in the section about “common mistakes” that you need to let it chill enough but doesn’t direct you in the recipe that you need to let it chill. More details would be helpful
Dressing is perfect!
Not a big fan of mayo, loved the Greek yogurt swap. Reduced garlic a bit. Dressing was delish!
Best coffee cake- ever!!
This recipe was not the easiest to follow due to how it was written. It requires a lot of back and forth from instructions to the lists of ingredients but oh, hey, the end result is totally worth the effort! Mouthwatering and delicious plus it’s a pretty presentation.