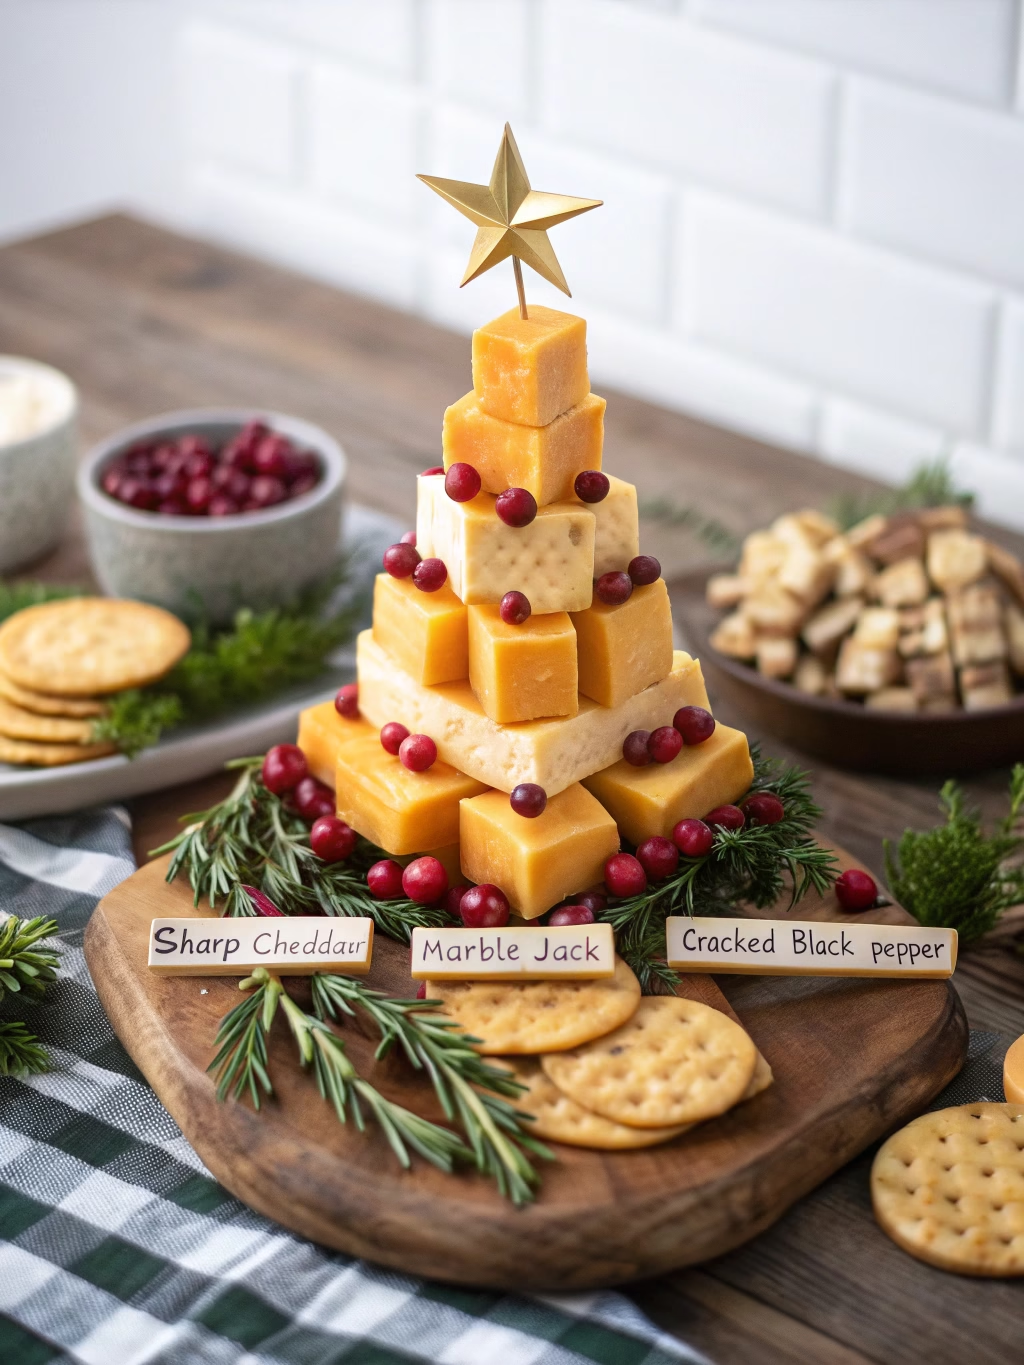
Cheese cube Christmas tree: Easy & Quick Holiday Idea
An Edible Centerpiece……
The sound I cherish most during the holidays isn’t sleigh bells-it’s the warm, happy hum of a kitchen filled with loved ones. It’s the clinking of glasses and the scent of rosemary mingling with the rich, savory aroma of good cheese. This Cheese cube Christmas tree isn’t just a recipe; it’s a memory in the making. It transforms simple ingredients into a breathtaking, edible centerpiece that sparks conversation and pure delight. What makes this version so special is the thoughtful balance of flavors and textures-creamy, sharp, and mild cheeses dancing with pops of juicy tomato and briny olive. Join me, and let’s build more than an appetizer; let’s build a new holiday tradition.
Why You’ll Love This Recipe
- Effortlessly Elegant: It looks like it took hours of culinary artistry, but it’s a simple assembly job that anyone can master.
- A No-Cook Marvel: Free up your stove and oven! This stunning Holiday appetizer requires zero cooking, just a bit of creative arranging.
- Endlessly Customizable: You are the artist. Mix and match cheeses, add cured meats, or even incorporate fruits to tailor it to your exact taste.
- The Ultimate Crowd-Pleaser: It’s a feast for the eyes and the palate, offering a little something for every guest to enjoy.
Preparation Time and Servings
⏱️ Preparation Time: 25 minutes
🔥 Cooking Time: 0 minutes
⏰ Total Time: 25 minutes
💡 Difficulty: Easy
👥 Servings: 12-15 people
A showstopping appetizer ready in under 30 minutes!
Ingredients List
- 8 oz (225g) Sharp Cheddar cheese, cut into 3/4-inch cubes
- 8 oz (225g) Colby Jack cheese, cut into 3/4-inch cubes
- 8 oz (225g) Pepper Jack cheese, cut into 3/4-inch cubes
- 1 pint (about 2 cups) cherry or grape tomatoes
- 1 cup pitted olives, a mix of green and black
- Fresh rosemary sprigs, for garnish
- 1 slice of provolone or yellow cheddar cheese, for the star topper
Step-by-Step Instructions
- Prepare Your Ingredients: Gently wash and pat the cherry tomatoes completely dry. Cut all your cheese blocks into uniform 3/4-inch cubes for a polished look. Use a small star-shaped cookie cutter to cut the star from your provolone or cheddar slice.
- Secure the Star: Attach the cheese star to the top of your styrofoam cone using a single toothpick. This sets the stage for your tree.
- Begin Assembling: Starting from the bottom of the cone, insert toothpicks into the foam at a slight upward angle. This helps the ingredients stay secure.
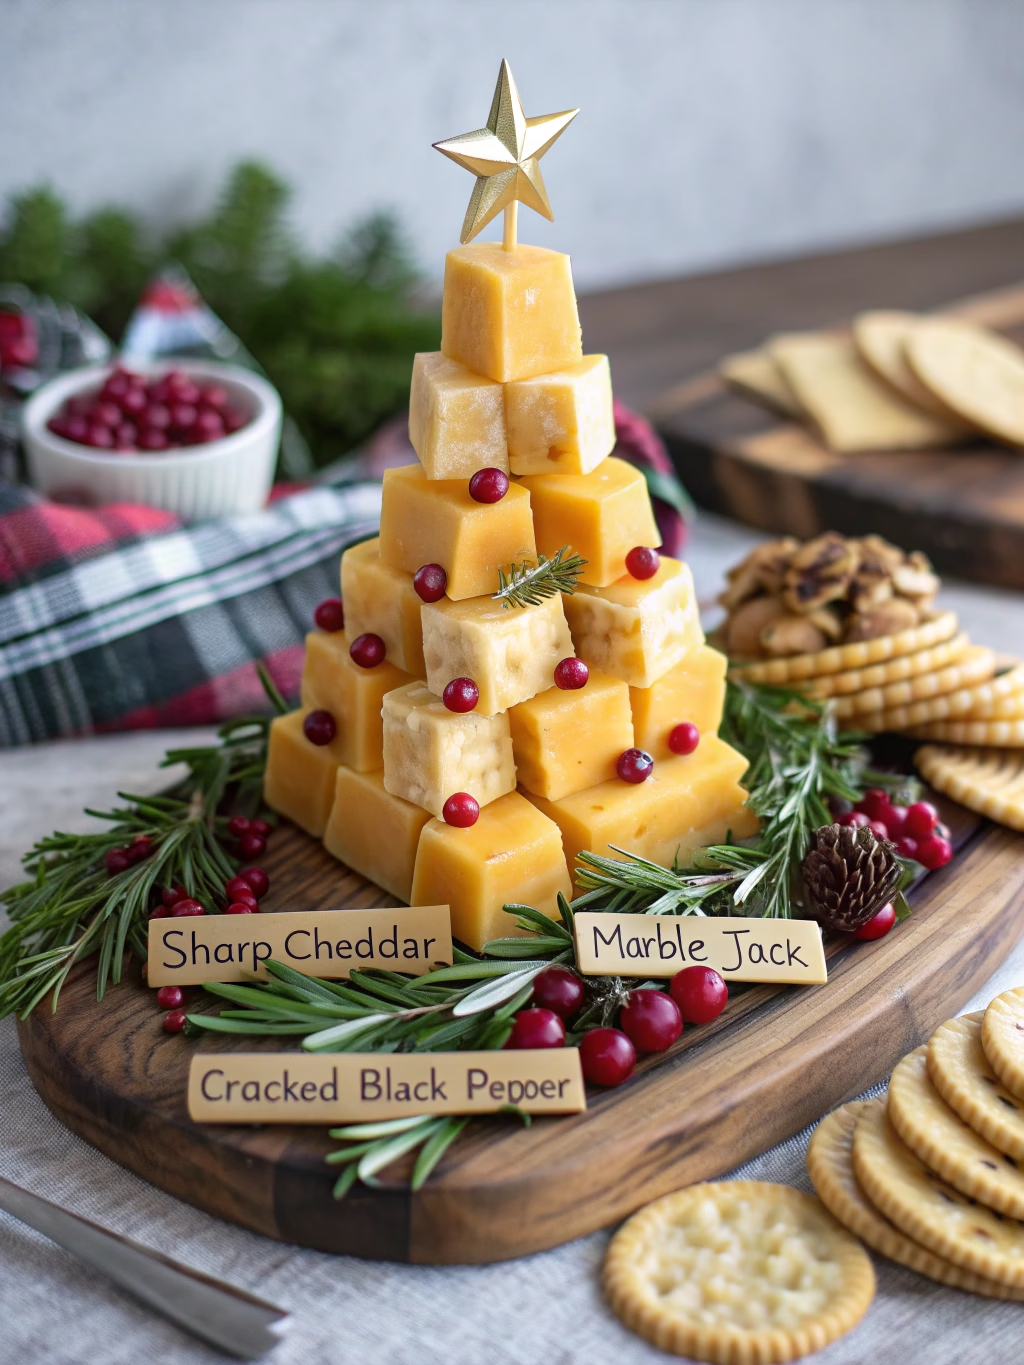
- Build Your Tree: Thread a cheese cube, a cherry tomato, or an olive onto each toothpick. Alternate colors and ingredients randomly to create a festive, varied appearance. Continue working your way up the cone, placing the items closely together to hide the foam base.
- Add the Greenery: Once the cone is covered, gently tuck small sprigs of fresh rosemary into the gaps between the cheese and tomatoes. This fills it out, adds a wonderful aroma, and truly gives it the look of a Christmas tree.
- Serve and Admire: Place your completed Cheese cube Christmas tree on a decorative platter or board. Surround it with crackers and let it be the star of your holiday spread.
Pro Tips from a Professional Chef
- A Symphony of Cheeses: Don’t be afraid to mix it up! For the best flavor experience, choose cheeses with different profiles-one sharp (like aged cheddar), one creamy (like havarti), and one with a little kick (like pepper jack). The color variety also makes the tree more beautiful.
- Temperature is Key: For the best, most robust flavor, allow the finished tree to sit at room temperature for about 20-30 minutes before your guests arrive. Cold mutes the flavor of cheese.
- Create a Sturdy Base: To prevent your tree from tipping, you can secure the styrofoam cone to your serving platter with a bit of double-sided tape or a small dollop of cream cheese on the bottom.
Special Equipment
- Styrofoam Cone (12-15 inches): This is the secret to a perfectly shaped, sturdy tree. You can find these at most craft stores. It provides the ideal framework for your edible creation.
- Festive Toothpicks: While plain toothpicks work fine, using ones with a frill or a festive color on the end adds an extra touch of holiday magic to your presentation.
Variations & Substitutions for Your Cheese cube Christmas tree
- The Antipasto Tree: Weave in folded salami, prosciutto rosettes, and marinated artichoke hearts for a delicious Italian-inspired twist on this festive Holiday appetizer.
- Sweet & Savory Version: Swap some of the tomatoes and olives for seedless grapes and small cubes of fresh fig. This adds a lovely sweetness that pairs wonderfully with the savory cheeses.
- Caprese Christmas Tree: Use fresh mozzarella balls (bocconcini), cherry tomatoes, and large fresh basil leaves. Just before serving, drizzle the entire tree with a rich balsamic glaze for a truly decadent treat. A Cheese cube Christmas tree can be so versatile!
Serving Suggestions
This magnificent Cheese cube Christmas tree is a centerpiece that pairs beautifully with an array of accompaniments. Offer a basket of assorted crackers, from buttery rounds to seeded multigrain crisps. A small bowl of fig jam or spicy mustard adds a wonderful contrast. For a beverage pairing, a crisp Sauvignon Blanc or a festive sparkling prosecco cuts through the richness of the cheese perfectly.
Storage & Make-Ahead Tips
Proper planning makes holiday hosting a breeze! This appetizer is perfect for prepping ahead.
- To Store: Once assembled, cover the tree as gently and airtight as possible with plastic wrap. Store in the refrigerator for up to 24 hours. The rosemary will help keep the cheese from drying out too much.
- To Reheat: This dish is best served chilled or at room temperature. No reheating is required.
- Make-Ahead: The true time-saver! You can cube all your cheeses and wash your garnishes up to two days in advance. Store them in separate airtight containers in the refrigerator. Assemble the tree on the day of your event for maximum freshness.
Frequently Asked Questions (FAQs)
What are the best cheeses for a cheese cube Christmas tree?
The best choices are semi-hard cheeses that hold their shape well when cubed. A mix of colors and flavors is ideal, so think sharp cheddar (orange), Colby Jack (marbled), Swiss (pale with holes), and Pepper Jack (speckled with peppers).
How do I keep the cheese from drying out?
The key is to assemble the tree as close to serving time as possible. If you must make it a few hours ahead, cover it loosely with plastic wrap. The rosemary sprigs also help create a micro-environment that retains some moisture.
Can I make this without a styrofoam cone?
Absolutely! You can arrange the cheese cubes, tomatoes, and olives on a large cheeseboard or platter, laying them out flat in the shape of a Christmas tree. Use the rosemary sprigs to define the “branches.”
How far in advance can I assemble the full tree?
For the best quality and freshness, I recommend assembling it no more than 24 hours in advance. Keep it well-covered and refrigerated until about 30 minutes before you plan to serve it.
How do I make the star topper stay in place?
Use a single, longer wooden skewer or a sturdy toothpick. Insert it firmly into the top point of the foam cone, leaving about an inch exposed. Then, carefully press your cheese star onto the exposed part of the skewer.
Conclusion
There is a unique joy in creating something with your hands that brings people together. This Cheese cube Christmas tree is more than an appetizer; it’s a beacon of holiday cheer on your table. The sight of it, dotted with festive colors and smelling faintly of fresh rosemary, is a promise of good food and great company. I can’t wait for you to experience the delight of placing this beautiful creation in the center of your celebration.
Contact Us
Contact us at [email protected] and we’ll get back to you as soon as possible.
Share your experience with us
OOLALA
This turned out so awesome they look like they came from a exspensive bakery.
Just a question
So what about the grease from the meat? Should I use the leanest meats or is the grease give more flavor.
What about a meatloaf on top of veggies ? Would that work?
Ingredients list good, directions lacking
There were great details on quantities of ingredients I should use, but the recipe didn’t tell me the cook time. Also, mentioned in the section about “common mistakes” that you need to let it chill enough but doesn’t direct you in the recipe that you need to let it chill. More details would be helpful
Dressing is perfect!
Not a big fan of mayo, loved the Greek yogurt swap. Reduced garlic a bit. Dressing was delish!
Best coffee cake- ever!!
This recipe was not the easiest to follow due to how it was written. It requires a lot of back and forth from instructions to the lists of ingredients but oh, hey, the end result is totally worth the effort! Mouthwatering and delicious plus it’s a pretty presentation.