Condensed Milk Snowball Truffles: Easy & Delicious Recipe
An Ode to Simplicity: The Magic of Condensed Milk
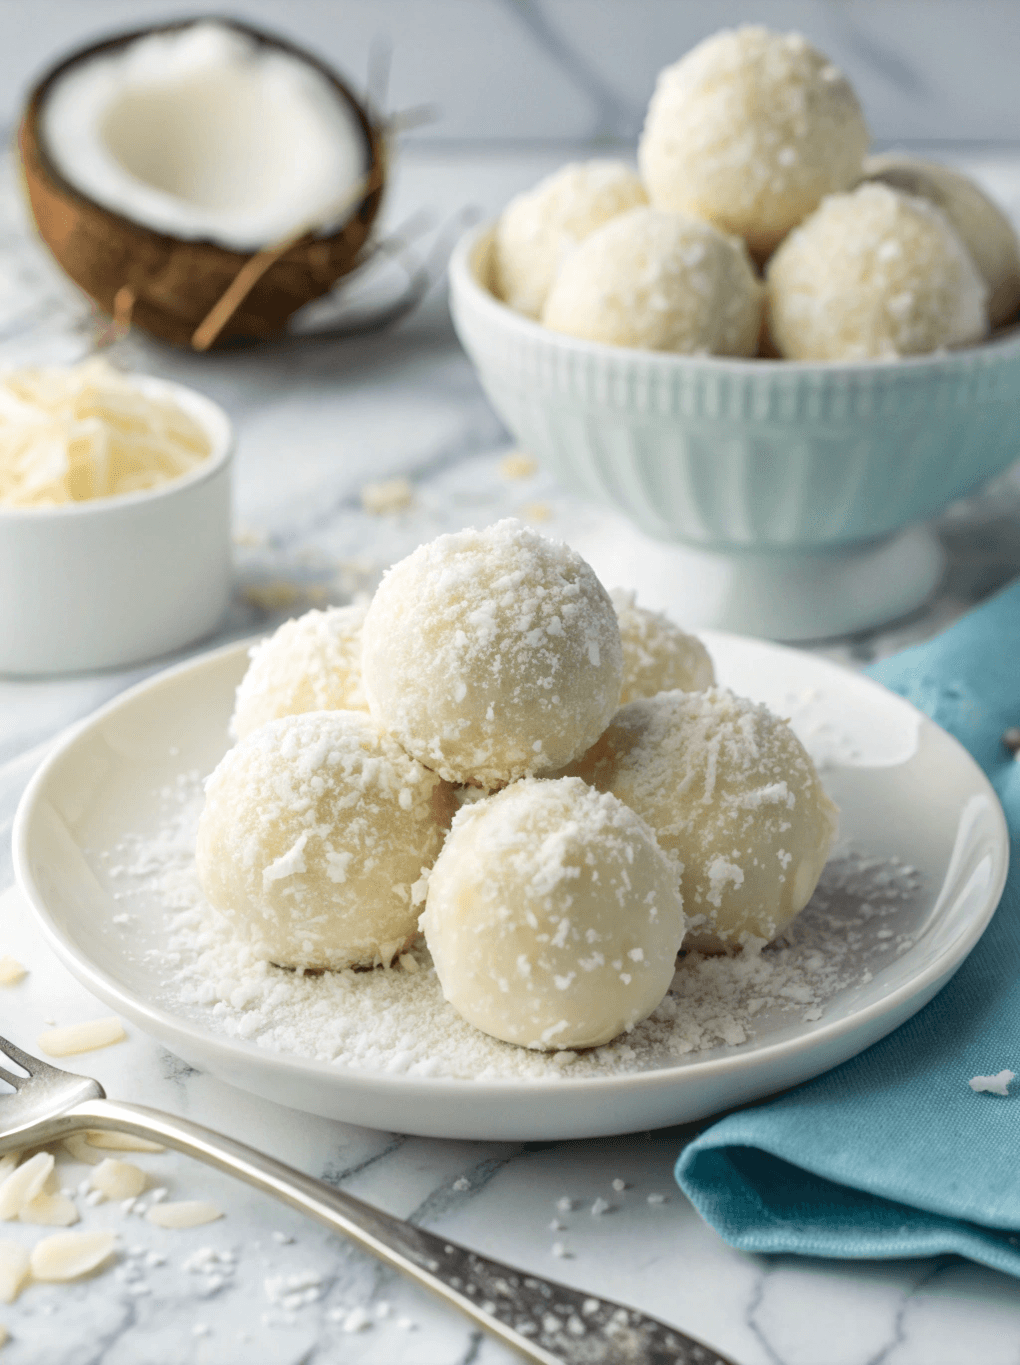
Throughout my culinary journeys, from the bustling patisseries of Paris to the vibrant street markets of Rio de Janeiro, I have found that true elegance often lies in simplicity. I once watched a grandmother in Brazil masterfully stir a pot, transforming just three ingredients into the most divine little confections called Beijinhos. It was a moment of pure culinary magic. That memory is the very soul of this recipe for Condensed Milk Snowball Truffles. These delicate, creamy morsels capture that same spirit of effortless sophistication. They require no special equipment, no complex techniques-just a bit of patience and a love for sweet, simple pleasures. Prepare to discover how a humble can of condensed milk can become the star of your dessert table.

Why You’ll Love This Recipe
- Effortless Elegance: With minimal effort, you can create a dessert that looks stunning and tastes like it came from a high-end confectionery.
- Only 4 Ingredients: You likely have everything you need in your pantry right now to whip up a batch of these incredible truffles.
- Perfectly No-Bake: This is an ideal recipe for warm weather or for when you don’t want to turn on your oven. It’s all done on the stovetop in minutes.
- A Crowd-Pleasing Treat: These little snowballs are universally loved by adults and children alike, making them perfect for parties, holidays, or as a homemade gift.
Preparation Time and Servings
This is a wonderfully quick recipe where the majority of the time is hands-off chilling, making it perfect for a last-minute treat.
⏱️ Preparation Time: 15 minutes
🔥 Cooking Time: 10-12 minutes
⏰ Total Time: 37 minutes (plus 30-60 minutes chilling)
💡 Difficulty: Easy
👥 Servings: 24 truffles
Ingredients List
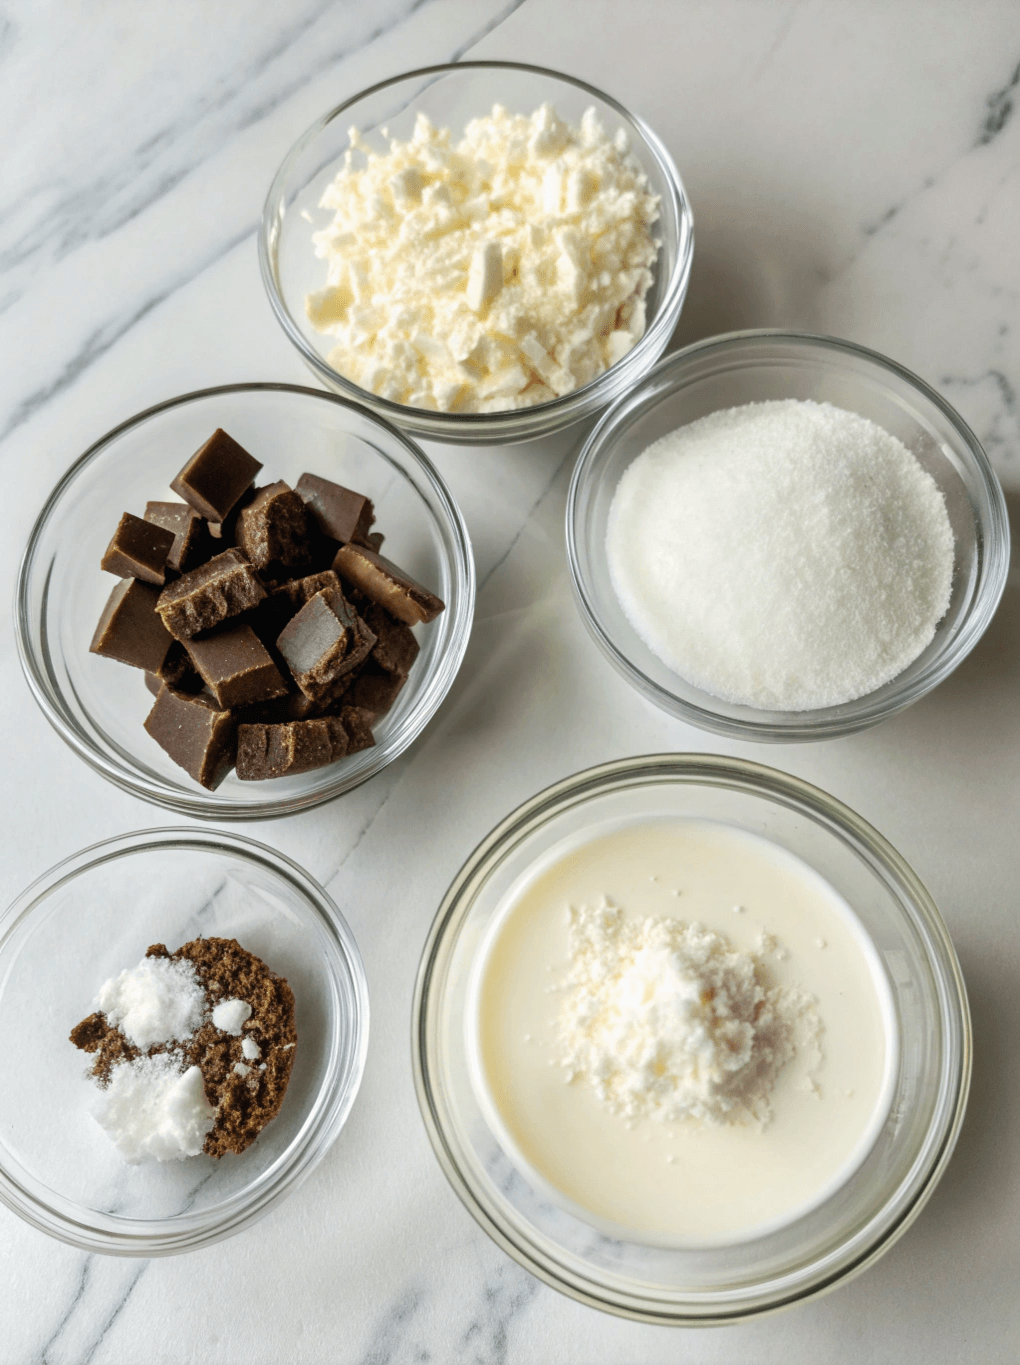
- 1 can (14 ounces / 397g) sweetened condensed milk
- 2 tablespoons (28g) unsalted butter
- 1 teaspoon pure vanilla extract
- 1 ½ cups (150g) unsweetened desiccated coconut, divided
Step-by-Step Instructions
- Combine Ingredients: In a medium-sized, non-stick saucepan, combine the sweetened condensed milk and the unsalted butter.
- Cook the Mixture: Place the saucepan over medium-low heat. Cook, stirring constantly with a silicone spatula, ensuring you scrape the bottom and sides of the pan to prevent scorching.
- Thicken the Fudge: Continue cooking for about 10-12 minutes. The mixture is ready when it has thickened considerably and you can see the bottom of the pan for a few seconds when you drag the spatula through it. It should be pulling away from the sides, almost like a very thick, sticky dough.
- Add Flavor: Remove the pan from the heat. Immediately stir in the vanilla extract and ½ cup of the desiccated coconut. Mix until well combined.
- Chill for Firmness: Spread the mixture onto a greased plate or a shallow dish. This increased surface area helps it cool faster. Allow it to cool at room temperature for about 15 minutes, then cover with plastic wrap and refrigerate for at least 30 minutes, or up to an hour, until it is firm enough to handle.
- Shape the Truffles: Place the remaining 1 cup of desiccated coconut in a shallow bowl. Lightly grease your hands with a little butter or oil to prevent sticking. Scoop about one tablespoon of the chilled mixture and roll it between your palms to form a smooth ball, about 1-inch in diameter.
- Coat and Serve: Immediately roll the ball in the bowl of desiccated coconut until it is evenly and generously coated. Place the finished truffle on a serving plate or in a mini cupcake liner. Repeat with the remaining mixture. Your delightful Condensed Milk Snowball Truffles are now ready to be enjoyed!
Expert Tips for Success
- Quality Matters: Since there are so few ingredients, use a good quality sweetened condensed milk and pure vanilla extract for the best possible flavor.
- Don’t Stop Stirring: The key to a smooth, creamy texture is constant stirring over low heat. If you walk away, the milk sugars can easily burn, resulting in a grainy texture and bitter taste.
- Chill Thoroughly: Do not rush the chilling step. A properly chilled mixture is much easier to roll and results in perfectly round, firm truffles. If it’s still too sticky, just pop it back in the fridge for another 15 minutes.
- Get Creative with Coatings: While classic coconut is wonderful, feel free to roll your Condensed Milk Snowball Truffles in other coatings like finely chopped nuts, cocoa powder, or colorful sprinkles for different occasions.
Common Mistakes to Avoid
Prevent common issues with these simple tips:
- Overcooking the mixture: Cooking the fudge for too long will make it dry and crumbly once cooled, making it difficult to roll. Watch for the visual cue of it pulling away from the sides of the pan.
- Using high heat: Patience is a virtue here. Using heat that is too high will scorch the condensed milk, ruining the flavor and texture. Stick to medium-low.
- Skipping the chilling time: This step is non-negotiable. A warm mixture will be a sticky, unmanageable mess. Proper chilling is crucial for forming perfect spheres.
- Using the wrong coconut: Using sweetened, shredded coconut instead of fine, unsweetened desiccated coconut can make the truffles overly sweet and change the final texture.
Storing Tips for the Recipe
These truffles keep beautifully, making them a fantastic make-ahead dessert.
- Short-term storage: They can be kept in a covered container at room temperature for up to 2 days, provided your kitchen isn’t too warm.
- Refrigeration: For longer freshness, store your truffles in an airtight container in the refrigerator for up to 1 week. Let them sit at room temperature for 10 minutes before serving for the best texture.
- Freezing: Place the truffles on a baking sheet in a single layer and freeze until solid. Transfer to a freezer-safe bag or container. They can be frozen for up to 3 months. Thaw overnight in the refrigerator.
- Make-ahead option: The truffle mixture can be cooked and stored in an airtight container in the fridge for up to 3 days before you roll and coat them.
Frequently Asked Questions (FAQs)
Can I add different flavors to these Condensed Milk Snowball Truffles?
Absolutely! This recipe is a fantastic base for creativity. You can add a tablespoon of unsweetened cocoa powder along with the condensed milk for a chocolate version. A teaspoon of lemon or orange zest stirred in with the vanilla adds a wonderful citrus brightness. You could even add a dash of almond extract or a splash of rum for a more adult-oriented treat.
My mixture seems too oily or greasy. What went wrong?
This can sometimes happen if the mixture is cooked too quickly over high heat, causing the butter to separate. It’s why maintaining a medium-low temperature and stirring constantly is so important. If it happens, you can try to vigorously whisk the mixture off the heat to emulsify it again, but prevention is the best approach for these delicious truffles.
Conclusion
With just a handful of pantry staples and a few minutes of your time, you can create a truly memorable dessert. This Condensed Milk Snowball Truffles recipe is proof that the most impressive treats are often the simplest. They are creamy, sweet, and satisfyingly chewy-a perfect little indulgence for any occasion. Don’t forget to share this coconut truffles recipe with your friends, or better yet, make a batch to share with them!
Contact Us
Contact us at [email protected] and we’ll get back to you as soon as possible.
Share your experience with us
OOLALA
This turned out so awesome they look like they came from a exspensive bakery.
Just a question
So what about the grease from the meat? Should I use the leanest meats or is the grease give more flavor.
What about a meatloaf on top of veggies ? Would that work?
Ingredients list good, directions lacking
There were great details on quantities of ingredients I should use, but the recipe didn’t tell me the cook time. Also, mentioned in the section about “common mistakes” that you need to let it chill enough but doesn’t direct you in the recipe that you need to let it chill. More details would be helpful
Dressing is perfect!
Not a big fan of mayo, loved the Greek yogurt swap. Reduced garlic a bit. Dressing was delish!
Best coffee cake- ever!!
This recipe was not the easiest to follow due to how it was written. It requires a lot of back and forth from instructions to the lists of ingredients but oh, hey, the end result is totally worth the effort! Mouthwatering and delicious plus it’s a pretty presentation.