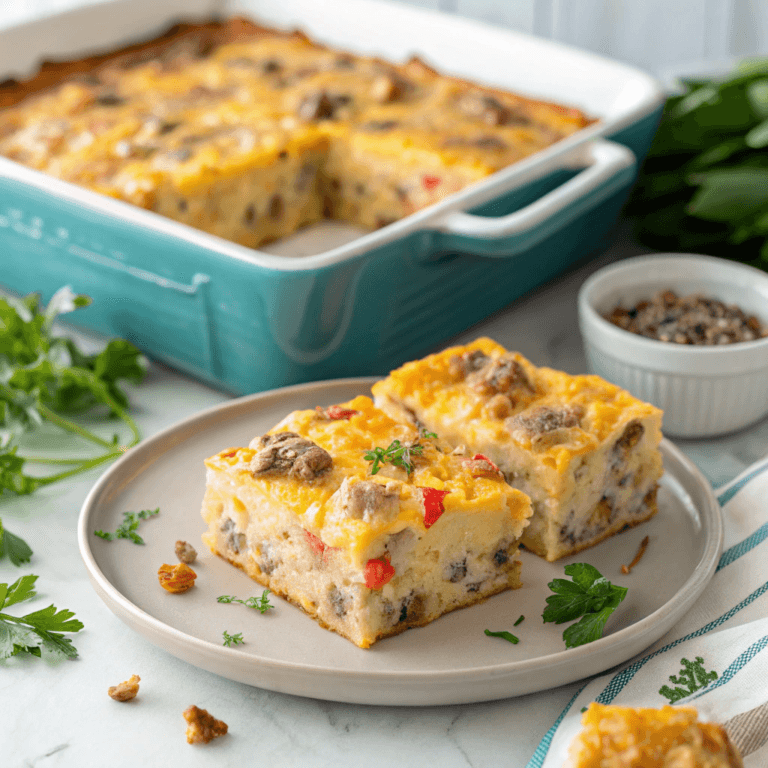
Homemade Breakfast Hot Pockets Easy, Cheesy Morning Win
Introduction
In my years traveling the globe, I’ve learned that a truly magnificent day often begins with a moment of quiet satisfaction. It starts not with a rush, but with a warm, savory bite that sets a tone of culinary delight. I recall a bustling morning market in Lyon, the air thick with the scent of baking bread and melting cheese. That experience inspired me to capture that magic in a handheld, convenient form. Forget the freezer aisle and the bland, uninspired options of yesteryear. We are crafting something far superior: golden, flaky, and bursting with flavor. These Homemade Breakfast Hot Pockets are your ticket to a gourmet morning, combining the convenience you need with the quality you deserve. Let me show you why this recipe will become an indispensable part of your morning ritual.

Why You’ll Love This Recipe
- Unparalleled Flavor & Quality: You control the ingredients, which means fresh sausage, real eggs, and high-quality cheese, creating a taste that store-bought versions simply cannot match.
- Perfectly Customizable: This recipe is a brilliant canvas for your culinary creativity. Swap sausage for bacon, add sautéed vegetables, or experiment with different cheeses to make it uniquely yours.
- Ideal for Meal Prep: Make a batch on Sunday and enjoy a quick, satisfying morning meal all week long. These homemade breakfast hot pockets are a game-changer for busy schedules.
- Family-Friendly Fun: This is a wonderful recipe to get the kids involved in the kitchen. They’ll love helping to fill and seal their very own perfect little pockets of deliciousness.
Preparation Time and Servings
This fantastic sub-one-hour recipe delivers a chef-quality experience without the lengthy kitchen commitment. It’s the perfect fast track to a delicious morning.
⏱️ Preparation Time: 20 minutes
🔥 Cooking Time: 20-25 minutes
⏰ Total Time: 45 minutes
💡 Difficulty: Easy
👥 Servings: 8 pockets
Ingredients List
- 1 lb (450g) ground breakfast sausage
- 6 large eggs, lightly beaten
- 1/2 cup (120ml) milk
- 1 cup (112g) shredded sharp cheddar cheese
- 1/2 cup (55g) shredded mozzarella cheese
- 2 tablespoons chopped chives or green onions
- Salt and freshly ground black pepper, to taste
- 2 sheets (from a 17.3 oz/490g package) frozen puff pastry, thawed
- 1 large egg, beaten with 1 tablespoon of water (for egg wash)
Step-by-Step Instructions
- Preheat and Prepare: Preheat your oven to 400°F (200°C). Line a large baking sheet with parchment paper for easy cleanup.
- Cook the Sausage: In a large skillet over medium-high heat, cook the breakfast sausage, breaking it up with a spoon, until it is browned and cooked through, about 5-7 minutes. Drain off any excess grease.
- Scramble the Eggs: In a medium bowl, whisk together the 6 eggs and milk. Season with a pinch of salt and pepper. Pour the egg mixture into the skillet with the sausage and cook, stirring gently, until the eggs are softly scrambled. Remove from the heat.
- Create the Filling: Let the egg and sausage mixture cool for at least 10 minutes. This is a critical step to prevent the puff pastry from becoming soggy. Once cooled, stir in the cheddar cheese, mozzarella cheese, and chopped chives. Mix until well combined.
- Assemble the Pockets: Gently unfold each sheet of thawed puff pastry on a lightly floured surface. Cut each sheet into 4 equal rectangles. You will have 8 rectangles in total.
- Fill and Seal: Spoon about 1/3 cup of the filling onto one half of each rectangle, leaving a 1/2-inch border around the edges. Brush the borders with the egg wash. Carefully fold the empty half of the dough over the filling to create your homemade breakfast hot pockets. Press the edges firmly with your fingers or a fork to seal completely.
- Bake to Perfection: Place the assembled pockets on the prepared baking sheet. Brush the tops with the remaining egg wash and use a sharp knife to cut a small slit in the top of each pocket to allow steam to escape. Bake for 20-25 minutes, or until the pastries are puffed up and a deep golden brown. Let them cool for a few minutes before serving, as the filling will be extremely hot.
Expert Tips for Perfect Homemade Breakfast Hot Pockets
- Cool the Filling Completely: I cannot stress this enough. A warm filling will melt the butter in your puff pastry before it hits the oven, resulting in a greasy, flat pocket instead of a light, flaky one. Patience is a virtue here.
- Don’t Overfill: It’s tempting to pack in as much cheesy, eggy goodness as possible, but overfilling will cause your pockets to burst open during baking. A 1/2-inch border is your safety zone.
- The Perfect Seal: A tight seal is non-negotiable. Using a fork to crimp the edges not only looks professional but also provides extra insurance against leaks. A good seal ensures all the delicious filling stays inside.
- Vent for Victory: That small slit on top is crucial. It allows steam to escape, preventing the interior from becoming too wet and ensuring the pastry cooks evenly to a crisp, golden perfection.
Common Mistakes to Avoid
Achieve flawless results by steering clear of these simple pitfalls:
- Using a Wet Filling – Ensure your scrambled eggs are not too wet and that you’ve drained all grease from the sausage. Excess moisture will create a soggy bottom.
- Stretching the Dough Too Thin – Handle the puff pastry gently. Stretching it can cause it to tear easily and fail to puff up properly in the oven.
- Skipping the Egg Wash – This simple step is what creates that beautiful, shiny, golden-brown crust. It’s the difference between an amateur and a professional finish.
- Not Sealing the Edges Properly – Any gaps will allow the melting cheese and filling to ooze out onto your baking sheet, creating a mess and leaving you with a less-than-full pocket.
Storing Tips for the Recipe
Freezing is the best way to store your homemade breakfast hot pockets for the long term, making them the ultimate grab-and-go meal.
- Short-term storage: Let cool completely, then store in an airtight container in the refrigerator for up to 3 days.
- Refrigeration: To reheat, place on a baking sheet in a 350°F (175°C) oven or a toaster oven for 10-12 minutes, or until heated through and crispy.
- Freezing: For best results, freeze unbaked. Assemble the pockets but do not apply the egg wash. Place them on a baking sheet in the freezer until solid, then transfer to a freezer-safe bag for up to 3 months. Bake from frozen, adding 10-15 minutes to the cooking time.
- Make-ahead option: The filling can be prepared up to 2 days in advance and stored in an airtight container in the refrigerator, making assembly incredibly quick.
Frequently Asked Questions (FAQs)
Can I make these Homemade Breakfast Hot Pockets vegetarian?
Absolutely! The beauty of this recipe is its versatility. For a delicious vegetarian version, simply omit the sausage and create a filling with sautéed vegetables like mushrooms, spinach, and bell peppers. You could also use a plant-based sausage alternative or scrambled tofu seasoned with nutritional yeast for a cheesy, savory flavor. The process remains exactly the same.
What other types of dough can I use?
While puff pastry provides that signature flaky, buttery crust, you can certainly experiment. Store-bought pizza dough will result in a chewier, more bread-like pocket, similar to a calzone. Crescent roll dough is another quick and easy option that yields a softer, more tender result. If using a different dough, be sure to adjust your baking time and temperature according to the package directions.
Conclusion
You now hold the secret to transforming your morning routine from mundane to magnificent. This recipe for Homemade Breakfast Hot Pockets delivers on every front: incredible flavor, satisfying texture, and ultimate convenience. It’s more than just a recipe; it’s a strategy for winning your day before it even truly begins. Don’t forget to share this incredible Breakfast recipe with your friends and family. I invite you to try it and discover the joy of a truly perfect start.
Contact Us
Contact us at [email protected] and we’ll get back to you as soon as possible.
Share your experience with us
OOLALA
This turned out so awesome they look like they came from a exspensive bakery.
Just a question
So what about the grease from the meat? Should I use the leanest meats or is the grease give more flavor.
What about a meatloaf on top of veggies ? Would that work?
Ingredients list good, directions lacking
There were great details on quantities of ingredients I should use, but the recipe didn’t tell me the cook time. Also, mentioned in the section about “common mistakes” that you need to let it chill enough but doesn’t direct you in the recipe that you need to let it chill. More details would be helpful
Dressing is perfect!
Not a big fan of mayo, loved the Greek yogurt swap. Reduced garlic a bit. Dressing was delish!
Best coffee cake- ever!!
This recipe was not the easiest to follow due to how it was written. It requires a lot of back and forth from instructions to the lists of ingredients but oh, hey, the end result is totally worth the effort! Mouthwatering and delicious plus it’s a pretty presentation.