Honey Baked Ham (Copycat) – Crispy Sugar Holiday Recipe
Introduction
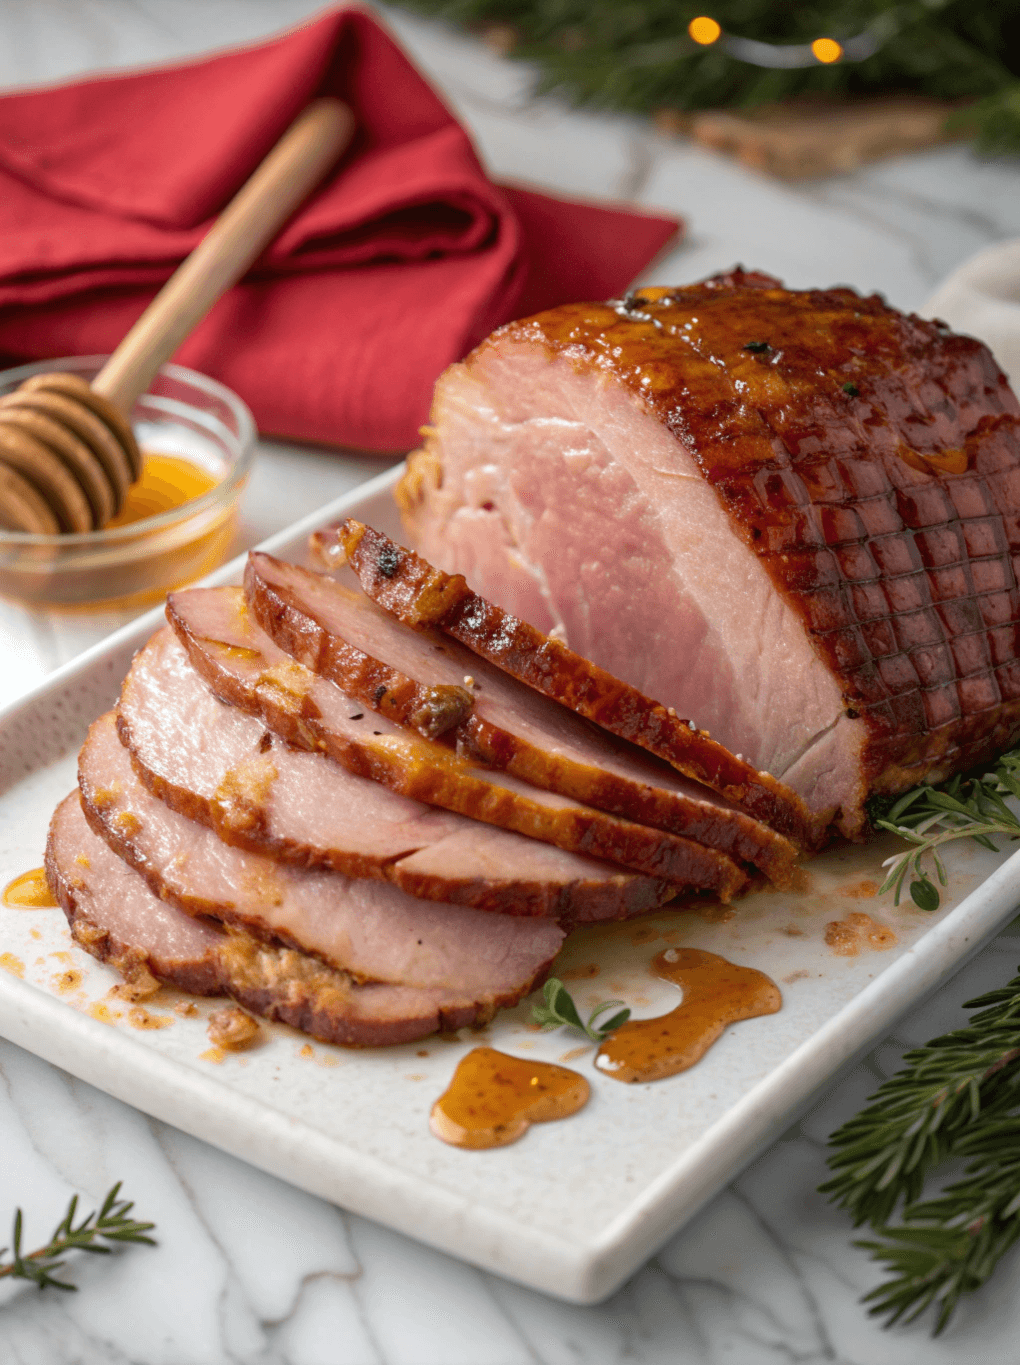
In my years spent in kitchens around the globe, from bustling Paris bistros to serene Kyoto kaiseki restaurants, I’ve learned that some dishes are more than just food; they are an event. They are the silent, magnificent anchors of our most cherished memories. For countless families, that anchor is the iconic, glistening centerpiece of a holiday table: the Honey Baked Ham. I remember the first time I tasted that legendary crackling glaze—a perfect symphony of sweet and savory that shattered under the slightest pressure. I became obsessed. This recipe is the culmination of that obsession, a meticulous re-creation that brings all the magic of that beloved classic into your own kitchen. It’s not just about replicating a flavor; it’s about empowering you to create the centerpiece of your own future memories. Now, allow me to show you precisely why this recipe will become your new holiday tradition.
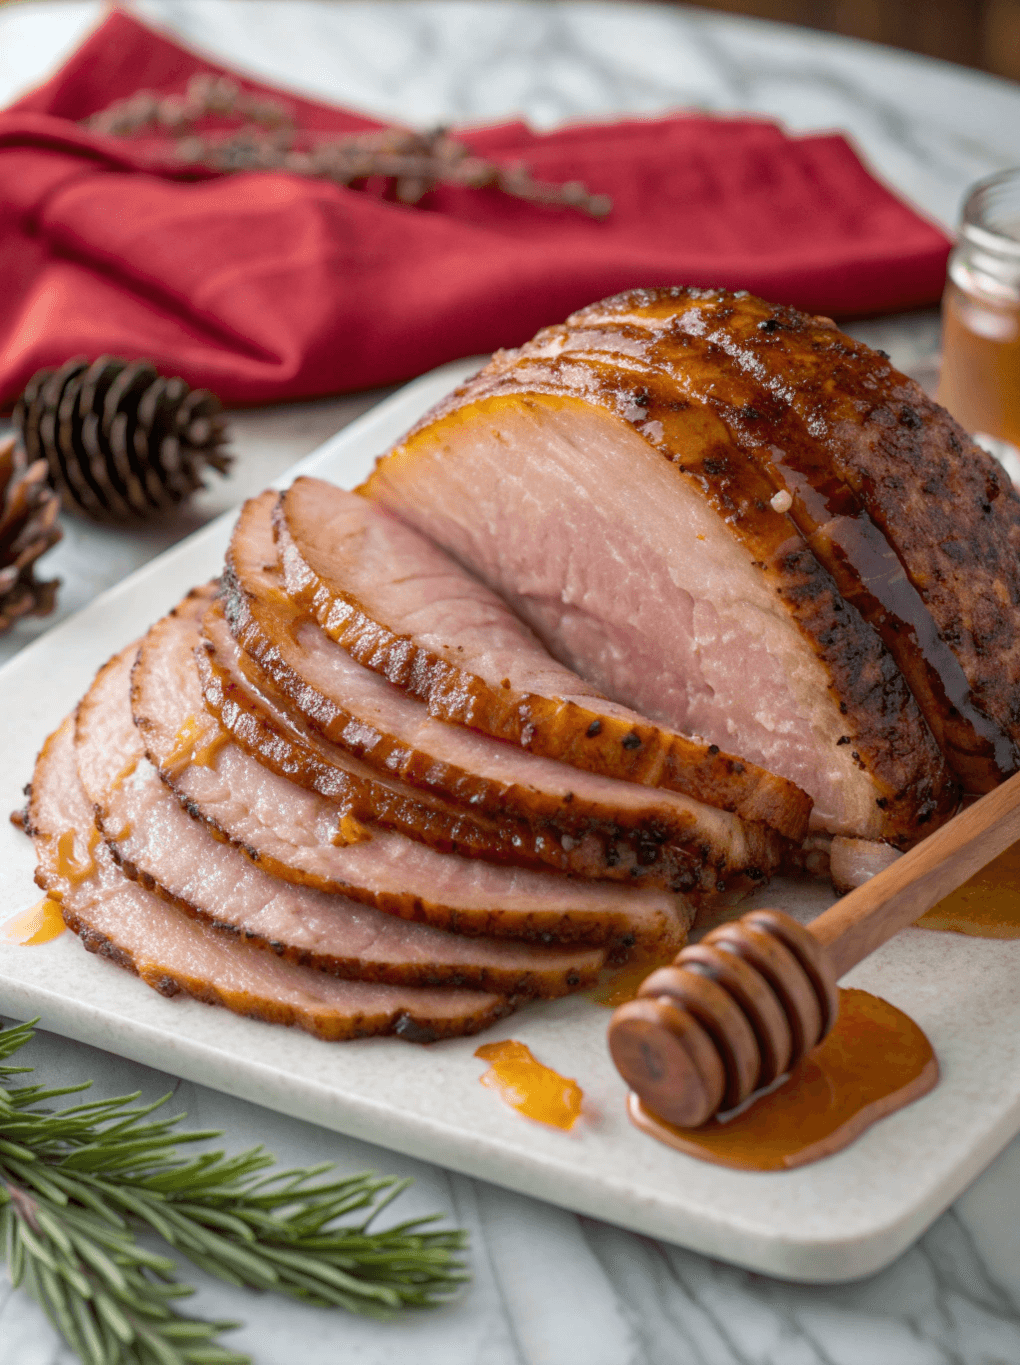
Table of Contents
Why You’ll Love This Recipe
- The Authentic Shatteringly Crisp Glaze: My method uses a specific two-stage sugar application and a kitchen torch to achieve that signature, glass-like crust that is the hallmark of a true luxury ham.
- Impossibly Juicy and Flavorful: We’re not just glazing the outside. This technique ensures the ham is gently heated through, remaining incredibly moist while the spices and sweetness penetrate between every single slice.
- A Show-Stopping Masterpiece: The deep amber color and glistening, crackled surface make this a truly spectacular centerpiece for any Easter, Christmas, or celebratory dinner. It commands attention.
- Gourmet Results, Simplified: While it looks and tastes like it came from a specialty store, the process is surprisingly straightforward, delivering an unparalleled taste experience for a fraction of the cost.
Preparation Time and Servings
⏱️ Preparation Time: 15 minutes
🔥 Cooking Time: 1 hour 45 minutes
⏰ Total Time: 2 hours
💡 Difficulty: Intermediate
👥 Servings: 14-18 people
This gourmet centerpiece comes together in a surprisingly quick timeframe, making your holiday preparation smoother and far less stressful.
Ingredients List
- 1 fully cooked, bone-in, spiral-sliced smoked ham (8 to 10 pounds)
For the Spice Rub & Glaze:
- 1 cup (200g) granulated sugar, divided
- 1/2 cup (110g) packed light brown sugar
- 1/4 cup (60ml) high-quality honey
- 4 tablespoons (56g) unsalted butter, melted
- 1 teaspoon kosher salt
- 1/2 teaspoon onion powder
- 1/2 teaspoon ground cinnamon
- 1/4 teaspoon ground nutmeg
- 1/4 teaspoon ground cloves
- 1/4 teaspoon smoked paprika
Step-by-Step Instructions
- Prepare the Ham: Remove the ham from the refrigerator 1 hour before baking to allow it to come to room temperature. Preheat your oven to 325°F (165°C). Place the ham, cut-side down, in a large roasting pan and tent it loosely with aluminum foil.
- Create the Spice Mixture: In a medium bowl, whisk together 1/2 cup of the granulated sugar, the light brown sugar, kosher salt, onion powder, cinnamon, nutmeg, cloves, and smoked paprika. Set aside.
- First Bake: Bake the ham for 10-12 minutes per pound, or until an instant-read thermometer inserted into the thickest part (avoiding the bone) reads 110°F (43°C). For an 8-pound ham, this will be approximately 80-95 minutes.
- Mix the Wet Glaze: While the ham is baking, take the remaining spice mixture and whisk in the melted butter and honey until a smooth, thick paste forms. This will be your primary basting glaze.
- Apply the Glaze: Remove the ham from the oven and increase the oven temperature to 400°F (205°C). Remove the foil. Brush half of the wet glaze evenly over the entire surface of the ham, gently working it between the slices.
- Final Bake: Return the ham to the oven, uncovered, and bake for another 15-20 minutes. Brush with the remaining glaze halfway through. The ham is ready when the internal temperature reaches 140°F (60°C) and the glaze is bubbly and caramelized.
- Create the Signature Crust: Carefully remove the ham from the oven and place it on a heatproof carving board. Evenly sprinkle the remaining 1/2 cup of granulated sugar over the entire surface. Using a kitchen torch, move the flame continuously over the sugar until it melts, bubbles, and hardens into a crisp, amber-colored shell. This is the crucial step for the perfect copycat **Honey Baked Ham**.
- Rest Before Serving: Let the ham rest for at least 15 minutes before carving. This allows the juices to redistribute, ensuring every slice is perfectly moist and tender.
Expert Tips for Success
- The Torch is Non-Negotiable: For that authentic, shatter-on-your-fork crust, a kitchen torch is essential. A broiler is an imprecise tool that will likely burn the delicate sugars before creating the correct texture. Invest in a torch; you will not regret it.
- Don’t Glaze Too Soon: Applying the wet glaze too early in the baking process will cause the sugars to burn before the ham is properly heated through. Patience is a virtue here.
- Room Temperature is Key: Starting with a ham that has rested outside the fridge ensures even cooking from edge to center. A cold ham in a hot oven is a recipe for a dry exterior and a cool interior.
- Choose Your Ham Wisely: The foundation of this magnificent dish is the ham itself. Select a high-quality, bone-in, spiral-cut smoked ham. The bone imparts incredible flavor and moisture that a boneless ham simply cannot replicate.
Common Mistakes to Avoid
Prevent these common pitfalls to ensure your ham is flawless:
- Overcooking the ham – Remember, it’s already cooked. You are simply reheating it. Using a meat thermometer is the only way to guarantee a juicy, not dry, final product.
- Burning the sugar glaze – When using the torch, keep the flame moving constantly. Lingering in one spot will turn the sugar from caramelized and delicious to burnt and bitter in seconds.
- Skipping the resting time – Carving a hot ham immediately will result in a flood of juices onto your cutting board instead of in the meat. That 15-minute rest is critical for a succulent result.
- Not getting glaze between the slices – The beauty of a spiral-cut ham is the surface area. Take a moment to gently separate the slices and brush the glaze in between for maximum flavor penetration.
Storing Tips for the Recipe
Enjoying the fruits of your labor for days to come is part of the joy.
- Short-term storage: There is no room temperature storage for cooked ham. It must be refrigerated promptly.
- Refrigeration: Wrap leftovers tightly in foil or place in an airtight container. The **Honey Baked Ham** will keep beautifully in the refrigerator for up to 5 days. It’s fantastic cold in sandwiches or gently reheated.
- Freezing: For longer storage, slice the ham off the bone. Wrap individual portions or slices in plastic wrap, then place in a freezer-safe bag or container. It will keep for up to 2 months. Thaw overnight in the refrigerator.
- Make-ahead option: The dry spice rub can be mixed and stored in an airtight container at room temperature for up to 3 months, saving you a step on a busy holiday.
Frequently Asked Questions (FAQs) about Honey Baked Ham
Can I make this recipe without a kitchen torch?
While I must stress that a torch provides the superior and authentic crust, you can attempt to use your oven’s broiler. Position the oven rack so the top of the ham is 6-8 inches from the broiler element. After sprinkling on the final layer of sugar, broil for 1-3 minutes, watching it like a hawk. Do not walk away, as it can burn in an instant. The result will be less of a “shatter” and more of a simple caramelization, but still delicious.
What is the best way to carve a spiral-sliced ham?
The beauty of a spiral ham is that much of the work is done for you. To serve, simply run your carving knife along the bone from top to bottom. The pre-cut slices will then fall away cleanly, ready to be plated. This simple technique ensures you get beautiful, intact slices every time you serve this delicious **Honey Baked Ham**.
Conclusion
Recreating a culinary icon like the **Honey Baked Ham** at home is more than just cooking; it’s an act of pure joy. This recipe demystifies the process, putting the power to create that unforgettable, crackling-sweet crust and juicy interior right into your hands. This is the recipe that will earn you applause and become a treasured part of your celebrations for years to come. Don’t forget to share this honey-glazed masterpiece with your friends and family!
Contact Us
Contact us at [email protected] and we’ll get back to you as soon as possible.
Share your experience with us
OOLALA
This turned out so awesome they look like they came from a exspensive bakery.
Just a question
So what about the grease from the meat? Should I use the leanest meats or is the grease give more flavor.
What about a meatloaf on top of veggies ? Would that work?
Ingredients list good, directions lacking
There were great details on quantities of ingredients I should use, but the recipe didn’t tell me the cook time. Also, mentioned in the section about “common mistakes” that you need to let it chill enough but doesn’t direct you in the recipe that you need to let it chill. More details would be helpful
Dressing is perfect!
Not a big fan of mayo, loved the Greek yogurt swap. Reduced garlic a bit. Dressing was delish!
Best coffee cake- ever!!
This recipe was not the easiest to follow due to how it was written. It requires a lot of back and forth from instructions to the lists of ingredients but oh, hey, the end result is totally worth the effort! Mouthwatering and delicious plus it’s a pretty presentation.