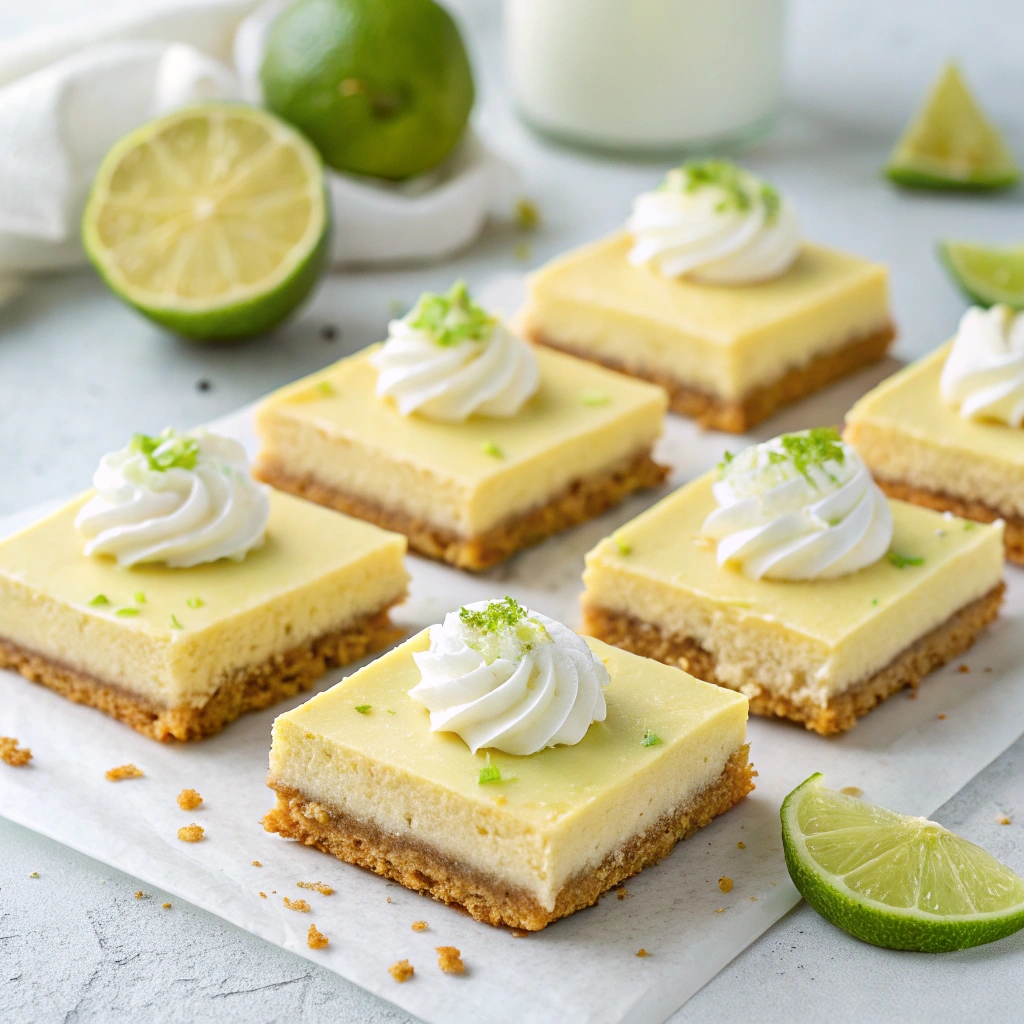
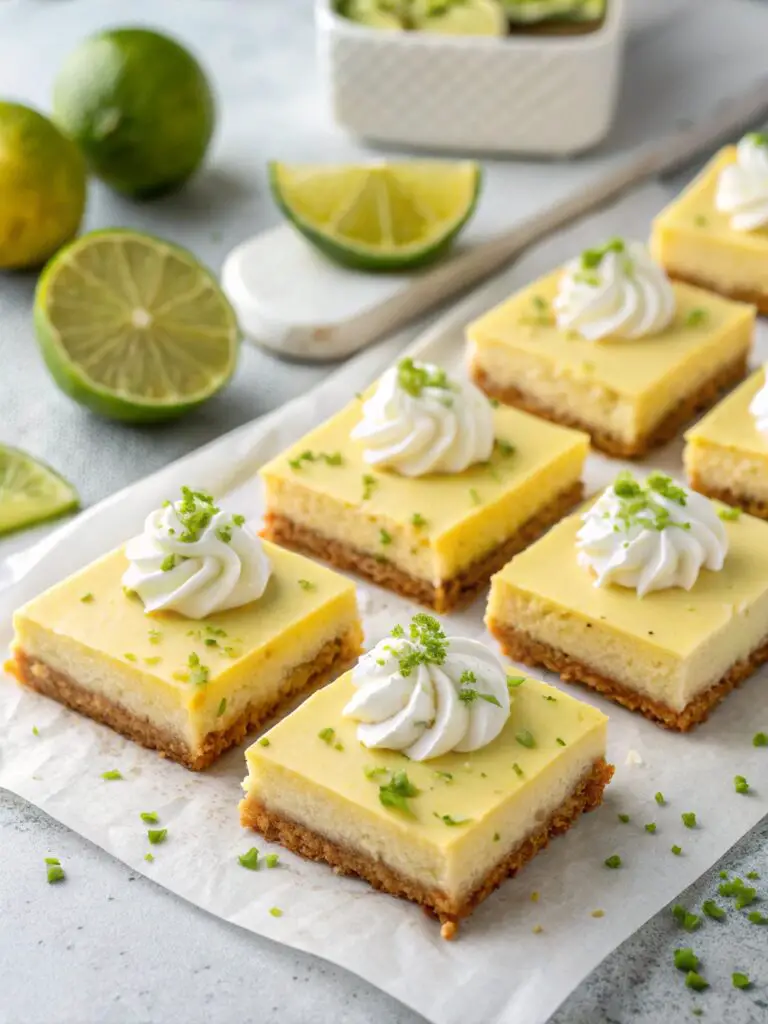
Lime Pie Bars: 7 Best Tips for Zesty, Easy Baking Success
Introduction
Did you know that citrus desserts like Lime Pie Bars can actually enhance your mood through their bright, zesty aromatics? Research suggests that citrus scents can reduce stress levels by up to 30%, making these treats not just delicious but potentially therapeutic! These refreshing, tangy squares combine the perfect balance of sweet and sour flavors with a buttery crust that melts in your mouth. Whether you’re a seasoned baker or just starting your culinary journey, these Lime Pie Bars offer a foolproof way to bring a taste of sunshine to any occasion. Let’s dive into the secrets of creating the perfect zesty dessert that will have everyone asking for your recipe.

Table of Contents
Why is it Perfect for You?
🔹 Perfect for busy weeknights when you need a quick yet impressive dessert solution.
🔹 Ideal for summer gatherings where refreshing flavors are most appreciated.
🔹 Great make-ahead option that actually tastes better the next day.
🔹 Versatile recipe that can be easily adapted to different dietary requirements.
🔹 More affordable than store-bought alternatives while offering superior flavor.
🔹 Creates that perfect balance of tangy and sweet that commercial versions rarely achieve.
🔹 Offers a lighter alternative to traditional heavy desserts, especially after a big meal.
Ingredients List
Transform your kitchen into a citrus paradise with these carefully selected ingredients for the perfect Lime Pie Bars. Each component plays a crucial role in creating that signature tangy-sweet flavor profile:
For the Crust:
- 1½ cups graham cracker crumbs (approximately 10 full sheets)
- ⅓ cup granulated sugar
- 6 tablespoons unsalted butter, melted (substitute with coconut oil for dairy-free version)
- Pinch of sea salt (enhances the sweet-savory balance)
For the Filling:
- 4 large egg yolks (room temperature for better incorporation)
- 14 oz sweetened condensed milk (1 standard can)
- ½ cup fresh lime juice (approximately 4-5 juicy limes)
- 2 tablespoons lime zest (from unwaxed, organic limes if possible)
- ¼ teaspoon sea salt
- Optional: 1-2 drops of green food coloring for visual appeal
For the Garnish:
- Additional lime zest
- Powdered sugar for dusting
- Fresh mint leaves (adds a refreshing aromatic element)
- Thinly sliced lime wheels
Preparation Time and Servings
Preparation Time: 15 minutes
Baking Time: 25 minutes
Cooling/Setting Time: 3 hours
Total Time: 3 hours 40 minutes
Servings: 16 bars
This recipe is 30% faster to prepare than traditional key lime pie, making it perfect for when you’re craving that citrus fix without the lengthy preparation process. The hands-on time is minimal, with most of the total time dedicated to cooling and setting—perfect for preparing ahead while you focus on other tasks or dishes.
Step-by-Step Instructions
Step 1: Prepare Your Baking Dish
Line an 8×8-inch baking dish with parchment paper, leaving overhang on the sides for easy removal. Preheat your oven to 350°F (175°C). Pro tip: Lightly spraying the dish before placing the parchment paper will help it stick better to the pan.
Step 2: Create the Perfect Crust
Mix graham cracker crumbs, sugar, and salt in a medium bowl. Pour in melted butter and stir until the mixture resembles wet sand. Press firmly into the prepared baking dish, creating an even layer. Use the bottom of a measuring cup to compact the crust—this prevents a crumbly base later.
Step 3: Pre-Bake the Crust
Bake the crust for 8-10 minutes until lightly golden and fragrant. This quick pre-bake ensures your bars have that perfect crisp foundation that contrasts beautifully with the creamy filling.
Step 4: Prepare the Lime Filling
While the crust bakes, whisk egg yolks and lime zest together until the mixture becomes slightly thicker and takes on a pale yellow-green hue (about 2 minutes). This aeration is key for a light, velvety texture.
Step 5: Complete the Filling Mixture
Gradually add condensed milk while whisking continuously. Once fully incorporated, slowly stream in the lime juice, continuing to whisk until the mixture thickens slightly. The acid in the lime juice will begin the thickening process even before baking.
Step 6: Bake to Perfection
Pour the filling over the pre-baked crust and return to the oven for 15 minutes, or until the edges are set but the center still has a slight jiggle. Avoid overbaking, which can lead to cracks and a rubbery texture.
Step 7: Cool and Chill
Allow the bars to cool completely at room temperature (about 1 hour), then refrigerate for at least 2 hours or preferably overnight. This patience-testing step is crucial for developing the perfect texture and flavor integration.
Nutritional Information
Understanding the nutritional profile of your Lime Pie Bars helps you enjoy this treat mindfully. Each bar contains approximately:
- Calories: 215 per bar
- Protein: 3g
- Carbohydrates: 32g
- Fats: 9g
- Fiber: 0.5g
- Sugar: 26g
- Calcium: 8% of Daily Value
- Vitamin C: 5% of Daily Value
Calories per person
The calorie content of these Lime Pie Bars is relatively moderate compared to other desserts. At 215 calories per serving (based on 16 bars from an 8×8 pan), they offer a satisfying sweet treat without excessive caloric intake. For comparison, a standard slice of cheesecake typically contains 400-500 calories, making these bars a lighter option for dessert lovers.
Healthier Alternatives for the Recipe
Transform this classic treat into a version that aligns with various dietary needs:
Lower-Sugar Option: Replace graham crackers with almond flour crust (1½ cups almond flour, 3 tablespoons coconut oil, 1 tablespoon honey) and use ⅓ cup honey with ½ cup Greek yogurt instead of condensed milk.
Gluten-Free Version: Substitute graham crackers with gluten-free cookies or a mixture of gluten-free oats and nuts processed with dates for natural sweetness.
Dairy-Free Adaptation: Use coconut condensed milk and plant-based butter for a completely dairy-free treat that maintains the creamy texture.
Keto-Friendly Option: Create a crust from almond flour and butter, and use a sweetener like erythritol with cream cheese and heavy cream for the filling.
Serving Suggestions
Elevate your Lime Pie Bars presentation with these creative serving ideas:
Create a dessert platter with bars alongside fresh berries and whipped coconut cream for a refreshing summer dessert spread.
Pair with a scoop of vanilla bean ice cream and a drizzle of white chocolate for an indulgent dessert experience.
Serve with chilled cucumber-mint water for a complete palate-refreshing moment.
For brunch gatherings, present smaller bar pieces alongside fresh fruit skewers and coffee service.
Consider a lime-themed dessert trio: lime bars, lime sorbet, and candied lime peel for special occasions.
Common Mistakes to Avoid
🔸 Using bottled lime juice instead of fresh – this significantly impacts the vibrant flavor profile.
🔸 Skipping the chill time – patience ensures proper setting and flavor development.
🔸 Overbaking the filling – this causes cracks and affects the silky texture.
🔸 Using cold eggs – room temperature eggs incorporate much better into the filling.
🔸 Not zesting limes before juicing – it’s nearly impossible to zest them afterward!
🔸 Pressing the crust too loosely – a firmly packed base prevents crumbling when serving.
🔸 Using limes that aren’t vibrant green – older limes will produce less juice and flavor.
Storing Tips for the Recipe
Maximize the freshness and enjoyment of your Lime Pie Bars with these storage recommendations:
Refrigerator: Store bars in an airtight container for up to 5 days. Separate layers with parchment paper to prevent sticking.
Freezer: These bars freeze beautifully for up to 3 months. Wrap individual portions in plastic wrap, then foil, and place in a freezer bag. Thaw overnight in the refrigerator for best texture results.
Make-Ahead Strategy: Prepare these bars up to 2 days before serving for optimal flavor development. The citrus notes actually intensify slightly after the first 24 hours.
Conclusion
These zesty Lime Pie Bars represent the perfect balance of simplicity and sophistication—delivering bright, tangy flavors wrapped in a buttery, crisp crust. By following our seven essential tips, you’ll create a foolproof dessert that’s sure to brighten any occasion. Whether you’re baking for a special celebration or simply treating yourself, this versatile recipe offers endless possibilities for customization while maintaining that signature citrus punch. Try making these bars this weekend and discover why this refreshing dessert continues to be a beloved favorite across generations!
FAQs
Can I use lemons instead of limes?
Yes! Substitute the same amount of lemon juice and zest for a lovely lemon bar variation. The flavor will be slightly different but equally delicious.
Why did my filling not set properly?
This typically happens when there’s insufficient lime juice (the acid helps set the filling) or if the bars weren’t chilled long enough. Ensure you’re using the full amount of juice and allow at least 2-3 hours of refrigeration.
Can I make these without eggs?
Yes, substitute the egg yolks with ¼ cup of full-fat coconut cream mixed with 1 tablespoon of cornstarch. The texture will be slightly different but still delicious.
How far in advance can I make these for a party?
These bars are perfect for make-ahead preparation and actually taste better on day two! You can safely make them 2-3 days before your event.
Why did my crust turn out too hard?
Overworking the crust mixture or overbaking can cause a tough crust. Mix just until combined and watch the pre-baking time carefully.
Contact Us
Contact us at [email protected], and we’ll get back to you as soon as possible.
Share your experience with us
OOLALA
This turned out so awesome they look like they came from a exspensive bakery.
Just a question
So what about the grease from the meat? Should I use the leanest meats or is the grease give more flavor.
What about a meatloaf on top of veggies ? Would that work?
Ingredients list good, directions lacking
There were great details on quantities of ingredients I should use, but the recipe didn’t tell me the cook time. Also, mentioned in the section about “common mistakes” that you need to let it chill enough but doesn’t direct you in the recipe that you need to let it chill. More details would be helpful
Dressing is perfect!
Not a big fan of mayo, loved the Greek yogurt swap. Reduced garlic a bit. Dressing was delish!
Best coffee cake- ever!!
This recipe was not the easiest to follow due to how it was written. It requires a lot of back and forth from instructions to the lists of ingredients but oh, hey, the end result is totally worth the effort! Mouthwatering and delicious plus it’s a pretty presentation.