Nectarine Lemon Bars 7 Steps to a Tangy Summer Treat
Introduction
Did you know that citrus-based desserts are searched over 250,000 times monthly during summer months? There’s something irresistibly refreshing about the combination of tangy citrus and sweet fruit that perfectly counterbalances the summer heat. Nectarine Lemon Bars represent the ideal marriage of zesty lemon and juicy stone fruit, creating a dessert that’s both nostalgic and innovative. This refreshing summer treat transforms the classic lemon bar into something extraordinary with the addition of ripe nectarines, offering a delightful twist that will have everyone asking for your secret recipe. Whether you’re hosting a backyard gathering or simply treating yourself, these tangy dessert bars deliver incredible flavor with relatively simple preparation.
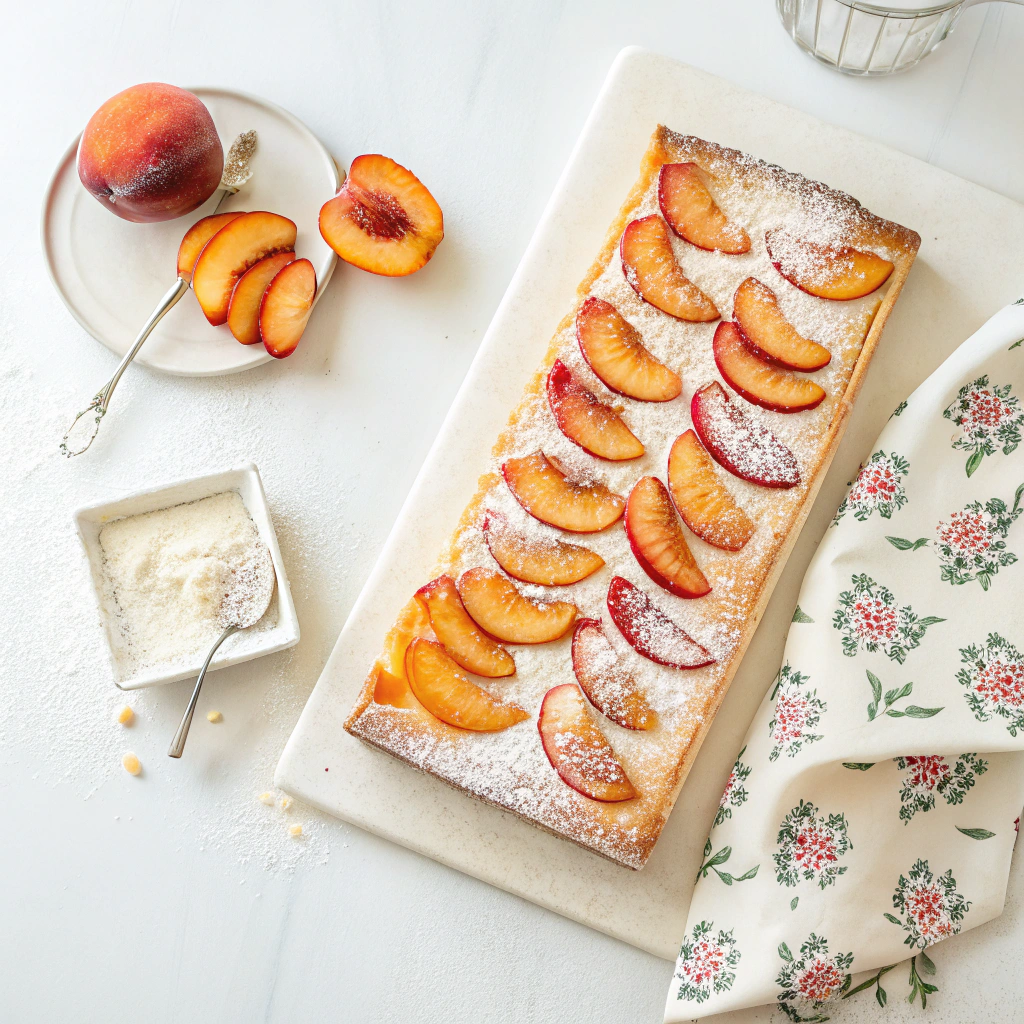
Table of Contents
Why is it Perfect for You?
🔹 Versatile enough for casual family desserts or elegant dinner party finales
🔹 Balances sweet and tangy flavors for a palate-pleasing experience
🔹 Makes use of seasonal summer nectarines at their peak ripeness
🔹 Requires minimal baking expertise while delivering professional-looking results
🔹 Creates a memorable dessert that stands out from typical summer treats
🔹 Stores well for several days, making it perfect for advance preparation
Ingredients List
For these Nectarine Lemon Bars, you’ll need ingredients that work harmoniously to create layers of buttery crust and vibrant filling. The velvety nectarines add a juicy sweetness that perfectly complements the zippy lemon custard. Here’s what you’ll need:
For the Shortbread Crust:
- 1 cup all-purpose flour (substitute gluten-free flour blend if needed)
- 1/4 cup granulated sugar
- 1/4 teaspoon salt
- 1/2 cup cold unsalted butter, cubed
- 1 teaspoon vanilla extract
For the Lemon-Nectarine Filling:
- 3 ripe but firm nectarines, thinly sliced
- 4 large eggs, room temperature
- 1 1/2 cups granulated sugar
- 3/4 cup fresh lemon juice (approximately 4-5 lemons)
- 2 tablespoons lemon zest
- 1/3 cup all-purpose flour
- 1/4 teaspoon salt
- Powdered sugar for dusting
Preparation Time and Servings
Preparation Time: 30 minutes
Baking Time: 40 minutes
Cooling Time: 2 hours
Total Time: 3 hours 10 minutes
Servings: 16 bars
This recipe requires less active time than many summer desserts, with most of the time being hands-off baking and cooling. The 30-minute prep time is 25% faster than traditional fruit pies or tarts, making these zesty dessert bars an efficient choice for busy home bakers.
Step-by-Step Instructions
Step 1: Prepare the Crust
Preheat your oven to 350°F (175°C) and line a 9×13-inch baking pan with parchment paper, leaving an overhang on the sides for easy removal. In a food processor, pulse together flour, sugar, and salt. Add butter and vanilla, then pulse until the mixture resembles coarse crumbs. Press firmly into the prepared pan, creating an even layer. Bake for 15-18 minutes until lightly golden.
Step 2: Prepare the Nectarines
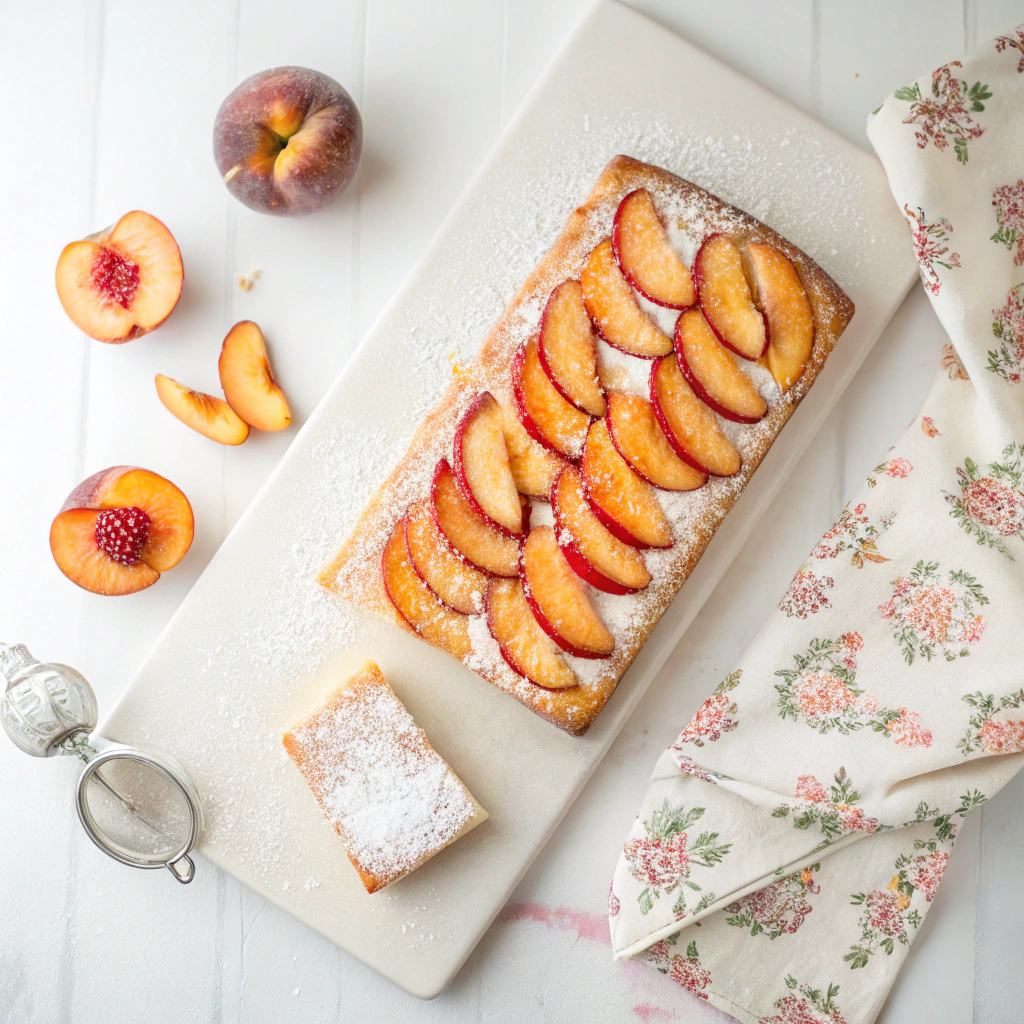
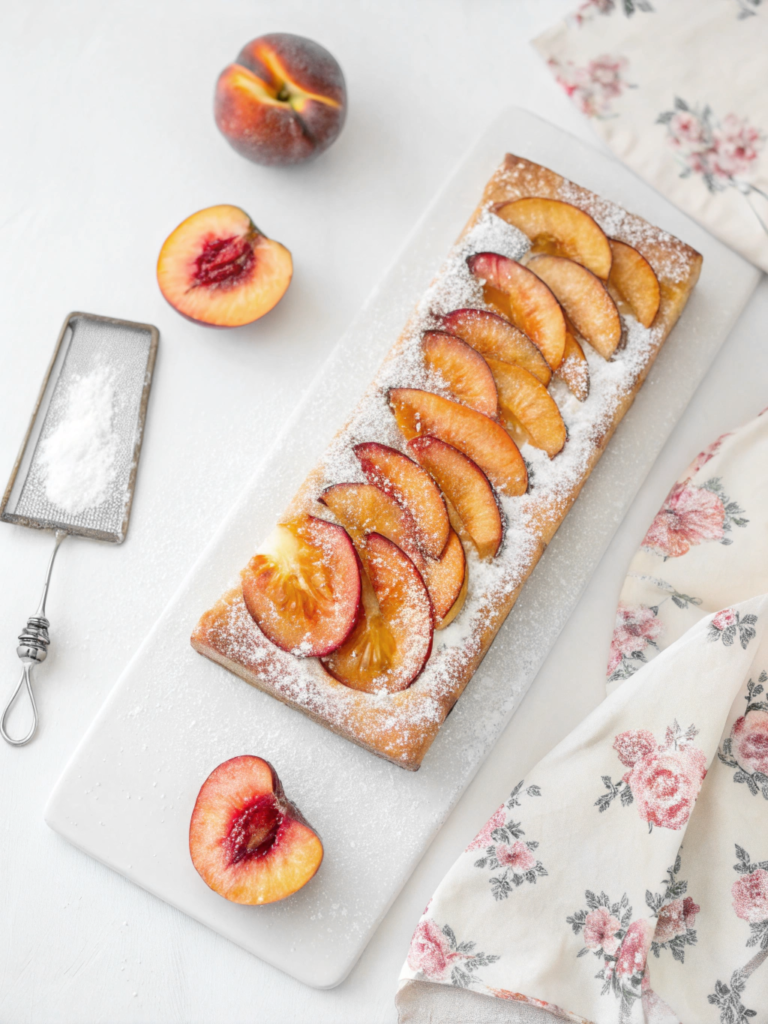
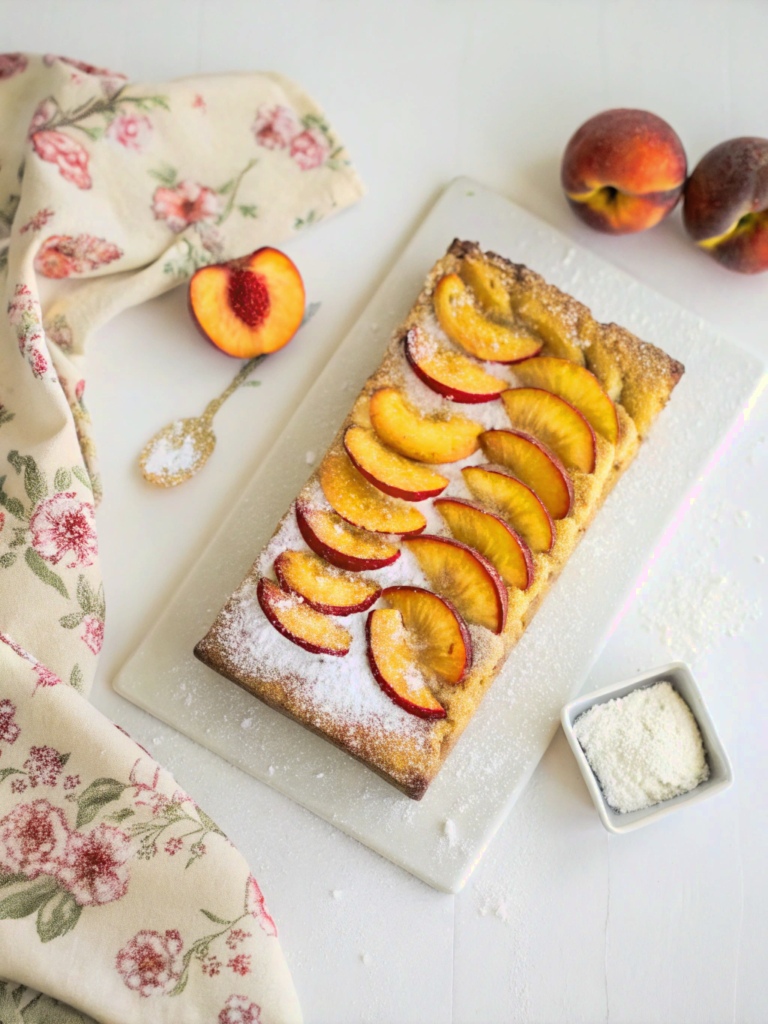
While the crust bakes, wash and slice your nectarines into thin, even pieces (about 1/8-inch thick). For maximum flavor, choose nectarines that yield slightly to gentle pressure – they should be ripe but not mushy. Removing the pits can be challenging, so use a sharp knife to cut around the pit, then twist the halves apart.
Step 3: Create the Lemon Filling
In a large bowl, whisk eggs and sugar until well combined and slightly thickened. Add lemon juice and zest, whisking continuously to prevent the eggs from curdling. Fold in flour and salt until just incorporated, being careful not to overmix for the silkiest texture.
Step 4: Assemble and Bake
Pour half the lemon filling over the pre-baked crust. Arrange nectarine slices in an overlapping pattern, then pour the remaining lemon mixture over the fruit. The nectarines will float slightly, creating a beautiful marbled effect. Return to the oven and bake for 22-25 minutes until the filling is set but still has a slight jiggle in the center.
Step 5: Cool Completely
Allow your nectarine lemon bars to cool completely in the pan on a wire rack (about 1 hour), then refrigerate for at least 1 hour before cutting. This cooling period is crucial for setting the bars properly and developing their full flavor profile.
Step 6: Slice and Finish
Use the parchment paper overhang to lift the entire dessert out of the pan. With a sharp knife dipped in hot water and wiped clean between cuts, slice into 16 even squares. Just before serving, dust with powdered sugar for a professional finishing touch.
Step 7: Serve and Enjoy
Bring these tangy dessert bars to room temperature for about 15 minutes before serving to enhance the nectarine flavor and soften the texture slightly.
Nutritional Information
Each bar contains approximately:
- Calories: 215
- Fat: 8g
- Carbohydrates: 34g
- Protein: 3g
- Fiber: 1g
- Sugar: 25g
- Vitamin C: 15% of daily value
Healthier Alternatives for the Recipe
For a lighter version of these refreshing summer treats, consider these modifications:
- Reduce sugar to 1 cup and add 2 tablespoons of honey for natural sweetness
- Substitute whole wheat pastry flour for all-purpose flour to add fiber
- Use coconut oil instead of butter for a dairy-free option
- Try monk fruit sweetener or erythritol to lower the calorie count significantly
Serving Suggestions
Elevate your nectarine lemon bars with these creative serving ideas:
- Pair with a small scoop of vanilla bean ice cream for an indulgent dessert
- Serve alongside fresh berries for additional color and flavor
- Add a sprig of fresh mint or basil for a sophisticated garnish
- Drizzle with a light honey-lavender syrup for an aromatic twist
- Serve with chilled prosecco for an elegant summer dessert course
Common Mistakes to Avoid
🔸 Underbaking the crust, which can lead to a soggy bottom
🔸 Using overripe nectarines that release too much liquid into the filling
🔸 Cutting the bars before they’re completely cooled, resulting in messy edges
🔸 Overmixing the lemon filling, which can incorporate too much air
🔸 Forgetting to line the pan, making removal difficult
🔸 Using bottled lemon juice instead of fresh, which lacks the bright flavor
🔸 Skipping the refrigeration step, which is essential for proper setting
Storing Tips for the Recipe
These nectarine lemon bars can be stored in an airtight container in the refrigerator for up to 5 days. For best results, place parchment paper between layers to prevent sticking. They can also be frozen for up to 3 months – simply wrap individual bars in plastic wrap, then store in a freezer-safe container. Thaw overnight in the refrigerator before serving. The powdered sugar may dissolve during storage, so consider adding a fresh dusting just before serving.
Conclusion
These vibrant nectarine lemon bars represent summer dessert perfection – the buttery shortbread crust supports a bright, citrusy filling studded with juicy nectarine slices. The contrast between tangy lemon and sweet stone fruit creates a memorable flavor experience that will have everyone reaching for seconds. Whether you’re a seasoned baker or just starting out, this recipe delivers impressive results with straightforward techniques. Try these refreshing summer treats at your next gathering and watch them disappear!
FAQs
Can I use peaches instead of nectarines?
Yes, peaches work beautifully in this recipe. If using peaches, you may want to peel them first, as their skin can be tougher than nectarine skin.
How do I know when the bars are properly set?
The filling should be just set but still have a slight jiggle in the center when you gently shake the pan. It will continue to firm up as it cools.
Can I make these bars gluten-free?
Absolutely! Substitute a 1:1 gluten-free flour blend in both the crust and filling for equally delicious results.
Why did my filling curdle?
This typically happens when eggs are added directly to hot ingredients. Ensure all ingredients are at room temperature and whisk continuously when combining.
How far in advance can I make these for a party?
These bars can be made up to 2 days in advance and stored in the refrigerator. Add the powdered sugar just before serving.
Contact Us
Contact us at [email protected], and we’ll get back to you as soon as possible.
Share your experience with us
OOLALA
This turned out so awesome they look like they came from a exspensive bakery.
Just a question
So what about the grease from the meat? Should I use the leanest meats or is the grease give more flavor.
What about a meatloaf on top of veggies ? Would that work?
Ingredients list good, directions lacking
There were great details on quantities of ingredients I should use, but the recipe didn’t tell me the cook time. Also, mentioned in the section about “common mistakes” that you need to let it chill enough but doesn’t direct you in the recipe that you need to let it chill. More details would be helpful
Dressing is perfect!
Not a big fan of mayo, loved the Greek yogurt swap. Reduced garlic a bit. Dressing was delish!
Best coffee cake- ever!!
This recipe was not the easiest to follow due to how it was written. It requires a lot of back and forth from instructions to the lists of ingredients but oh, hey, the end result is totally worth the effort! Mouthwatering and delicious plus it’s a pretty presentation.