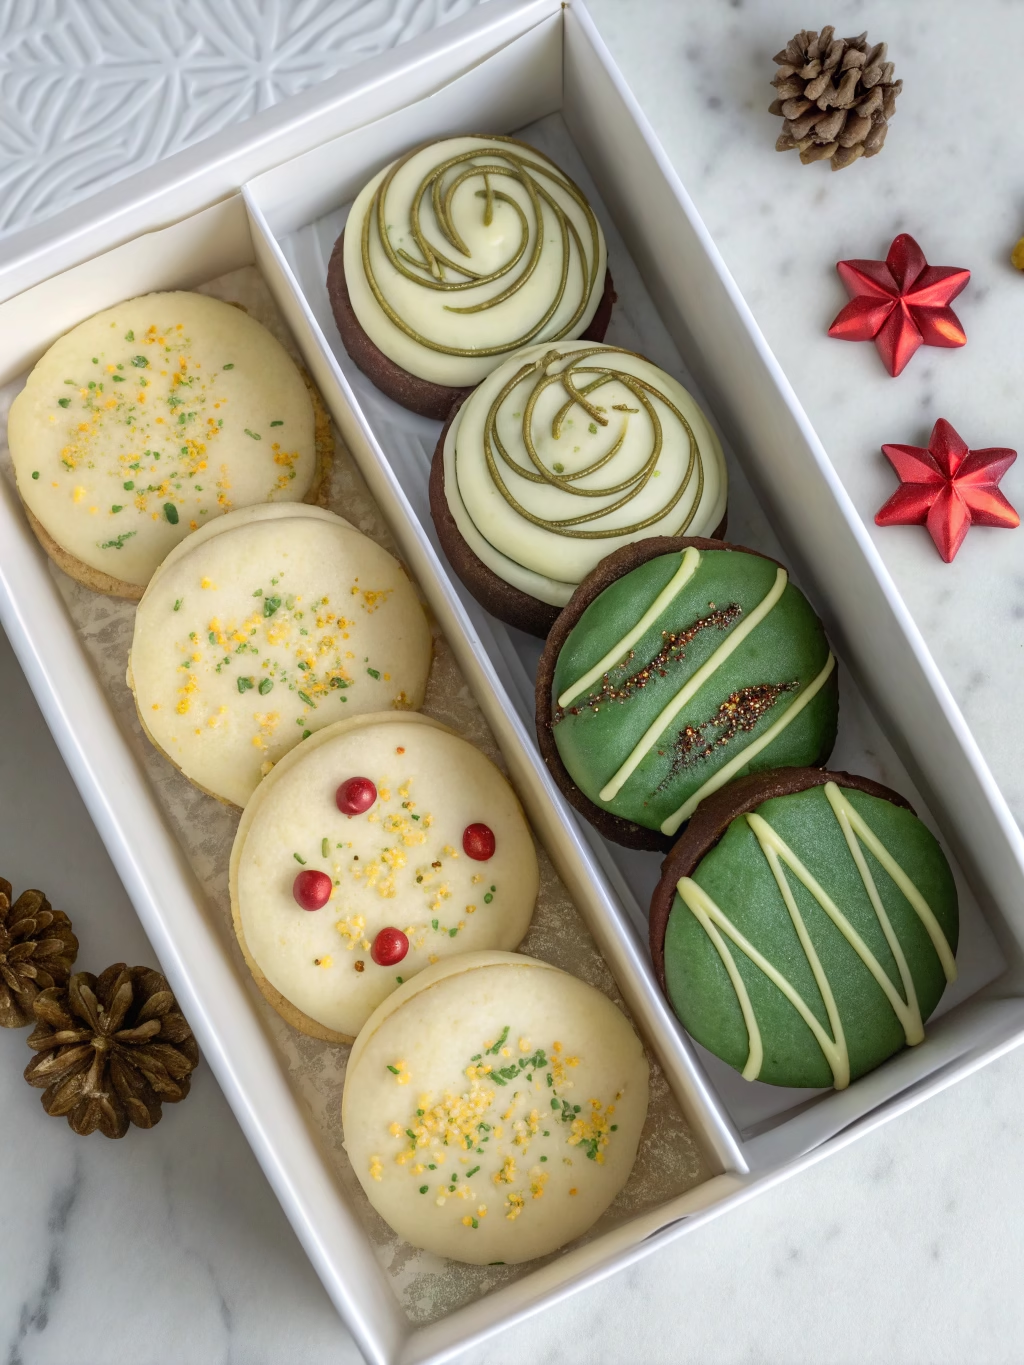
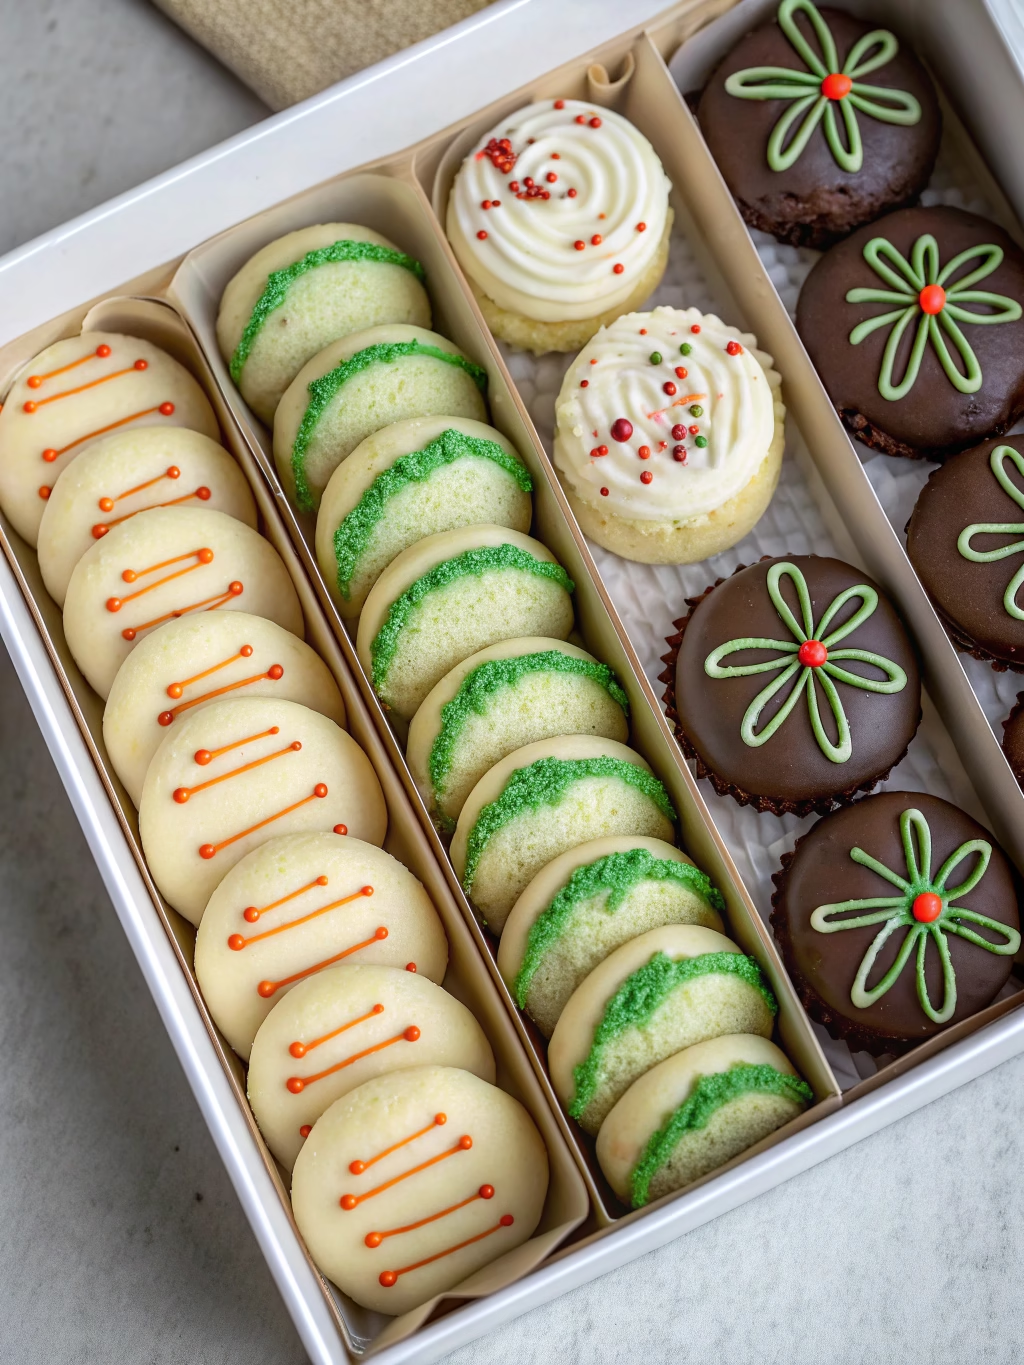
One dough holiday cookie gift box: The Best Easy Recipe
The Magic of One Dough for a Season of Giving
The air in my kitchen changes during the holidays. It becomes heavy with the scent of melting butter, warm vanilla, and the sweet promise of sugar caramelizing in the oven. This is the aroma of my childhood, the very essence of holiday magic, and it all starts with this recipe for a One dough holiday cookie gift box. This isn’t just about efficiency; it’s about creating an entire story-a beautiful, edible gift-from one perfect, versatile butter cookie dough. This recipe is my secret weapon for stress-free holiday baking, and it allows for endless creativity. Join me, and let’s fill your kitchen with the unforgettable scent of pure holiday joy.
Why You’ll Love This Recipe
- Effortless Variety: Master one simple dough and unlock a world of different cookies. This is the ultimate guide on How to make different holiday cookies from one dough.
- Perfect for Gifting: Create a stunning, diverse cookie box that looks like it took days of work, making it the most thoughtful homemade present.
- Incredibly Delicious Foundation: The base dough is rich, buttery, and tender-a truly professional-quality cookie that melts in your mouth.
- A Fun, Creative Project: Get the whole family involved in decorating and shaping the different cookies. It’s a memory-making activity in itself!
Preparation Time and Servings
Preparation Time: 30 minutes
Chilling Time: 2 hours (minimum)
Cooking Time: 10-12 minutes per batch
Total Time: Approximately 3 hours
Difficulty: Easy
Servings: About 4 dozen cookies
Don’t be daunted by the total time! Most of it is hands-off chilling, which is the secret to perfect cookies. The active work is surprisingly quick and simple.
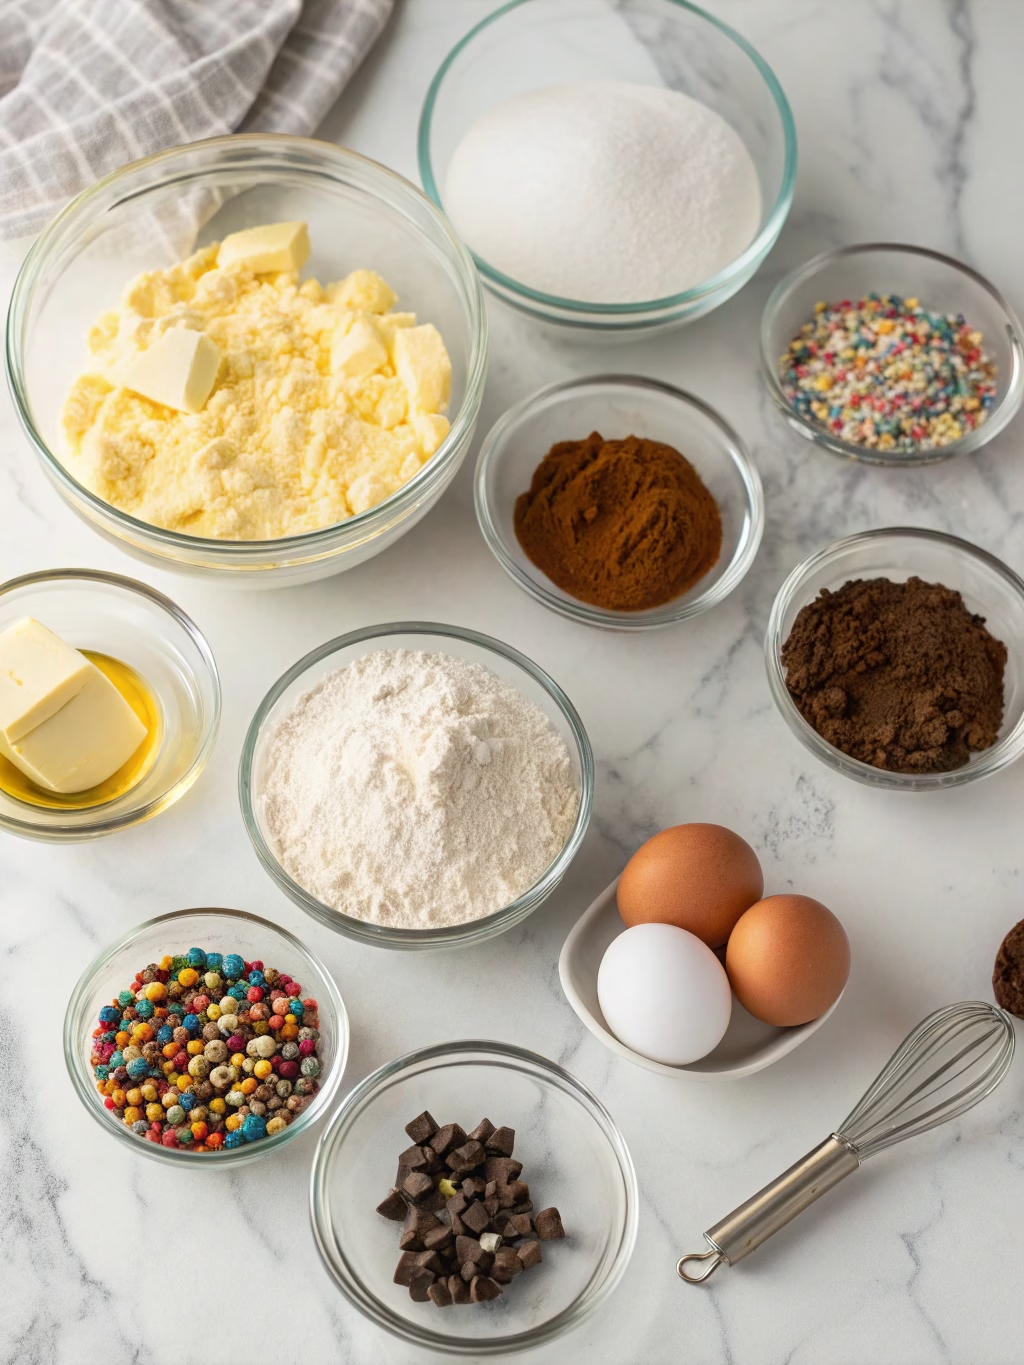
Ingredients List
For the Master Dough:
- 1 ½ cups (340g) unsalted butter, softened
- 1 ½ cups (300g) granulated sugar
- 2 large eggs, room temperature
- 2 teaspoons pure vanilla extract
- 4 cups (480g) all-purpose flour
- 1 teaspoon baking powder
- ½ teaspoon salt
For the Variations:
- Jam Thumbprints: ½ cup your favorite seedless jam (raspberry, apricot)
- Chocolate-Dipped Wreaths: 1 cup semi-sweet chocolate chips, festive sprinkles
- Spiced Cut-Outs: 1 teaspoon ground cinnamon, ½ teaspoon ground ginger, ¼ teaspoon ground cloves
- Pecan Snowballs: 1 cup finely chopped pecans, 1 cup powdered sugar for rolling
Step-by-Step Instructions
- Create the Base: In a large bowl or the bowl of a stand mixer, beat the softened butter and granulated sugar on medium-high speed until light and fluffy, about 3-4 minutes. Scrape down the sides of the bowl.
- Add Wet Ingredients: Beat in the eggs one at a time, followed by the vanilla extract. Mix until everything is well combined.
- Combine Dry Ingredients: In a separate bowl, whisk together the flour, baking powder, and salt.
- Form the Dough: With the mixer on low, gradually add the dry ingredients to the wet ingredients. Mix only until the flour is just incorporated. Do not overmix. The dough will be soft.
- Divide and Flavor: Divide the dough into four equal portions. Leave one plain. To the second, gently knead in the spices for cut-outs. To the third, knead in the finely chopped pecans for snowballs. The fourth portion will be for the thumbprints and wreaths.
- Chill Thoroughly: Wrap each portion of dough in plastic wrap, flatten into a disk, and refrigerate for at least 2 hours or up to 3 days. This step is critical for flavor and to prevent spreading.
- Preheat and Prepare: When ready to bake, preheat your oven to 350°F (175°C). Line baking sheets with parchment paper.
- Shape and Bake:
- Thumbprints/Wreaths: Roll 1-inch balls. For thumbprints, press an indent in the center and fill with jam. For wreaths, press the ball flat and use a small circular cutter to remove the center. Bake all for 10-12 minutes. Dip cooled wreaths in melted chocolate and add sprinkles.
- Spiced Cut-Outs: Roll the spiced dough on a lightly floured surface to ¼-inch thickness. Use cookie cutters to create shapes. Bake for 9-11 minutes.
- Pecan Snowballs: Roll the pecan dough into 1-inch balls. Bake for 10-12 minutes, until the bottoms are lightly golden. While still warm, roll them generously in powdered sugar.
- Cool Completely: Let the cookies rest on the baking sheet for a few minutes before transferring them to a wire rack to cool completely. This is key for a beautiful One dough holiday cookie gift box.
Pro Tips from a Professional Chef
- Use European-Style Butter: If you can find it, use butter with a higher fat content. It provides a richer flavor and a more tender, melt-in-your-mouth texture.
- Measure Flour Correctly: Spoon the flour into your measuring cup and level it off with a knife. Scooping directly from the bag can pack the flour and result in dry, tough cookies.
- Don’t Skip the Chill: I cannot stress this enough. Chilling the dough solidifies the butter, which means your cookies will hold their shape beautifully instead of spreading into thin crisps.
- Know Your Oven: Ovens can have hot spots. Rotate your baking sheets halfway through the baking time to ensure all your cookies bake evenly to a perfect golden brown. This attention to detail is what elevates a good One dough holiday cookie gift box to a great one.
Special Equipment
- Stand Mixer: While you can make this with a hand mixer, a stand mixer makes the initial creaming of butter and sugar incredibly easy and efficient, incorporating more air for a lighter cookie.
- Cookie Scoop: Using a small cookie scoop ensures that all your drop cookies (like the thumbprints and snowballs) are uniform in size, which means they bake evenly.
Variations & Substitutions
- Go Gluten-Free: You can successfully substitute the all-purpose flour with a high-quality 1-to-1 gluten-free baking flour blend. Just let the dough rest a bit longer before baking.
- Add a Citrus Spark: For a bright, fresh flavor, add the zest of one orange or lemon to the base dough along with the vanilla. This works beautifully for cut-out cookies.
- Nut-Free Version: For the pecan snowballs, simply omit the pecans and add ½ teaspoon of almond extract to the dough for a delicious marzipan-like flavor.
Serving Suggestions
These cookies are the star of the show. Serve your beautifully arranged cookie box with classic holiday beverages. A tall, cold glass of milk is perfect for the kids, while adults will love them alongside a steaming mug of rich hot chocolate, a spiced latte, or a simple, strong cup of freshly brewed coffee.
Storage & Make-Ahead Tips
Knowing How to make different holiday cookies from one dough is only half the battle; proper storage is key!
- To Store: Keep baked cookies in an airtight container at room temperature for up to one week. Store different cookie types separately if possible to prevent flavors from mingling.
- To Reheat: These cookies are best at room temperature. A quick 5-second zap in the microwave can soften them up if they become too firm.
- Make-Ahead: The unbaked cookie dough is perfect for making ahead. It can be refrigerated for up to 3 days or frozen for up to 3 months. Just thaw the frozen dough in the refrigerator overnight before rolling and baking.
Frequently Asked Questions (FAQs)
Why did my cut-out cookies spread and lose their shape?
This is almost always due to the dough being too warm. Ensure you chill the dough for at least two hours. If your kitchen is warm, you can even chill the cut-out shapes on the baking sheet for 10 minutes in the freezer before baking.
Can I use salted butter in this recipe?
You can, but I recommend unsalted to control the exact amount of salt. If you only have salted butter, reduce the added salt in the recipe to ¼ teaspoon.
Can I freeze the baked cookies?
Yes! Most of these cookies freeze beautifully. Let them cool completely, then store them in a freezer-safe container or bag with layers of parchment paper in between for up to a month. Thaw at room temperature.
How do I get my thumbprint cookies to not crack?
If the dough cracks when you make the indent, it might be a little too cold. Let it sit at room temperature for a few minutes. Also, rolling the ball of dough smoothly in your palms before indenting helps create a smooth surface.
What is the best way to package this as a gift?
Find a sturdy, festive tin or box. Line it with parchment or tissue paper and use small cupcake liners to separate the different types of cookies. This keeps them from breaking and creates a beautiful presentation for your One dough holiday cookie gift box.
Conclusion
There is nothing more heartwarming than sharing something you’ve made with your own hands. The real joy of this One dough holiday cookie gift box isn’t just in the buttery, tender bite of each cookie, but in the act of creation and giving. I truly can’t wait for you to fill your home with these incredible aromas and share this little box of happiness with the people you love.
Contact Us
Contact us at [email protected] and we’ll get back to you as soon as possible
Share your experience with us
OOLALA
This turned out so awesome they look like they came from a exspensive bakery.
Just a question
So what about the grease from the meat? Should I use the leanest meats or is the grease give more flavor.
What about a meatloaf on top of veggies ? Would that work?
Ingredients list good, directions lacking
There were great details on quantities of ingredients I should use, but the recipe didn’t tell me the cook time. Also, mentioned in the section about “common mistakes” that you need to let it chill enough but doesn’t direct you in the recipe that you need to let it chill. More details would be helpful
Dressing is perfect!
Not a big fan of mayo, loved the Greek yogurt swap. Reduced garlic a bit. Dressing was delish!
Best coffee cake- ever!!
This recipe was not the easiest to follow due to how it was written. It requires a lot of back and forth from instructions to the lists of ingredients but oh, hey, the end result is totally worth the effort! Mouthwatering and delicious plus it’s a pretty presentation.