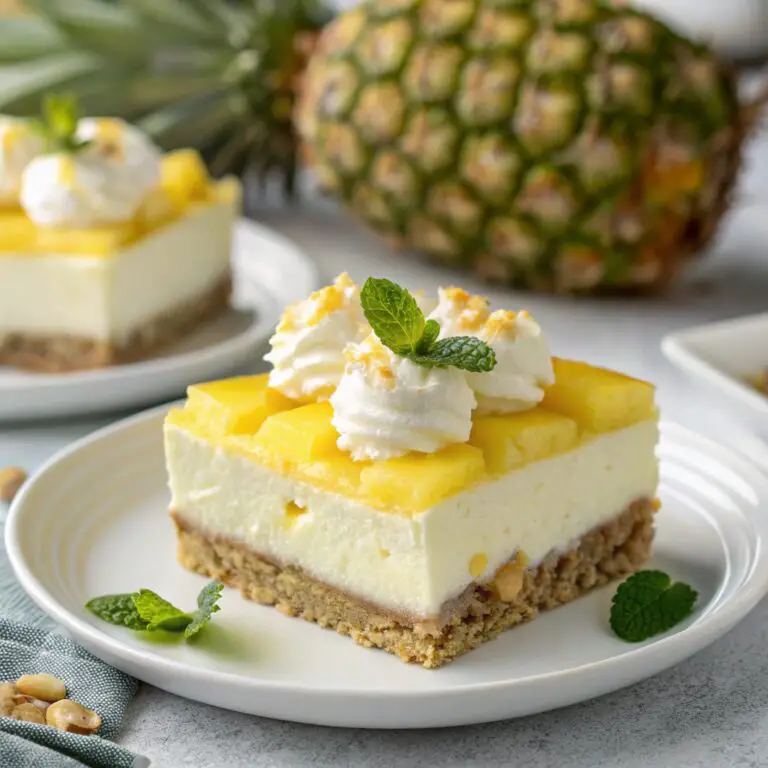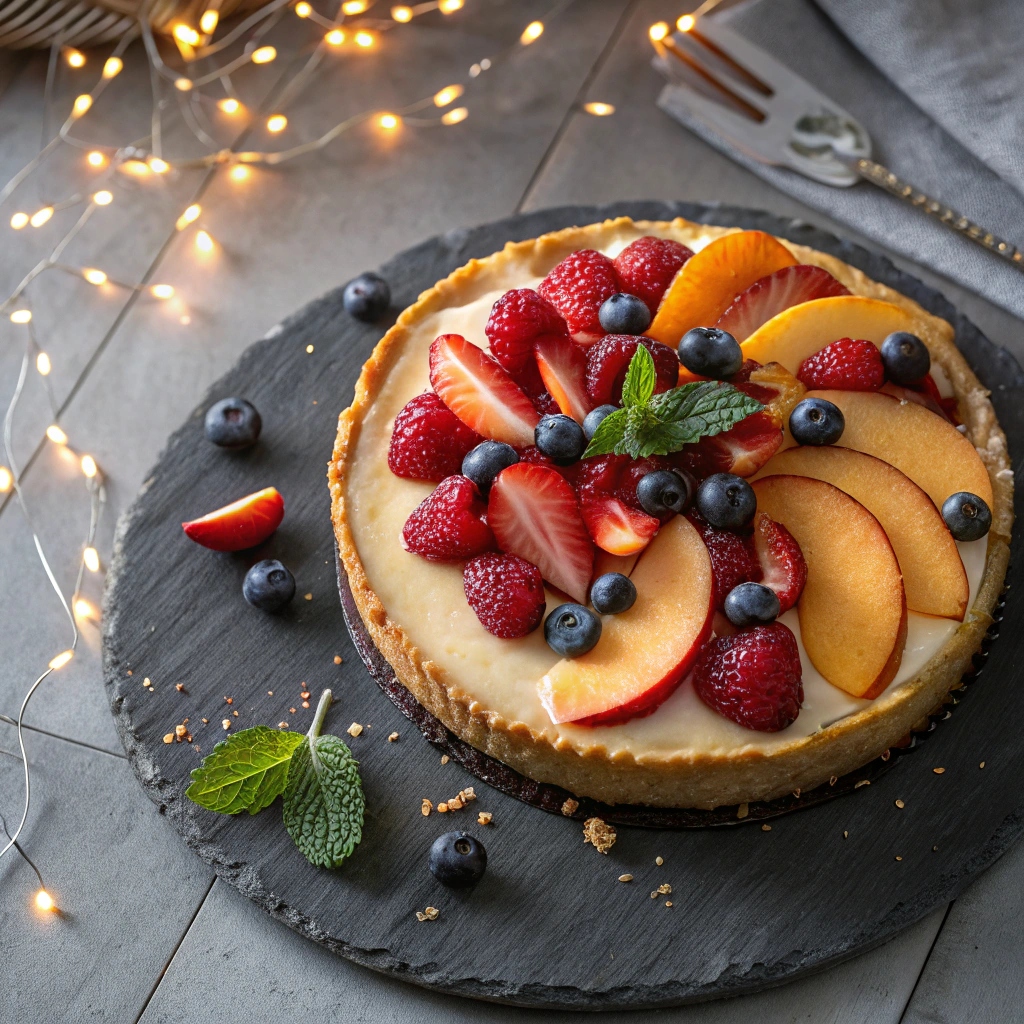
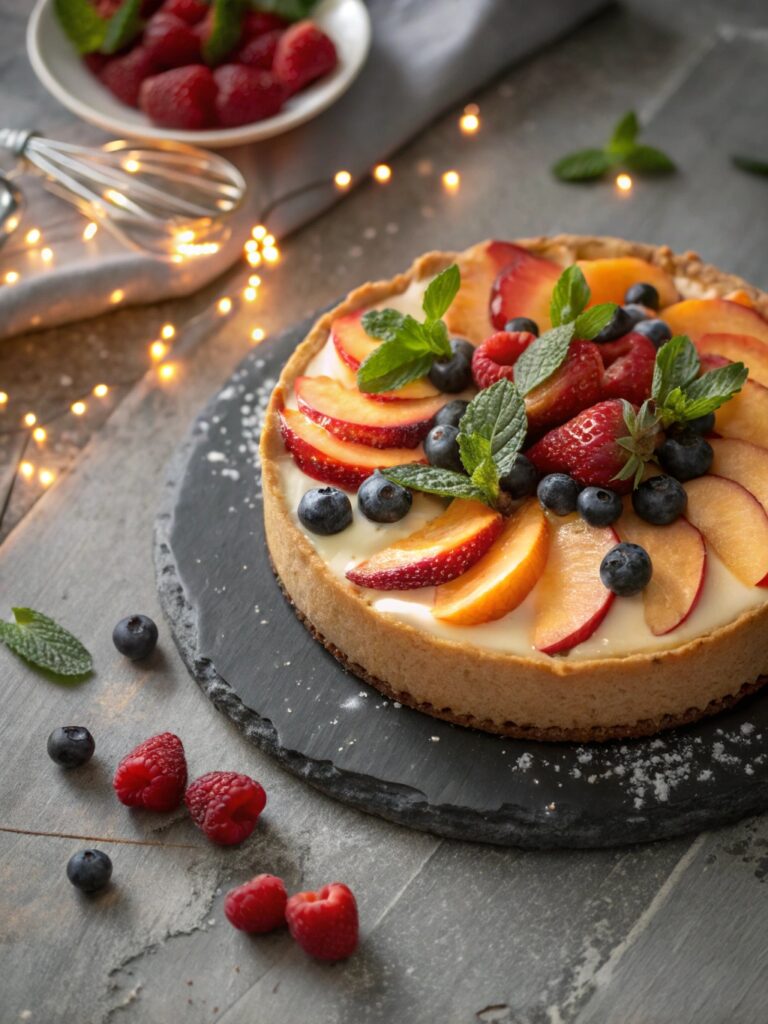
Summer Berry Peach Cheesecake: 3 Amazing No-Bake Secrets
Introduction
Ever felt the summer heat begging for something sweet, cool, and comforting? 🍑🍓 Did you know that no-bake desserts saw a 40% search spike last July? That’s no surprise because when it’s blazing outside, turning on the oven is the last thing you want. This Summer Berry and Peach Cheesecake Recipe is your answer to a perfect, refreshing, easy summer dessert. Loaded with seasonal fruits and creamy goodness, it’s as stunning as it is simple, and you don’t even need to bake it!

1. Why is Perfect for You :
🔹 Quick to prepare—no baking required, perfect for warm days
🔹 Ideal for summer gatherings, BBQs, or a backyard brunch
🔹 Packed with fresh berries and juicy peaches for seasonal flair
🔹 Adaptable for dietary preferences—easy to make gluten-free or dairy-free
🔹 Looks fancy, tastes gourmet, but made with simple ingredients
🔹 A hit with kids and adults alike—a crowd-pleaser every time
🔹 Stores well—great for making ahead of time
🔹 Offers a balance of fruity tang and creamy texture
🔸 2. Ingredients List for 4 persons 👤👤👤👤
🔸 For the crust:
- 1 ½ cups graham cracker crumbs (or use digestive biscuits)
- ⅓ cup unsalted butter, melted
- 1 tbsp brown sugar
🔸 For the filling:
- 16 oz cream cheese, softened
- ½ cup granulated sugar
- 1 tsp vanilla extract
- 1 cup heavy whipping cream
🔸 For the topping:
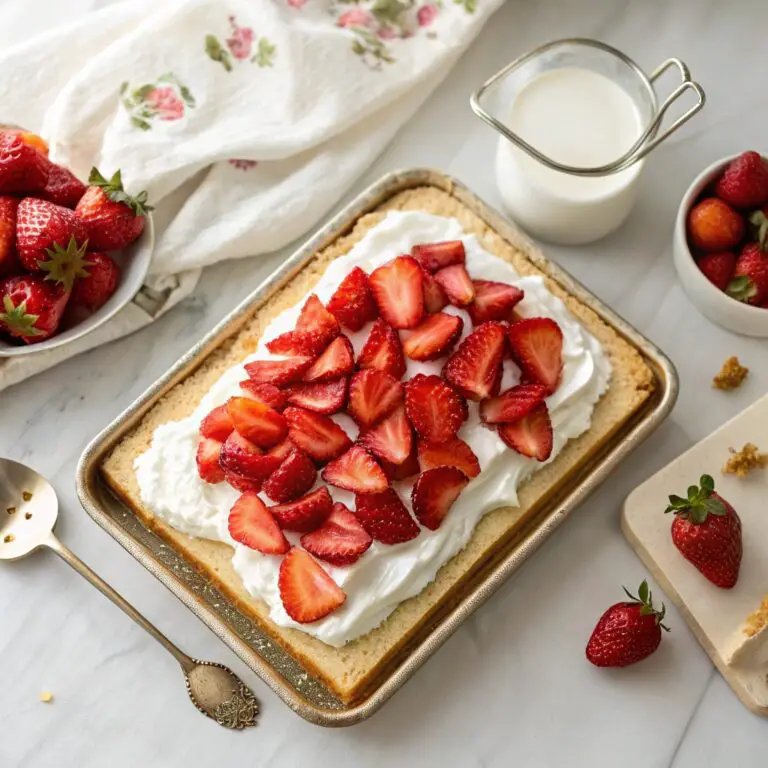
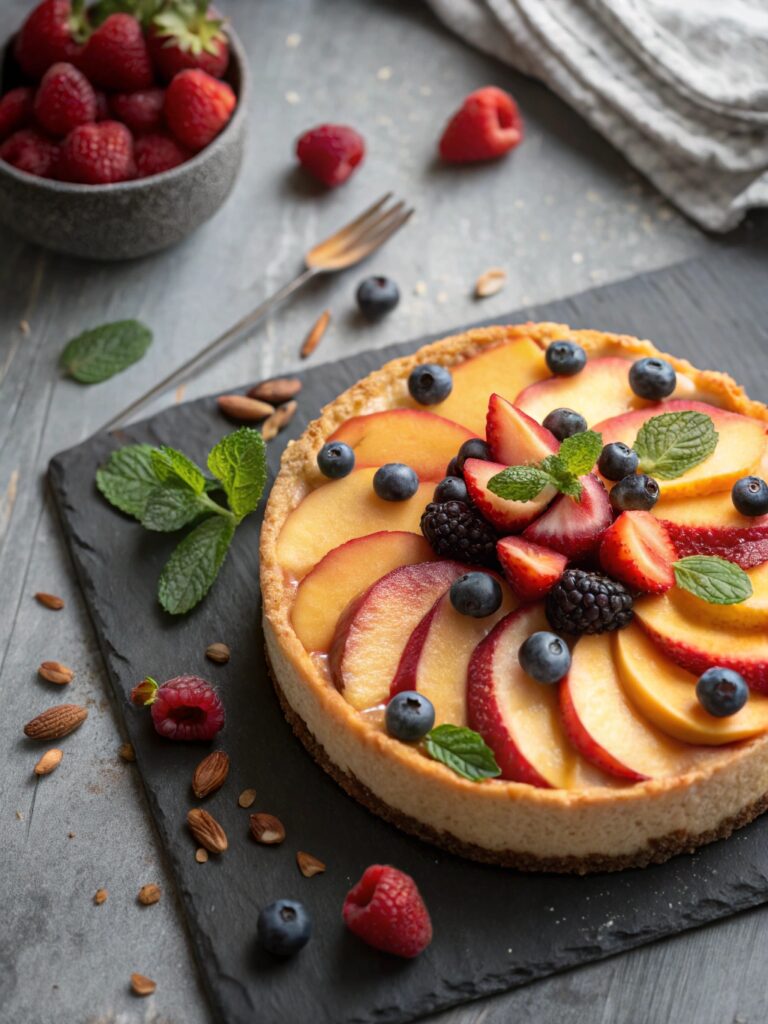
- 1 cup mixed summer berries (strawberries, blueberries, raspberries)
- 1 cup sliced peaches (fresh or canned)
- 1 tbsp honey or maple syrup
- Zest of 1 lemon (optional, for brightness)
Substitutions:
- Use coconut cream for a dairy-free version
- Almond flour crust for gluten-free option
- Greek yogurt instead of cream cheese for a lighter texture
🔸 3. Preparation Time and Servings
- Preparation time: 20 minutes
- Chill time: 4 hours (or overnight)
- Total time: 4 hours 20 minutes
- Serves: 4 generous portions
This no-bake cheesecake is 20% faster to prepare than most oven-baked versions, making it a perfect easy summer dessert when you’re short on time but big on flavor.
🔸 4. Step-by-Step Instructions and Directions
Step 1: Make the Crust
Crush graham crackers in a food processor or zip bag until fine. Mix with melted butter and brown sugar. Press firmly into the bottom of a springform pan. Chill in the fridge while preparing the filling.
Pro Tip: Use the bottom of a glass to press the crust evenly.
Step 2: Whip the Filling
In a large bowl, beat the cream cheese, sugar, and vanilla until smooth. In a separate bowl, whip the heavy cream to stiff peaks, then fold it gently into the cream cheese mixture.
Pro Tip: Make sure the cream cheese is at room temperature to avoid lumps.
Step 3: Assemble the Cheesecake
Spread the filling over the crust and smooth the top with a spatula. Cover and refrigerate for at least 4 hours (overnight is better).
Step 4: Top with Summer Fruits
Before serving, top the cheesecake with fresh berries, peach slices, a drizzle of honey, and lemon zest for extra flavor.
Pro Tip: Chill the fruit before topping to keep the cheesecake cool and firm.
🔸 5. Special Equipment
- Springform pan (8-inch)
- Hand mixer or stand mixer
- Rubber spatula
- Mixing bowls
- Food processor (optional)
🔸 6. Information and Food Benefits
This cheesecake blends vitamin-rich fruits with calcium-packed dairy. Here’s what you get in every serving:
- Vitamin C from berries – supports immunity
- Fiber from peaches – good for digestion
- Calcium from cream cheese – strengthens bones
- Healthy fats – from cream and butter for energy
🔸 7. Calories per person
| Component | Calories (approx.) |
|---|---|
| Crust | 180 kcal |
| Filling | 320 kcal |
| Topping | 90 kcal |
| Total | 590 kcal |
🔸 8. Healthier Alternatives for the Recipe
- Use low-fat cream cheese or Greek yogurt for a lighter filling
- Swap graham crackers for almond flour or oats for a healthier crust
- Replace sugar with maple syrup or stevia
- Use coconut cream for a vegan twist
- Choose fresh, unsweetened fruits to reduce added sugars
🔸 9. Serving Suggestions
- Serve with a mint sprig and a dusting of powdered sugar
- Pair with iced green tea or sparkling lemonade
- Garnish with crushed pistachios or almonds for crunch
- Create a dessert board with mini cheesecakes, fruit skewers, and chocolate drizzles
🔸 10. Storage and Leftovers
Store your cheesecake in an airtight container in the fridge for up to 4 days.
To prep ahead, make the crust and filling, but add fruit just before serving.
Pro Tip: Freeze individual slices for up to 1 month—wrap tightly to avoid freezer burn.
🔸 11. Common Mistakes to Avoid
- Don’t skip chilling time – it’s essential for a firm cheesecake
- Avoid warm cream cheese when mixing – can cause curdling
- Don’t over-whip the cream – it makes the filling grainy
- Using too much fruit juice – can make the topping watery
- Not pressing the crust firmly – leads to crumbly base
🔸 12. FAQs
Q1: Can I use frozen berries?
Yes, but thaw and drain them well to avoid sogginess.
Q2: Can I make this recipe dairy-free?
Absolutely—use coconut cream and vegan cream cheese.
Q3: How far in advance can I prepare this?
You can make it up to 2 days ahead. Just add toppings fresh.
Q4: Can I use a different fruit combo?
Yes! Try mango and kiwi or figs and blueberries.
Q5: Is it safe to freeze the whole cheesecake?
Yes—wrap the entire pan in foil and freeze for up to a month.
🔸 13. Conclusion
This Summer Berry and Peach Cheesecake Recipe is everything a dessert should be—easy, refreshing, and unforgettable. Whether you’re looking to impress guests or treat yourself on a sunny afternoon, this easy summer dessert will hit the sweet spot every time. Try it once, and you’ll be asked for it again and again.
Go ahead—grab those peaches and berries, and let the summer flavors shine. And don’t forget to share your creations with us in the comments below or tag us on social media!
🔸 14. Contact Us:
Contact us at [email protected], and we’ll get back to you as soon as possible.
Share your experience with us
Dressing is perfect!
Not a big fan of mayo, loved the Greek yogurt swap. Reduced garlic a bit. Dressing was delish!
Best coffee cake- ever!!
This recipe was not the easiest to follow due to how it was written. It requires a lot of back and forth from instructions to the lists of ingredients but oh, hey, the end result is totally worth the effort! Mouthwatering and delicious plus it’s a pretty presentation.
Confused on picture
The cookies are tasty, but do you have the recipe for the actual cookies in your picture? These cookies are certainly not going to be that beautiful purple color. Thanks!
good for a nice dinner
nice