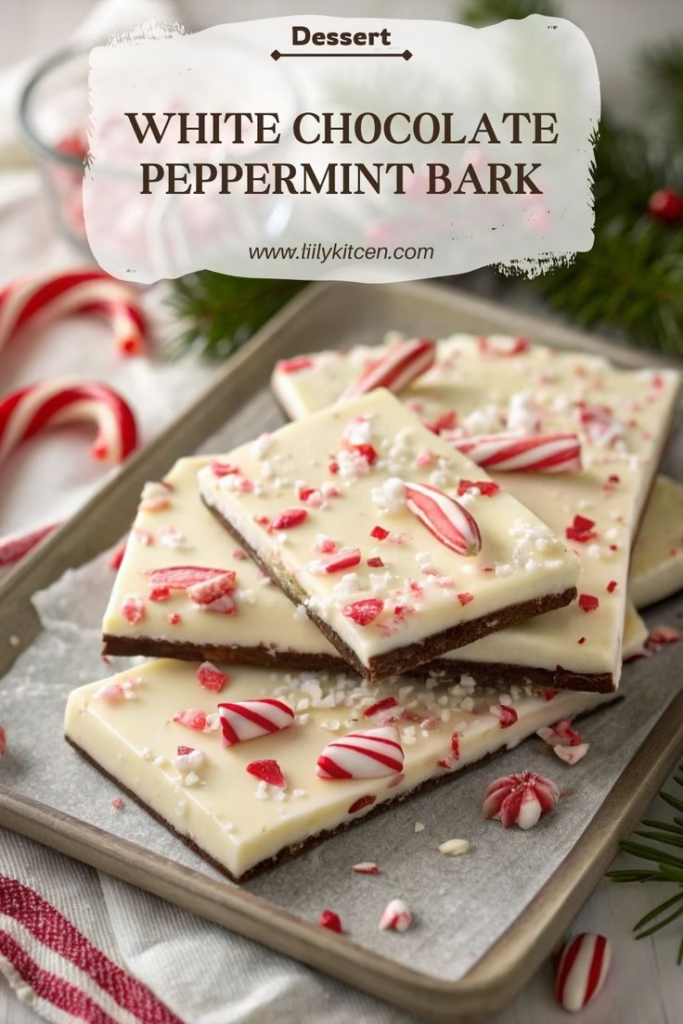
White chocolate peppermint bark candy: Easy Recipe to Make
An Unforgettable White chocolate ….
The first sharp, sweet scent of peppermint instantly transports me back to my grandmother’s kitchen during the holidays. That, combined with the creamy, luscious aroma of melting white chocolate, is pure magic. This isn’t just any White chocolate peppermint bark candy; it’s a recipe perfected over years to achieve the most satisfying snap, the perfect balance of sweet and cool, and a texture that is simply divine. From a chef’s perspective, the beauty lies in its simplicity and the quality of just a few ingredients. Come, join me in creating a confection that’s more than a treat- it’s a cherished memory in the making.
Why You’ll Love This Recipe
- Incredibly Simple: With just a handful of ingredients and no complex steps, this is a perfect recipe for beginners and kids.
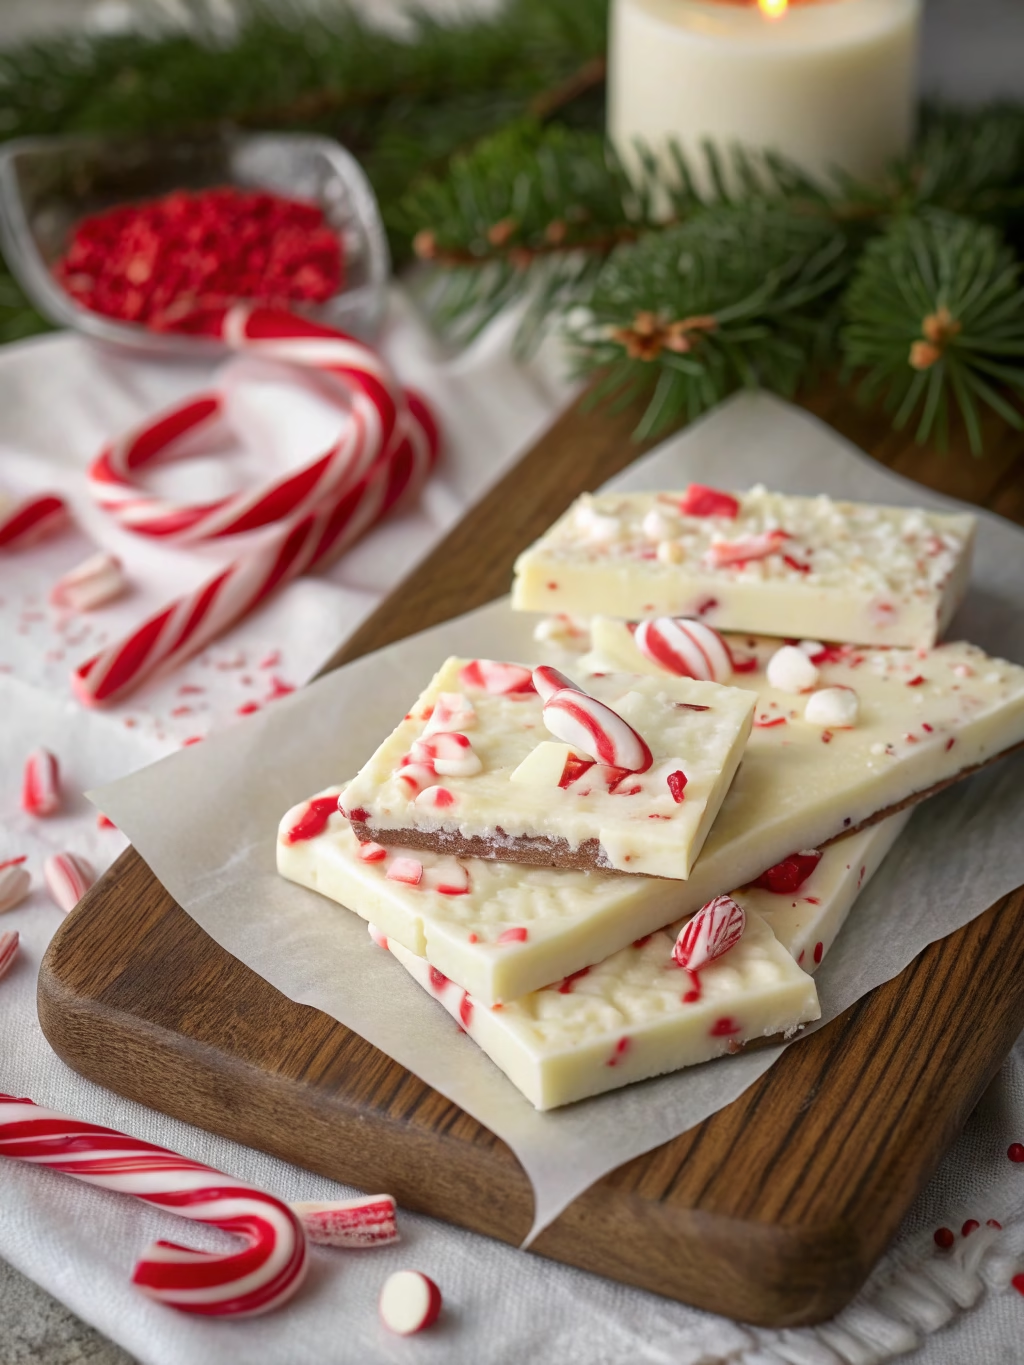
- Visually Stunning: The contrast of creamy white chocolate and glittering red candy cane pieces makes a beautiful, festive treat.
- Perfect for Gifting: Packaged in a clear bag with a ribbon, this homemade candy becomes a thoughtful and delicious gift for anyone.
- No-Bake Wonder: You don’t even need to turn on your oven, making this the ideal last-minute holiday Dessert.
Preparation Time and Servings
⏱️ Preparation Time: 15 minutes
🔥 Cooking Time: 30 minutes (for chilling)
⏰ Total Time: 45 minutes
💡 Difficulty: Easy
👥 Servings: 12-16 people
A stunningly quick treat ready in under an hour!
Ingredients List
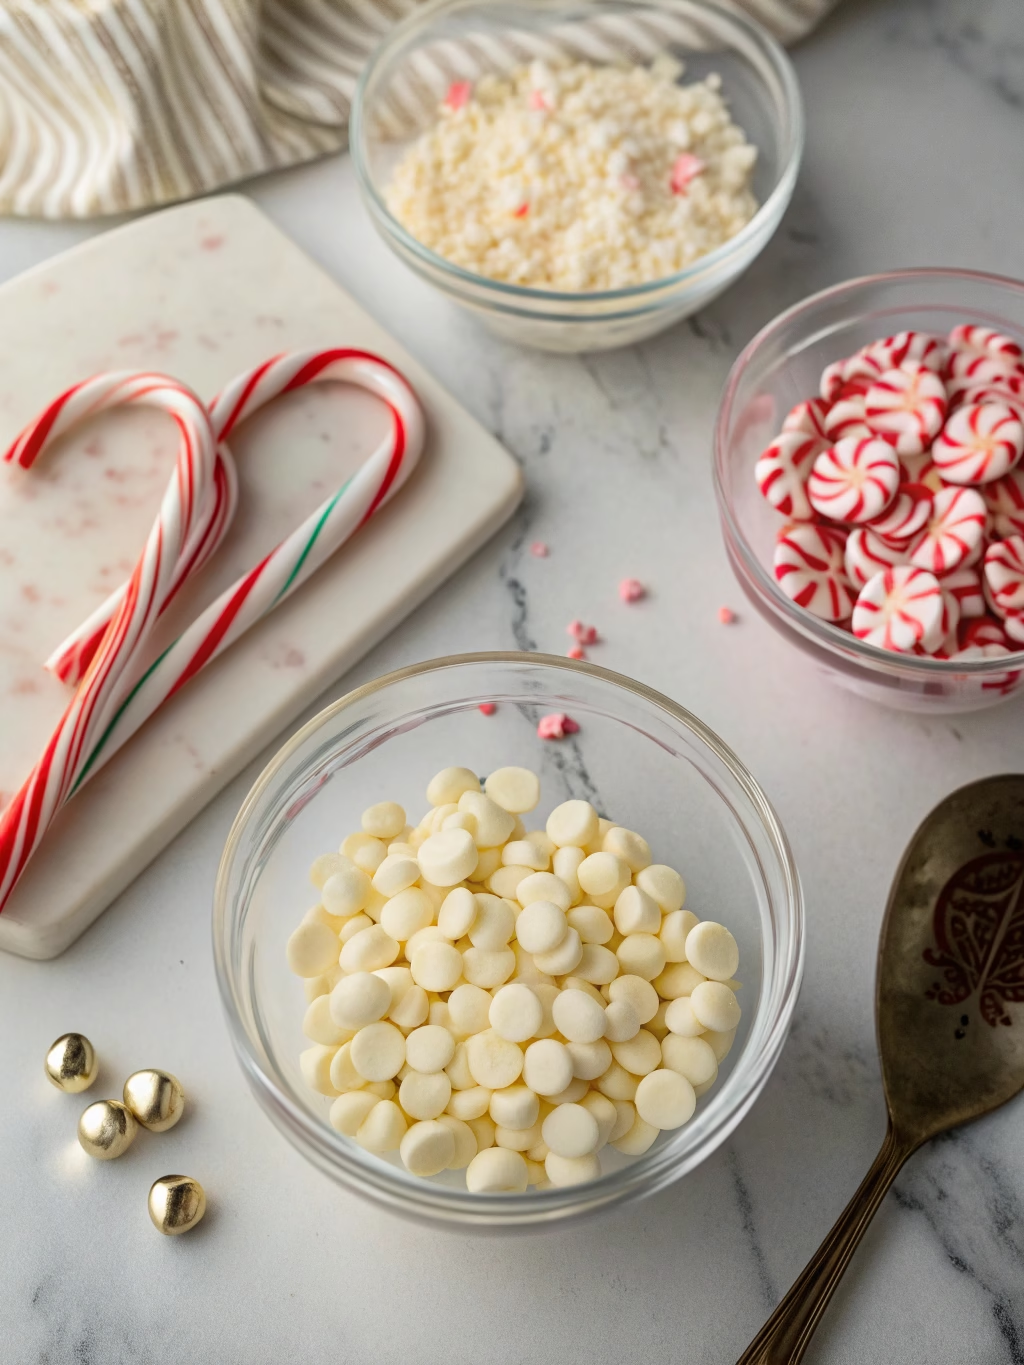
- 16 ounces (450g) high-quality white chocolate, chopped or in wafers
- 1 teaspoon peppermint extract
- 1/2 cup (about 8-10) candy canes, crushed
- Optional: 1 teaspoon coconut oil or vegetable shortening (to help the chocolate melt smoothly)
Step-by-Step Instructions
- Prepare your station by lining a baking sheet with parchment paper. This is crucial for easy removal later.
- Crush the candy canes. Place them in a sturdy zip-top bag, cover with a towel, and gently smash with a rolling pin or mallet until you have a mix of fine dust and small pieces.
- Melt the white chocolate. You can do this in a double boiler or in the microwave. For the microwave, heat in 30-second intervals, stirring thoroughly after each one, until the chocolate is smooth and fully melted. Be careful not to overheat it.
- Stir in the coconut oil (if using) and the peppermint extract until completely combined. The aroma will be incredible!
- Spread the melted chocolate mixture evenly over the prepared baking sheet using a spatula. Aim for about a 1/4-inch thickness.
- Sprinkle the crushed candy canes generously over the top of the wet chocolate. Gently press them in with the back of the spatula to ensure they adhere.
- Chill the baking sheet in the refrigerator for at least 30 minutes, or until the bark is completely firm.
- Break the chilled White chocolate peppermint bark candy into rustic, irregular pieces with your hands. Now it’s ready to be enjoyed!
Pro Tips from a Professional Chef
- Choose Your Chocolate Wisely: The quality of your white chocolate is paramount. Look for one with a high cocoa butter content for the best flavor and a smooth, creamy melt.
- Avoid Water Contamination: Even a tiny drop of water can cause your white chocolate to “seize” and become a clumpy mess. Ensure all your bowls and utensils are perfectly dry.
- The Perfect Crush: For the best texture, aim for a mix of candy cane sizes. The fine peppermint “dust” infuses flavor throughout, while the larger pieces provide a delightful crunch.
- Work Quickly: Once the chocolate is melted and spread, sprinkle the candy canes on immediately. If you wait too long, the chocolate will start to set and the candy won’t stick properly.
Special Equipment
- Offset Spatula: While a regular spatula works, an offset spatula makes it incredibly easy to spread the melted chocolate into a thin, even layer without getting your knuckles in it.
- Double Boiler: This provides gentle, indirect heat, which is the safest way to melt white chocolate and prevent it from scorching or seizing. A heatproof bowl set over a pot of simmering water works just as well.
Variations & Substitutions
- Layered Bark: Create a stunning two-layer bark by first melting and chilling a layer of dark or semi-sweet chocolate before adding the white chocolate layer on top.
- Festive Swirls: Before the chocolate sets, add a few drops of red or green gel food coloring and gently swirl it with a toothpick for a beautiful marbled effect.
- Add a Twist: Feel free to mix in other ingredients like crushed pretzels for a sweet-and-salty kick, or festive sprinkles for extra color. This makes your White chocolate peppermint bark candy unique.
Serving Suggestions
This White chocolate peppermint bark candy is a star on its own, but it truly shines as part of a larger holiday spread. Arrange it on a platter with other festive cookies and treats. It’s also the perfect companion to a steaming mug of rich hot cocoa or a bold, dark-roast coffee to cut through the sweetness. Making it the perfect Dessert.
Storage & Make-Ahead Tips
This is a fantastic make-ahead treat that takes the stress out of holiday preparations.
- To Store: Keep the bark in an airtight container in a cool, dry place for up to two weeks. The refrigerator is a great option to keep it firm and snappy.
- To Reheat: Reheating is not recommended. This candy is best served chilled or at room temperature to maintain its signature snap.
- Make-Ahead: You can make this entire recipe up to two weeks in advance. Just store it properly, and it will be ready whenever you need a quick, delicious treat.
Frequently Asked Questions (FAQs)
Why did my white chocolate get thick and pasty when I melted it?
This is called “seizing.” It happens when the chocolate is either overheated or comes into contact with even a tiny amount of water. Melt it slowly and ensure all your equipment is bone dry to prevent this.
Can I use peppermint oil instead of extract?
Yes, but be very careful! Peppermint oil is much more potent than extract. Start with just a couple of drops, taste, and add more only if needed. Too much can easily overpower the delicate white chocolate.
What is the best way to break the bark into pieces?
Once it’s fully chilled and hard, simply lift the parchment paper from the baking sheet and use your hands to snap it into pieces. Don’t strive for perfection; the rustic, uneven shapes are part of its charm.
Can I use chocolate chips instead of chopped chocolate?
You can, but be aware that many chocolate chips contain stabilizers that prevent them from melting as smoothly. For the creamiest result, I always recommend using high-quality chocolate bars or wafers (callets).
Why are my candy cane pieces getting sticky on the bark?
Candy canes can absorb moisture from the air, causing them to become sticky. To minimize this, store your finished White chocolate peppermint bark candy in a very well-sealed, airtight container in a cool, dry place like the refrigerator.
Conclusion
There is such joy in creating something so simple yet so elegant. The crisp snap of the chocolate followed by the cool rush of peppermint is a sensory delight. I hope this easy White chocolate peppermint bark candy recipe brings a little bit of that handmade magic into your home. I can’t wait for you to experience this deliciousness in your own kitchen and share it with those you love.
Contact Us
Contact us at [email protected] and we’ll get back to you as soon as possible.
Share your experience with us
OOLALA
This turned out so awesome they look like they came from a exspensive bakery.
Just a question
So what about the grease from the meat? Should I use the leanest meats or is the grease give more flavor.
What about a meatloaf on top of veggies ? Would that work?
Ingredients list good, directions lacking
There were great details on quantities of ingredients I should use, but the recipe didn’t tell me the cook time. Also, mentioned in the section about “common mistakes” that you need to let it chill enough but doesn’t direct you in the recipe that you need to let it chill. More details would be helpful
Dressing is perfect!
Not a big fan of mayo, loved the Greek yogurt swap. Reduced garlic a bit. Dressing was delish!
Best coffee cake- ever!!
This recipe was not the easiest to follow due to how it was written. It requires a lot of back and forth from instructions to the lists of ingredients but oh, hey, the end result is totally worth the effort! Mouthwatering and delicious plus it’s a pretty presentation.